
This post contains affiliate links. As an Amazon Associate, I earn from qualifying purchases at no extra cost to you.
Last spring, I made a decision that seemed a little risky at the time. I wanted to grow a dwarf mulberry tree, but my yard is mostly clay-heavy soil that drains poorly and bakes hard in summer. A friend suggested I try a raised bed kit dwarf mulberry tree setup instead of fighting my native soil. Honestly, I was skeptical. Could a tree — even a compact dwarf variety — actually thrive in a raised bed long-term? I decided to find out.
My backyard space is limited. I have a narrow side yard that gets about six hours of direct sun daily. That ruled out in-ground planting near the house foundation. It also meant I needed something with real depth — enough room for roots to spread without suffocating. Most shallow planters were immediately off the table.
After a few weeks of research, I landed on a cedar raised bed with serious dimensions. What followed was one of the most satisfying growing seasons I’ve had in years. Here’s exactly what happened — the good, the frustrating, and the surprisingly delicious.
Why I Chose the Infinite Cedar Select Cedar Raised Garden Bed
Shopping for raised beds is genuinely overwhelming. There are fabric grow bags, metal Corten steel beds, cheap pine kits, and everything in between. Most options I found were either too shallow (under 12 inches) or made from materials I wasn’t confident about long-term.
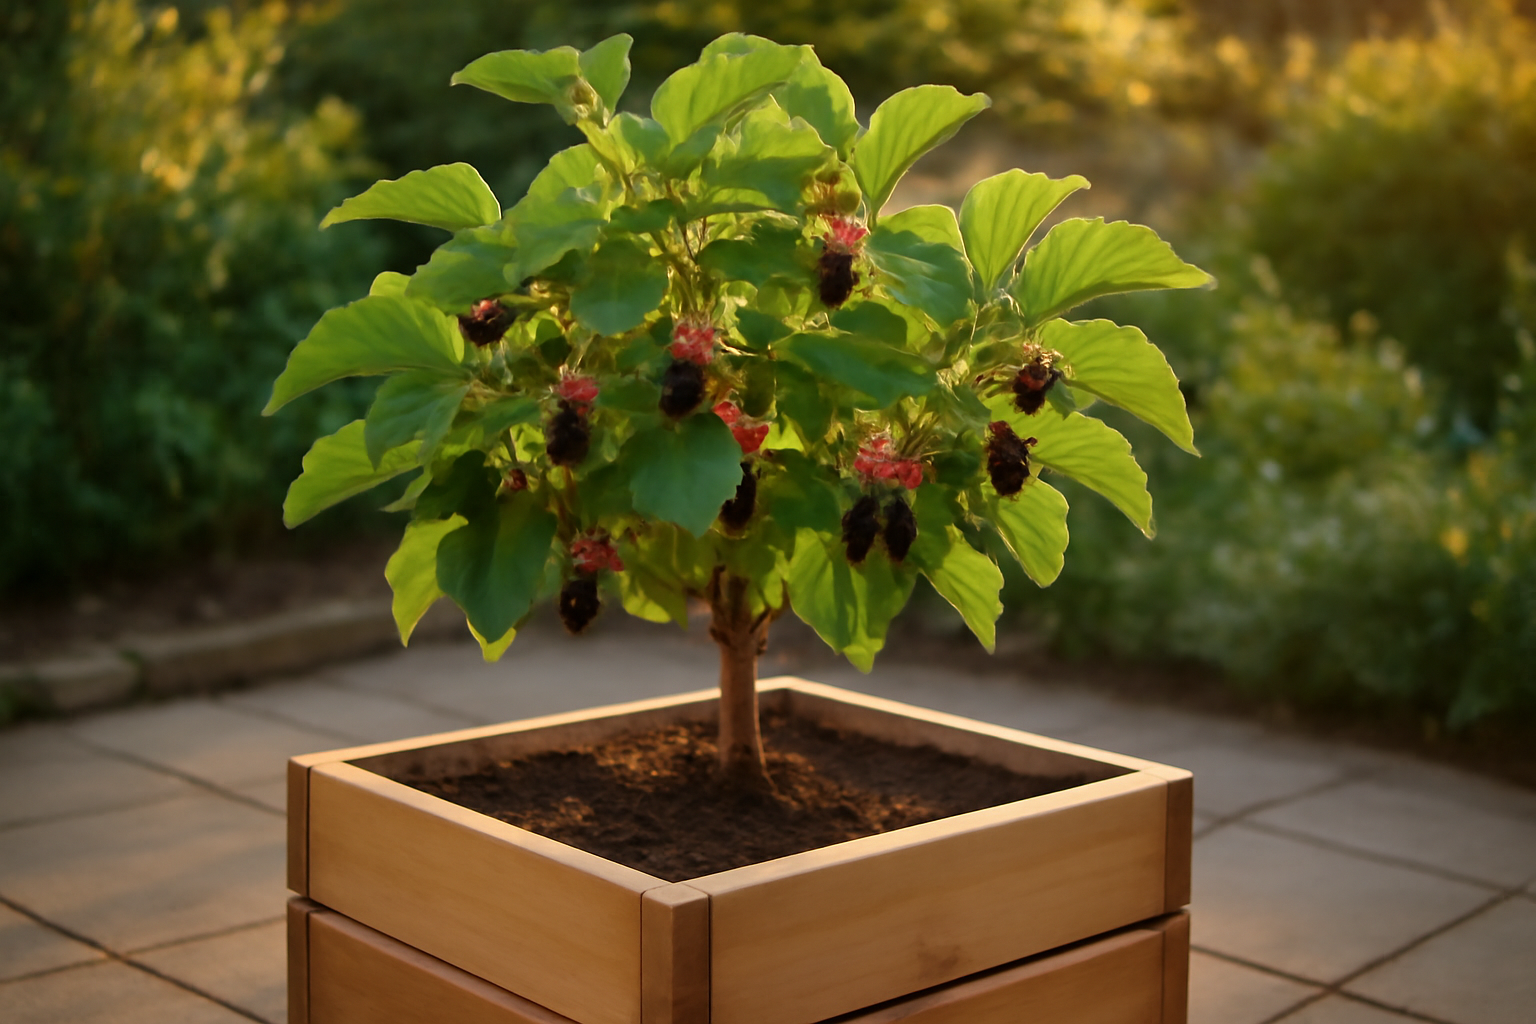
Two things stood out immediately about the Infinite Cedar Select Cedar Raised Garden Bed (4′ x 8′ x 17.5″ H). First, the 17.5-inch height is genuinely deep. Most “tall” raised beds cap at 11 or 12 inches. For a dwarf mulberry with an active root system, extra depth matters. Second, the material is select-grade western red cedar — naturally rot-resistant without chemical treatments.
I also liked the 4′ x 8′ footprint. That gave me enough room to plant the dwarf mulberry off-center and still tuck in some companion herbs around the edges. Basil and lemon thyme ended up filling the gaps nicely by midsummer.
Cedar was a deliberate choice for another reason. I didn’t want to use pressure-treated lumber near edible plants. Cedar’s natural oils resist decay without any chemical impregnation. That felt important when I’m growing fruit I plan to actually eat.
First Impressions: Unboxing and Build Quality
The bed arrived in two boxes, both well-packed with minimal movement inside. Nothing was cracked or warped on arrival, which I honestly half-expected given how long cedar boards can sometimes shift during shipping.
The cedar boards themselves were noticeably dense and fragrant. That fresh, slightly spicy cedar smell hit immediately when I opened the packaging. The wood grain was tight and consistent — not the knotty, rough-cut appearance you sometimes get with budget cedar products.
Assembly took me about 45 minutes working alone. The instructions were clear, and the hardware was all included. Every corner bracket lined up cleanly. I did have one moment where I second-guessed the stability — the bed felt slightly wobbly before I tightened the final bolts. Once fully secured, though, it was rock-solid. I’ve since bumped it with a wheelbarrow twice and nothing has shifted.
The finished dimensions felt generous on the ground. Four feet wide is the sweet spot for reach — I can access the center from either side without stepping in. Eight feet long gives meaningful planting real estate without dominating the entire side yard.
A Note on the Wood Finish
The boards arrived unfinished, which is standard for untreated cedar. Some people apply a food-safe oil to extend lifespan. I chose not to for the first season, wanting to see how the raw cedar held up. By fall, it had developed a soft silver-gray patina on the sun-exposed sides. The shaded boards stayed closer to their original honey tone. Both are cosmetically fine. Neither showed any soft spots or signs of rot after one full season.
My Testing Protocol: Planting and Care Routine
I planted a container-grown dwarf mulberry (a ‘Issai’ variety, roughly 18 inches tall at planting) in mid-May. The bed was already positioned on a mostly level patch of lawn. I laid cardboard underneath to suppress grass before filling.
For the growing medium, I used a mix of roughly 60% high-quality bagged garden soil, 30% compost, and 10% perlite for drainage. Total soil volume to fill a 4x8x17.5″ bed is substantial — I needed about 28 cubic feet of material. That’s worth budgeting for upfront.
My care routine throughout the season looked like this:
- Watered deeply 2–3 times per week during dry stretches
- Applied a balanced slow-release fertilizer in June and again in August
- Mulched the soil surface around the tree base to retain moisture
- Pruned one crossing branch in late June to encourage an open shape
- Monitored drainage after heavy rain — the bed never pooled water
I kept notes from planting through first frost in late October. That gave me roughly five and a half months of active observation. The bed held up through heat spells, several heavy rainstorms, and one brief hailstorm in July.
What Actually Changed: Honest Results with Timeline
The first month was slow. New growth appeared by week three, but the tree mostly sat and sulked — typical transplant adjustment. I had a real moment of doubt in early June when a few leaves yellowed and dropped. I worried the bed was somehow too warm or the drainage was off.
Then things shifted noticeably around week six. New shoot growth accelerated. The tree put on roughly 14 inches of new growth by end of July, which felt strong for a first-season container-to-raised-bed transplant.
By August, I had my first small harvest. It wasn’t abundant — maybe two cups of berries across three picking sessions. However, the berries were intensely sweet and perfectly ripe. Growing in the raised bed seemed to warm the root zone slightly compared to ground planting, which may have contributed to earlier ripening.
The overall results by season’s end:
- Tree grew from 18 inches to just over 32 inches in height
- No signs of root circling or stress from the contained environment
- Drainage remained excellent throughout — no waterlogging after rain
- The bed itself showed no warping, splitting, or structural weakness
- Companion herbs (basil and lemon thyme) thrived alongside the tree
The depth of the Infinite Cedar Select Cedar Raised Garden Bed (4′ x 8′ x 17.5″ H) genuinely made a difference. I’m confident a shallower bed would have stressed the roots by midsummer.
The Downsides: What You Should Know Before Buying
No review is complete without honest negatives. Here’s what I’d flag for anyone considering this setup.
Soil Cost Adds Up Fast
Filling a bed this deep is expensive. Depending on where you source your soil and compost, expect to spend $80–$150 just on growing medium. That’s on top of the bed itself. Factor that into your total budget from the start.
It’s Heavy When Filled
Once filled with soil, this bed is not moving. Position it carefully before you fill it. I had to adjust mine twice while still empty, which was manageable. Moving it after filling would require completely emptying it first.
Long-Term Tree Suitability
A raised bed is excellent for a dwarf mulberry’s first several seasons. However, a vigorous dwarf variety may eventually outgrow any container environment. Monitor root health annually. If the tree starts showing signs of being pot-bound in years three or four, plan for either repotting or transitioning to in-ground planting.
Additionally, the bed has no bottom. That’s intentional for drainage and root access — but it means determined roots can eventually enter native soil below. For most gardeners, that’s actually a benefit. For others managing specific soil contamination concerns, it’s worth noting.
Final Verdict: Who Should Buy a Raised Bed Kit Dwarf Mulberry Tree Setup
After one full growing season, I’m genuinely impressed. The Infinite Cedar Select Cedar Raised Garden Bed (4′ x 8′ x 17.5″ H) handled everything I threw at it without complaint. The depth supported real root development, the cedar showed no signs of degradation, and the structure remained completely stable all season.
A raised bed kit dwarf mulberry tree combination works especially well for gardeners dealing with poor native soil, limited space, or drainage problems. If that sounds like your situation, this is a genuinely strong solution.
Buy This If:
- You have clay, compacted, or contaminated native soil
- You want to grow a dwarf fruit tree in a defined, accessible space
- You prefer untreated natural wood near edible plants
- You need a bed deep enough for real root development
- You want something that will last multiple seasons without rot
Skip This If:
- You need something portable or easy to relocate
- You’re on a very tight budget and can’t absorb the soil fill cost
- You’re planting a full-size mulberry variety that needs much greater root volume
A Worth-Considering Alternative
If your space situation is different — specifically if you need a bed elevated off the ground entirely — consider the Maple99 Raised Garden Bed with Legs 48x24x30. It’s a natural cedar elevated planter box with a 200lb capacity and built-in bed liner. The standing height makes it ideal for gardeners who need back-friendly access or are working on patios and decks. The footprint is smaller, so it suits compact dwarf varieties rather than more vigorous ones. It’s a solid option if ground-level placement doesn’t work for your setup.