In the spring of my first year on this homestead, I planted a mulberry tree eight feet from my back fence. I was proud of that decision. I had done my research — or so I thought — and I figured eight feet was more than enough clearance for a fruit tree. Three seasons later, I was watching roots buckle a fence post I had just replaced the year before, branches dragging across my chicken coop roof, and a canopy so dense it was shading out half my vegetable garden. That one placement call set me back years and cost me real money in fencing, reshaping labor, and a harvest window I never got right because the tree was stressed from aggressive pruning I had to do just to keep it manageable.
I am telling you this because mulberry tree planting mistakes are not always dramatic. Sometimes they are a single quiet decision made in March that you do not fully pay for until year four. After twelve years of growing mulberries on my three-acre property — multiple varieties, multiple planting methods, hundreds of pounds harvested per season — I can tell you exactly what I got wrong, why it happens to almost everyone, and how to set yourself up for a tree that actually works with your land instead of against it.
The Core Mistake: Underestimating the Spread
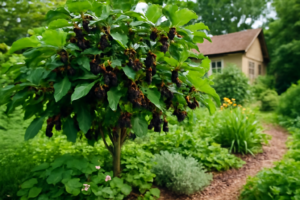
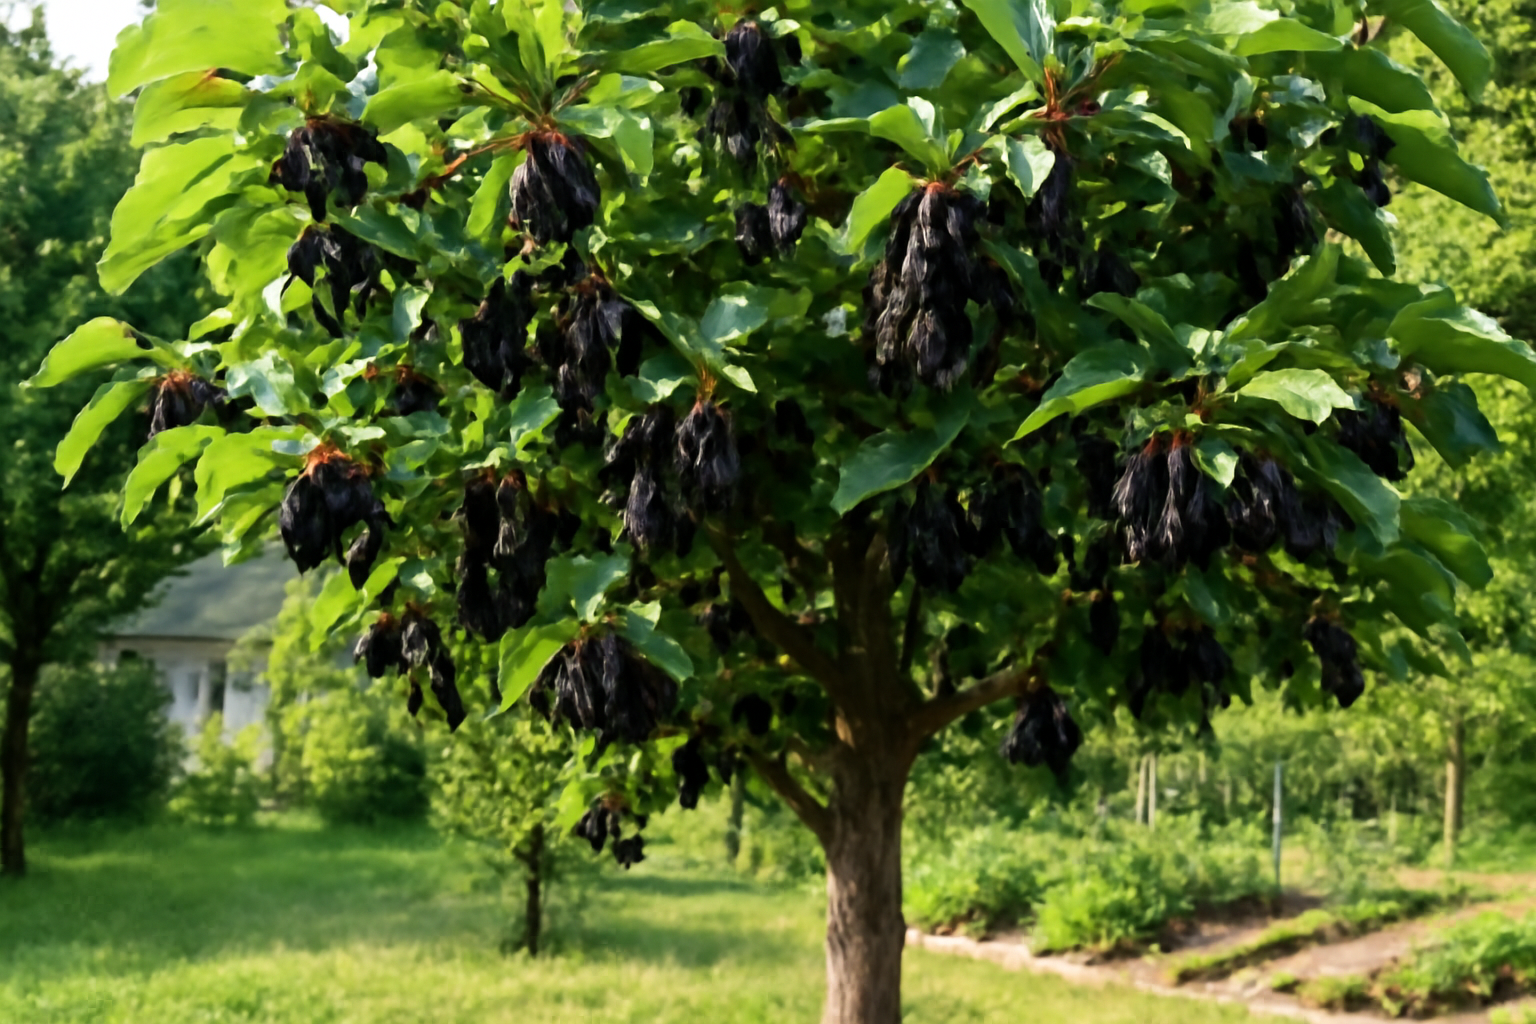
Most guides will tell you to plant mulberries fifteen to twenty feet from structures. That is not wrong, but it is incomplete advice that lulls you into a false sense of safety. What those guides often fail to explain is that a vigorous mulberry — particularly a red mulberry or an Illinois Everbearing — is not behaving like a standard ornamental tree. It is behaving like a tree that has been optimizing its survival for thousands of years. The roots run wide and shallow. The canopy follows. By year seven on my property, the tree I planted eight feet from the fence had a canopy spread of over thirty feet. Its root zone extended well past that.
The rule I follow now: take whatever spacing recommendation you read and add ten feet. Then ask whether you are comfortable with a mature tree at that full radius affecting everything inside that circle — fencing, garden beds, structures, septic lines, and neighboring plantings. If the answer is no, move the site before you ever dig the hole.
Why Most People Get This Wrong in Year One
When you are planting a six-to-ten inch sapling, it is nearly impossible to visualize what twenty years of growth looks like. I have coached newer homesteaders through their first plantings, and the most common thing I see is someone placing a young tree where it looks right based on current scale — not where it will work at full maturity. A one-gallon potted tree next to a fence line looks tidy and reasonable. That same tree at year ten does not.
The second reason this happens is that mulberries establish faster than most people expect. We are not talking about a slow-building apple tree that gives you years to correct course. In my climate — Zone 6b in central Ohio — a well-placed mulberry can put on six to eight feet of growth in its first two or three years under good conditions. By the time you realize the placement is wrong, the tree is already invested in its location and transplanting it is a high-risk gamble that usually ends in losing the tree entirely.
The Harvest Timing Problem Nobody Warns You About
Here is the second major mistake tied directly to my placement error, and this one cost me real fruit. Because my tree was overcrowded against the fence and coop, I was constantly cutting it back to manage spread. Heavy pruning in late winter — which I was doing out of necessity, not strategy — was disrupting the fruiting wood. Mulberries fruit on new growth, but they also need established wood structure to produce consistently. I was interrupting that cycle every single year, and my harvests were erratic and low-volume through years two, three, and four as a result.
Once I stopped reactive pruning and started working with a proper annual shaping schedule — light formative pruning in late winter, nothing aggressive — my yields jumped significantly. In year eight I harvested just over two hundred pounds from two mature trees. In year eleven, three trees produced closer to four hundred pounds across a six-week window. That turnaround was not about fertilizer or watering schedules. It was about getting out of the tree’s way.
What Proper Site Selection Actually Looks Like
When I planted my second tree — this time correctly — here is the checklist I worked through before touching a shovel:
- Minimum thirty feet from any structure, fence, or utility line. I now use forty feet as my personal standard.
- Full sun, at least six hours direct. Partial shade will give you a tree. It will not give you a productive one.
- Account for what is downhill and downwind. Ripe mulberries drop constantly. They stain everything they touch. My second tree is positioned so fruit drops into a grass strip I mow, not onto a path, patio, or car parking area.
- Soil drainage matters more than soil richness. Mulberries tolerate poor soil. They do not tolerate waterlogged roots. I learned this when I lost a young tree to a low spot that pooled water after heavy rain three years in a row.
- Plan your harvest access. A mature mulberry canopy during peak season requires you to be under and around it frequently. You want enough open ground on all sides to work with a tarp or harvest sheet.
Getting the Soil Right from the Start
Mulberries are not heavy feeders, but giving them a strong start in good soil pays dividends for decades. The single best thing I have done for tree establishment on my property is focus on soil biology rather than synthetic fertilizers. About four years ago I shifted to using a humic acid-based soil amendment at planting time and again in early spring. I noticed measurably better root establishment in new plantings and improved fruit set on older trees. The science here is well-supported — humic acids improve nutrient uptake efficiency and stimulate microbial activity in ways that synthetic inputs simply do not replicate over the long term.
This post contains affiliate links. As an Amazon Associate I earn from qualifying purchases.
Starting from Seed vs. Buying Established Trees
I want to be honest here: if you are starting from seed, you are committing to a longer road. Mulberry trees grown from seed can take anywhere from five to ten years to reach productive fruiting. I have done it, and there is genuine satisfaction in it, but it is not the path I recommend if your goal is fruit in the near term. A grafted or rooted cutting from a known productive variety will fruit far sooner and give you predictable outcomes in terms of fruit size, flavor, and season.
That said, starting from seed has its place — especially if you are establishing a long-term windbreak, building up rootstock for future grafting, or simply want the experience. Just go in with clear expectations about the timeline.
What I Use and Recommend
After twelve seasons of trial and adjustment, here is what I actually reach for when starting or expanding mulberry plantings:
For seed starting and long-term projects, I have used 20Pcs Mulberry Seeds for Planting-Non-GMO Heirloom Fruit Seeds Garden Outdoor-Grow Your Own Mulberry Trees. Non-GMO heirloom seed stock is the right starting point if you are going the seed route.
For anyone who wants to skip the multi-year wait and start with a tree that will produce on a reasonable timeline, the Illinois Everbearing Mulberry Tree 6-10″ Tall, Sweet Fruit to Enjoy Year After Year, Fruit Bearing Potted Plant is a solid choice. Illinois Everbearing is one of the best-performing varieties for home growers in a wide range of climates — long fruiting window, excellent flavor, reliable yields.
For soil preparation and ongoing tree health, I use Farmer’s Secret Soil Revitalizer (32oz) – Organic (OMRI Listed) Dirt Health Booster – Liquid Compost Soil Amendment – Activated Humic Acid – Great for Fall/Spring Application. OMRI Listed, liquid application, and the activated humic acid formula fits exactly the soil biology approach I have been using for the past four years with consistent results.
The Honest Caveat
I want to be clear about one thing: mulberry trees, once established, are remarkably forgiving. If you have already made some of the mistakes I described here — and most of us have — you are not necessarily in an unrecoverable situation. My original problem tree still produces. I manage it differently now, accept its limitations, and work around the placement rather than fighting it every season. The point of sharing all this is not to create anxiety about perfection. It is to give you the specific, honest information I wish I had in year one so that the mistakes you make are smaller ones than mine were.
Get the placement right from the start. Respect the spread. Give the tree room to do what it does. Everything else is manageable.