
I once planted fifteen mulberry trees in what I can only describe as “enthusiastic chaos.” No plan, no spacing research, no thought whatsoever about sun angles or airflow — just me, a shovel, and the misguided confidence of someone who had successfully kept a houseplant alive for three months. By year two, I had a mulberry jungle so dense you needed a machete to retrieve the harvest. My neighbor actually asked if I was “going for a haunted forest vibe.” I was not. But that ridiculous disaster is exactly what pushed me to finally figure out a proper mulberry orchard layout — and when I did, everything changed.
This post contains affiliate links. As an Amazon Associate, I earn from qualifying purchases.
How My “Orchard” Became a Cautionary Tale
Let me paint you a picture. It was late spring, and I was standing in my backyard staring at a tangle of overlapping branches so thick the grass underneath had completely given up and died. My five standard-size mulberry trees and ten dwarf varieties were competing for every ray of light like contestants on a survival reality show. The fruit was sparse, undersized, and stubbornly out of reach because all the good growth had shot straight up toward the one patch of sky the trees could find. I harvested maybe two pounds of berries that entire season. Two pounds. From fifteen trees. My breakfast smoothie habit was costing me a fortune at the grocery store, and I had an orchard.
The breaking point came when I got tangled in a low branch while carrying a full bucket, did a spectacular slow-motion stumble, and dumped my entire harvest onto the ground. I sat there in the dirt, covered in mulberry juice that looked genuinely alarming, and I made a decision: I was going to learn how to do this properly. I got inside, ordered a couple of books, and started taking notes like my smoothie habit depended on it — because it did.
The Mulberry Orchard Layout Principles That Actually Work
Once I started researching, I realized my mistakes were completely fixable. A smart orchard layout isn’t complicated, but it does require a little upfront thinking. Here are the principles I now swear by.
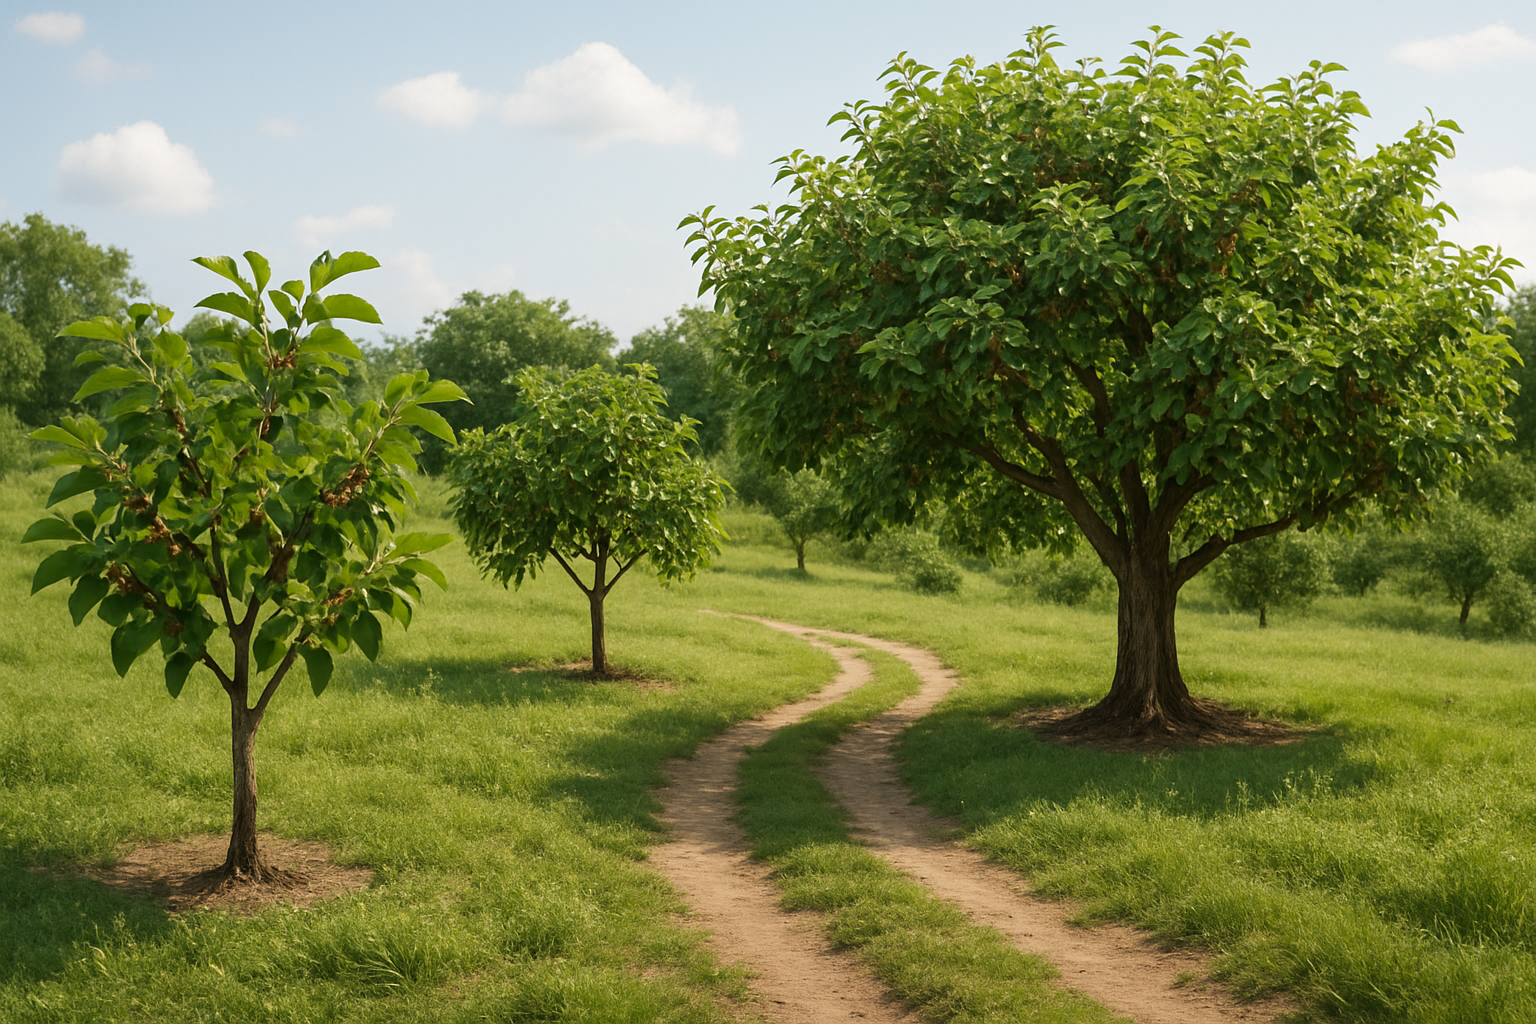
Spacing Is Everything
Standard mulberry varieties (like Illinois Everbearing or Pakistan) need a minimum of 25–30 feet between trees at full maturity. Dwarf or semi-dwarf varieties can work at 10–15 feet, but only if you’re committed to annual pruning. I had standard trees planted eight feet apart. Eight! They weren’t growing — they were fighting. Proper spacing lets each tree develop a full, open canopy that catches maximum sunlight on all sides, which translates directly to more fruit-bearing wood and bigger yields.
Orient Your Rows North to South
This one sounds fussy, but it makes a real difference. Running your rows from north to south means both sides of every tree get direct sun exposure throughout the day as the sun moves east to west. East-to-west rows put one side of your trees in perpetual shade from their neighbors. I replanted my surviving trees on a north-south orientation, and the difference in fruiting the following season was immediately visible.
Plan for Airflow, Not Just Space
Dense plantings trap humidity, which invites fungal issues. Mulberries are relatively hardy, but they’re not immune to problems when air can’t circulate. Leave access paths between rows — ideally wide enough to walk through comfortably with a harvest basket. I now keep my row spacing at around 20 feet, which gives me a generous walking corridor and lets the breeze move through freely.
Match Varieties to Zones Within Your Space
If you have a mix of full-size and dwarf trees, cluster them strategically. Put your tallest trees on the north side of your plot so they don’t shade out the smaller ones. Place any varieties that need more heat or reflected warmth near a south-facing fence or wall. A little zoning within your layout can dramatically improve the performance of every single tree.
Feeding Your Layout Right: Don’t Let Good Spacing Go to Waste
Rearranging my trees solved the light and airflow problem, but I also noticed that my soil was genuinely depleted after years of cramped, competing root systems. Good layout plus good feeding is the real winning combination. I started using a phosphorus-rich fertilizer to encourage root development and fruiting, and the results in year one of my new layout were honestly a little emotional. I cried a little. The mulberries, not me. (Okay, maybe also me.)
Tools and Products I Recommend
These are the things that made the biggest difference in my replanting and recovery season. I’ve linked everything for convenience.
- For deep root feeding: Farmer’s Secret Fruit Tree Booster Fertilizer (32oz) — super concentrated and phosphorus-rich, this is what I use at the start of every growing season to give my trees a strong foundation. A little goes a long way.
- If you’re just getting started or have fewer trees: Farmer’s Secret Fruit Tree Booster Fertilizer (8oz) — same excellent formula, smaller size, perfect for testing it out before committing to the large bottle.
- For easy, set-and-forget feeding: Miracle-Gro Fruit & Citrus Plant Food Spikes — I keep these on hand for mid-season top-ups. You just push them into the soil around the drip line and walk away. Genuinely zero effort.
- For the big-picture orchard philosophy: The Holistic Orchard: Tree Fruits and Berries the Biological Way — this book completely changed how I think about soil health, beneficial biology, and sustainable tree care. I’ve read it twice and still refer back to it.
- For practical layout and planning guidance: Orchard Masterclass: Expert Tips to Start Your Orchard — a highly readable guide covering everything from site selection to pruning strategy. Great if you’re starting fresh or starting over like I was.
The Season Everything Came Together
The spring after I redesigned my mulberry orchard layout, replanted with proper spacing, oriented my rows correctly, and started a consistent feeding routine, I harvested over thirty pounds of berries. Thirty. From the same trees that had given me two pounds the year before. I didn