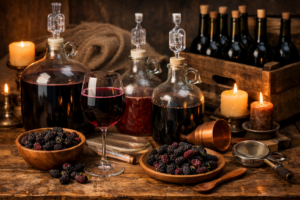
It was the same Tuesday afternoon, the same colander of fat, dark mulberries from my backyard tree, and the same pair of stained hands. I pressed half the batch into fresh juice, let it chill in the fridge, and set the other half fermenting in a gallon jar with a little yeast and some patience. Four days later, I tasted them side by side and genuinely said out loud — to nobody — “These cannot be from the same fruit.” The flavors were so wildly different that I immediately fell down a research rabbit hole on mulberry wine vs juice fermentation chemistry that kept me up way past my bedtime. I’m sharing everything I found, and everything I tasted, right here.
This post contains affiliate links. As an Amazon Associate I earn from qualifying purchases at no extra cost to you.

What Fresh Mulberry Juice Actually Tastes Like (And Why It’s More Complex Than You Think)
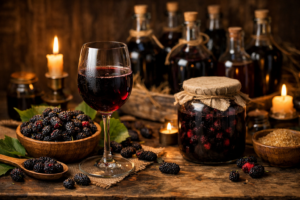
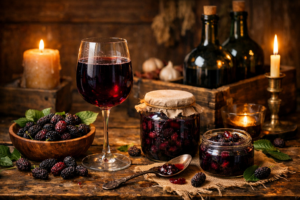
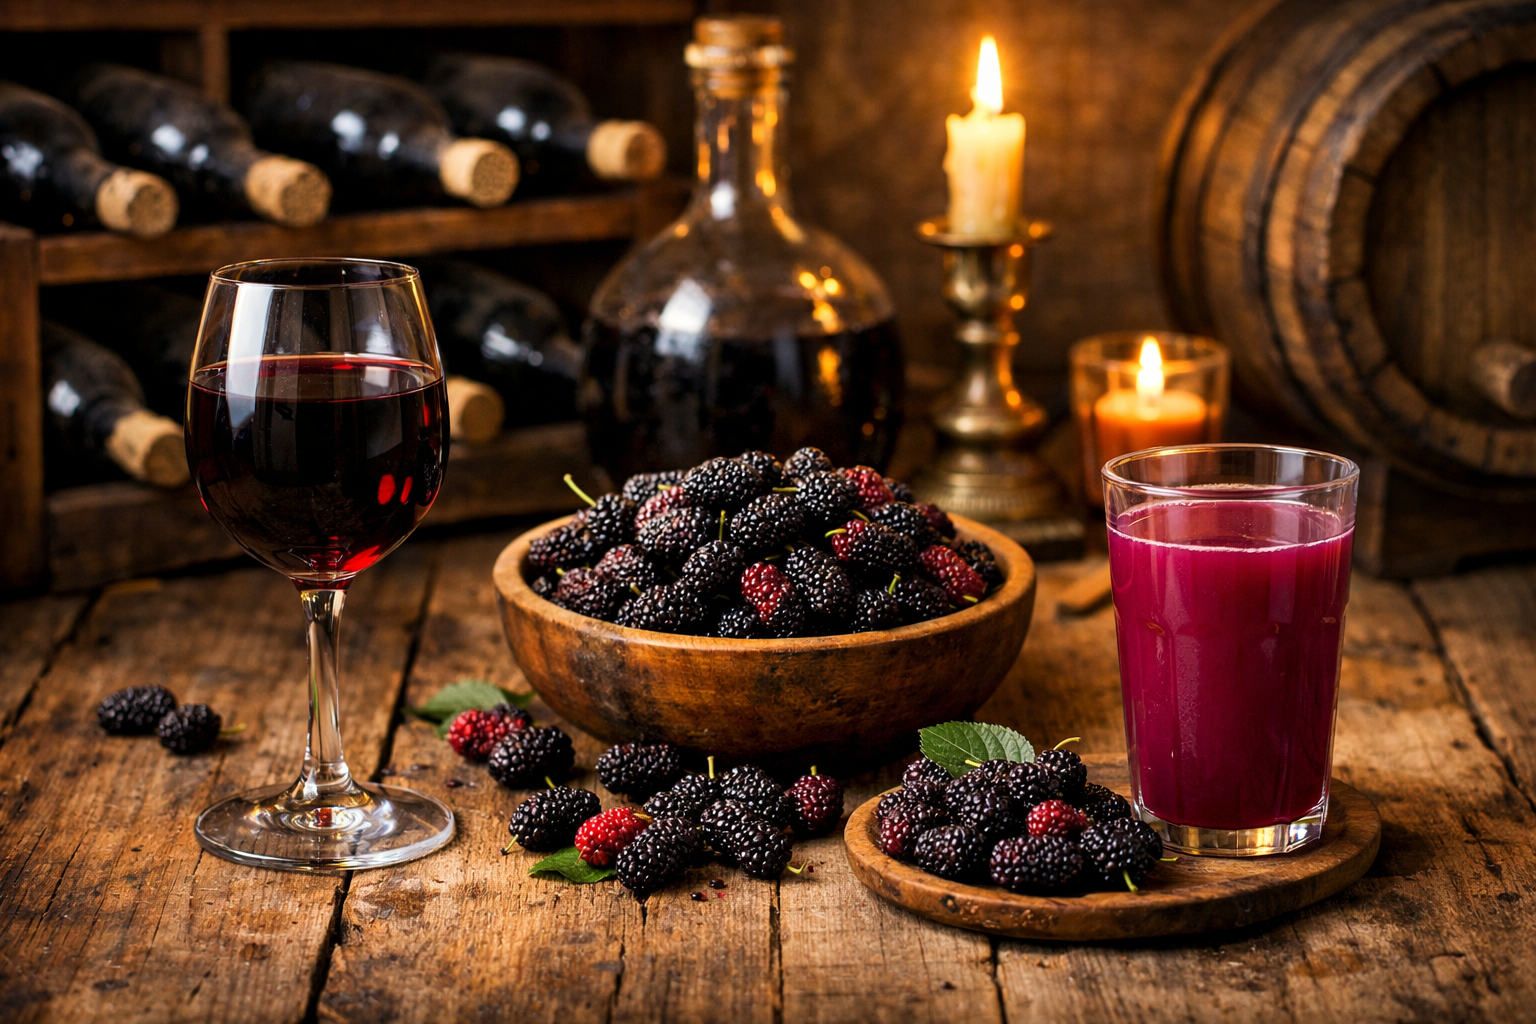
Fresh mulberry juice is genuinely lovely. If you’ve never made it, picture something like a cross between blackberry and grape, but softer — less tart, with an almost floral sweetness that hits you right at the front of your palate. It’s deeply pigmented from the anthocyanins in the fruit, and it has this lush, almost jammy quality that makes it feel indulgent even without any sugar added.
But here’s the thing: fresh juice is also a little one-dimensional. Don’t get me wrong — it’s delicious. My kids will drain a glass of it before I’ve even finished pouring. The sweetness is prominent, the berry flavor is forward and obvious, and the acidity is gentle. What you taste is essentially what the mulberry is. No surprises, no layers, no evolution on your tongue. It’s a fruit doing exactly what a fruit does.
When I made mine that week, I cold-pressed the berries through a fine mesh strainer, added nothing, and refrigerated it immediately. Crystal clear flavor. Beautiful color. Completely straightforward. I loved it. And then I tried the fermented version and suddenly the juice felt like a rough draft.
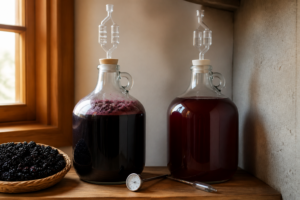
The Chemistry of Fermentation: Why Everything Changes in the Jar
Here’s where the research rabbit hole got genuinely fascinating. When yeast goes to work on mulberry juice, it doesn’t just eat the sugar and burp out alcohol. The fermentation process triggers a cascade of chemical transformations that fundamentally alter the flavor profile of the liquid.
First, the obvious: yeast consumes fructose and glucose and produces ethanol. But ethanol itself is nearly flavorless. The real magic happens in the byproducts. Yeast produces esters — aromatic compounds that create fruity, floral, and sometimes even spicy notes that were never present in the original juice. It produces glycerol, which adds body and a silky mouthfeel. It produces small amounts of organic acids that sharpen and brighten the overall profile. The simple berry sweetness gets metabolized and replaced with something far more complex.
There’s also what fermentation removes. Fresh mulberry juice has a kind of raw, almost vegetal undertone — very faint, but it’s there if you pay attention. Fermentation essentially burns that off. What’s left is a more refined, concentrated expression of the berry’s deeper flavor compounds, the ones that were always present but got overshadowed by the dominant sweetness.
The yeast strain matters enormously here. For my batch I used Red Star Premier Classique (formerly Montrachet) Yeast, which is a classic choice for fruit wines. It ferments cleanly and allows the fruit character to stay prominent while still developing that layered complexity. I’ve also used Angel Sweet Wine Yeast, which is specifically designed for fruit wines and gives a slightly rounder, softer finish — great if you want the mulberry sweetness to stay a little more present in the final wine.

How the Flavor Profile Shifts: A Side-by-Side Comparison
Let me try to describe this as specifically as I can, because “the wine tastes different from the juice” is not exactly groundbreaking journalism.
The fresh juice leads with sweetness and then hits you with a clean, bright berry note. The finish is short, pleasant, and uncomplicated. It tastes like mulberries in the most direct possible way.
The fermented wine — even at just four days, which is barely a young wine — led with something almost earthy and dark. There were notes I can only describe as dried fruit, a faint whisper of something like black pepper, and a longer finish that evolved across my palate. The berry character was still there, but it had gone deeper underground. It was like the difference between listening to a song on a phone speaker and listening to it through proper headphones. Same song. Entirely different experience.
Here’s a quick breakdown of how the two compare:
- Sweetness: Fresh juice is forward and sweet. Wine is drier, with sweetness receding as fermentation progresses.
- Acidity: Juice is gently acidic. Wine develops a brighter, more defined acidity from fermentation byproducts.
- Aromatics: Juice smells like fresh fruit. Wine develops floral, earthy, and sometimes spiced notes you won’t detect in raw juice.
- Body and texture: Juice is lighter and more watery. Wine gains body and a slight viscosity from glycerol production.
- Complexity: Juice is delicious but simple. Wine keeps revealing new flavors as it sits in your glass.

Getting Started With Mulberry Wine (What Equipment Actually Matters)
I’ll be honest: the first time I tried to make fruit wine I seriously overcomplicated it. I bought equipment I didn’t need and ignored equipment I did. Let me save you from my mistakes.
The most important piece of equipment, full stop, is a proper airlock. Fermentation produces carbon dioxide, and you need a way for that gas to escape without letting oxygen or wild yeast in. My personal favorite setup uses the Fastrack Twin Bubble Airlock and Carboy Bung (2-Pack), which I find incredibly satisfying to watch bubble away on the counter. If you want a few more options on hand, the Bubble Airlock Set with 4 Airlocks and Drilling #6 Stoppers gives you extras for multiple batches, and the Fastrack 3-Piece Airlock Set with Drilled Rubber Stoppers is another solid choice for beginners running several jars at once.
For complete starter kits, I’d genuinely recommend one of three options depending on your commitment level. If you want to jump in without thinking too hard about sourcing individual pieces, the Home Brew Ohio Upgraded 1 Gallon Wine from Fruit Kit includes a mini auto-siphon which is a game-changer for transferring wine without disturbing the sediment. The Craft A Brew Fruit Wine Making Kit is excellent for beginners and supports up to 20 one-gallon batches with reusable equipment — perfect if mulberry season has you drowning in fruit. And the Wine Making Kit with 1 Gallon Glass Fermentation Jar, 4 Bottles, Yeast, Nutrients, and Step-By-Step Guide is especially appealing if you want everything in one box and a clear roadmap to follow your first time through.
A few things I’ve learned from trial and error worth mentioning: always use filtered or spring water if you’re topping up your must. Chlorine in tap water can inhibit yeast. Keep your fermentation jar somewhere with a stable temperature — mulberry wine ferments happily between 65°F and 75°F. And please, please label your jars with the date. Future you will be grateful.

Which Should You Make? My Honest Recommendation
Here is the conclusion I landed on after my mulberry wine vs juice fermentation experiment, and after a lot of reading about what fermentation actually does to fruit compounds: make both, if you possibly can, but prioritize the wine when your harvest is at peak ripeness.
Fresh juice is the right call when you want to celebrate the mulberry in its most immediate, honest form — when the fruit is perfectly ripe and you want that flavor right now, unfiltered and undisguised. It’s also the better choice for kids, for mixing into smoothies, and for recipes where you want a fresh berry flavor without alcohol.
But if you want to understand what your mulberry tree is truly capable of producing, fermentation is where that story gets told. The process strips away the noise, amplifies the depth, and creates something that has no comparison in the fresh fruit world. It’s humbling, honestly, that a handful of wild yeast and a few weeks of patience can do more for a mulberry than anything I could accomplish in a kitchen.
If you’re ready to try it yourself, I’d start with the Craft A Brew Fruit Wine Making Kit for its beginner-friendliness and reusability, grab a packet of Red Star Premier Classique Yeast, and pick up a couple of Fastrack Twin Bubble Airlocks so you can run two batches at once. Then go pick your mulberries, press half for juice, ferment the other half, and taste them side by side in a week. I promise you’ll end up doing exactly what I did — standing in your kitchen talking to yourself about chemistry.
Have you made mulberry wine before? Drop your experience in the comments — I’d love to know what yeast you used and whether your flavor transformation was as dramatic as mine.