This post contains affiliate links. As an Amazon Associate I earn from qualifying purchases at no extra cost to you.
It was late April, and my mulberry tree was absolutely exploding with new growth. I was out there with my pruning shears, doing what I do every spring — trimming back the wild branches, shaping it up, trying to keep it from taking over the entire corner of my yard. And suddenly, mid-snip, I stopped and stared at the massive pile of fresh green leaves accumulating at my feet.
I’d been buying mulberry leaf tea bags for two years. Two years of subscription orders, little paper packets arriving at my door, brewing my afternoon cup. And here I was, literally throwing away armfuls of the exact same thing.
So I asked myself: can I actually make mulberry leaf tea from fresh leaves? Can I just… do this myself?
Turns out, yes. Absolutely yes. And what started as a “why not?” moment has become one of my favorite things to do every spring. There’s something genuinely special about drinking tea made from leaves you harvested with your own hands, dried in your own home, and brewed into a cup. It tastes better. It feels intentional. And honestly? It’s not even that hard. Let me walk you through exactly how I do it now.
Why Mulberry Leaf Tea Is Worth Making Yourself
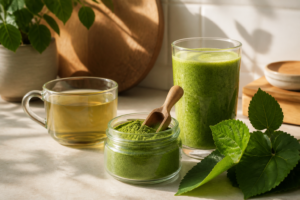
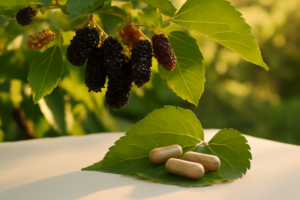
Before we get into the how-to, let’s talk about why this matters. Mulberry leaves have been steeped as tea for over 2,000 years, particularly in Traditional Chinese Medicine where they’re known as Sang Ye. The white mulberry tree (Morus alba L.) produces the young leaves most traditionally used for tea, though red and black mulberry leaves work too.
The leaves contain powerful compounds including rutin, quercetin, and chlorogenic acid — flavonoids with established antioxidant and anti-inflammatory properties. When you make mulberry leaf tea from fresh leaves yourself, you’re capturing those compounds at their peak. And you’re doing it without any of the packaging waste or shipping delays.
Plus — let’s be honest — it’s just cool. You grew it. You dried it. You’re drinking it. That’s a full-circle moment right there.
How to Make Mulberry Leaf Tea from Fresh Leaves: The Complete Process
The process for making mulberry leaf tea from fresh leaves mirrors traditional green tea production, which makes sense — you’re essentially creating your own fresh herbal tea. The magic happens in four main stages: harvesting, wilting, heat-treating (what tea makers call the “kill-green” step), and drying.
Let me break down each stage so you can do this confidently.
Step 1: Harvest Your Leaves
Timing matters here. You want young, tender leaves — ideally the top 2–3 leaves on each branch. These have the best flavor and the most delicate texture. Spring is prime harvesting season (hello, April for me), but you can harvest through early summer.
Pick leaves in the morning after the dew has dried but before the heat of the day. Use clean hands or scissors, and be gentle. You’re not stripping branches bare — you’re doing what you’d do anyway when pruning or maintaining your tree. I usually fill a medium bowl with fresh leaves, which is plenty for a whole season’s tea supply.
Rinse them gently under cool water if they’ve picked up any dust, then pat dry with a clean cloth.
Step 2: Wilt the Leaves (4–6 Hours)
Spread your clean, damp leaves on a clean cloth or paper towels in a warm, well-ventilated spot. A sunny windowsill or outdoor table works perfectly. You’re not trying to completely dry them yet — you’re just beginning to soften them and reduce their moisture content slightly.
This wilting step takes 4–6 hours. You’ll notice the leaves starting to look less crisp, becoming more pliable. This is exactly what you want. I usually set mine out in the morning and check on them mid-afternoon.
Step 3: The “Kill-Green” Heat Treatment (10–12 Minutes)
This is the step that stops oxidation and sets the flavor. Once your leaves are wilted, you need to briefly expose them to heat. This halts the browning process and locks in that fresh, green tea character.
You have two options here:
- Pan-frying method: Heat a large, dry skillet over medium heat. Working in batches, toss your wilted leaves in the hot pan for 3–5 minutes, stirring gently and constantly. The leaves should feel warm to the touch but not scorched. You’re aiming for a light toasting effect.
- Oven method: Spread your wilted leaves on a baking sheet and roast at 180°F for 10–12 minutes. This is my preferred method because it’s easier to control the temperature and I can do a larger batch at once.
Either way, you’ll notice the leaves becoming slightly darker and releasing a gentle, grassy aroma. That’s your signal that you’ve done it right.
Step 4: Dry the Leaves (1–3 Weeks or 4–8 Hours)
Now comes the final step. Your heat-treated leaves need to dry completely until they’re crisp and crumbly. How long this takes depends on your method.
- Air-drying: Spread your heat-treated leaves on a clean cloth or wire rack in a warm, dry, well-ventilated space. A spare shelf in a closet, a pantry, or an outdoor covered area all work. This takes 1–3 weeks depending on your climate and humidity levels. I check mine every few days and gently stir them around for even drying.
- Food dehydrator: This is my go-to method now, and it’s why I invested in a good one. Set your dehydrator to 95–115°F (35–45°C) and spread the heat-treated leaves on the trays. They’ll be completely dry and crispy in 4–8 hours. This lower temperature range actually preserves more of the volatile aromatics and active compounds like 1-deoxynojirimycin (DNJ) compared to higher-heat methods.
You’ll know they’re ready when they break apart easily between your fingers and have no moisture left at all.
Storing Your Homemade Mulberry Leaf Tea
Once your leaves are completely dry, transfer them to an airtight container — a glass jar with a tight lid is perfect. Store in a cool, dark, dry place away from direct sunlight. Properly dried mulberry leaves will keep for an entire year, easily. I keep mine in a labeled mason jar in my pantry, and I love being able to reach for a handful whenever I want tea.
For the best flavor and to preserve those antioxidant compounds, use your homemade tea within 6–8 months.
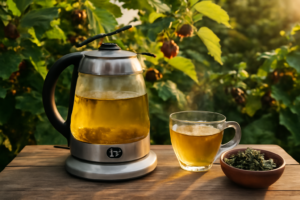
How to Brew Your Homemade Mulberry Leaf Tea
Here’s where a lot of people make a mistake: they use boiling water. Don’t do that. Boiling water can actually degrade some of the more delicate polyphenols in your carefully dried leaves.
Instead, heat water to 175–185°F — just below boiling. If you don’t have a thermometer, wait about 5 minutes after your water boils and it’s off the heat. Use about 1 teaspoon of dried leaves per cup of water, steep for 3–5 minutes, and strain.
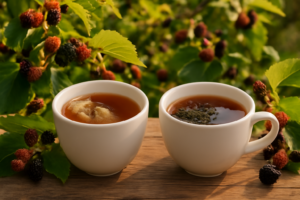
The result is a light, slightly sweet, grassy tea that tastes clean and fresh. The flavor is subtle and sophisticated — nothing like the oversteeped, bitter tea you might get if you used boiling water or steeped too long.
Products I Use (and Recommend)
If you’re serious about making mulberry leaf tea from fresh leaves, a few tools make the process so much easier:
For drying: The Nifty Herb Drying Rack — Hang-Dry Fresh Herbs, 3 Tier is compact and perfect if you prefer air-drying. It takes up minimal space and gives you organized, hanging drying with good airflow.
If you want faster, more reliable results, the COSORI Food Dehydrator for Jerky, Herbs, Fruit — 6 Trays, Stainless Steel is genuinely excellent. The temperature control is precise, and six trays give you plenty of capacity. I’ve used mine for mulberry leaves, herbs, fruit leather, and more.
For brewing: The Hiware Loose Leaf Tea Infuser Strainer — Fine Mesh, Stainless Steel is my favorite way to brew. The fine mesh keeps even the tiniest leaf particles out of your cup, and it’s durable and easy to clean.
And if you want to compare your homemade tea to a commercial option, FullChea USDA Organic White Mulberry Leaf Tea — 100 Bags is a solid benchmark. But honestly? Once you’ve made your own, you’ll probably prefer it.
Give It a Try This Spring
Making mulberry leaf tea from fresh leaves is genuinely easier than I expected, and the reward — a cup of tea you grew and processed yourself — is so much better than I anticipated.
If you have a mulberry tree, those leaves you’re trimming away anyway are waiting for you. They’re already yours. All you have to do is harvest them, wilt them, give them a quick heat treatment, dry them out, and suddenly you’ve got a year’s supply of the most satisfying tea you’ve ever tasted.
I’d love to hear about your experience. Do you have a mulberry tree? Have you thought about making your own tea? Drop a comment below and tell me how it goes — I’m cheering you on.