Don’t expect a weeping mulberry to behave like your average ornamental tree. These grafted beauties demand specific handling, or they’ll revert to upright growth and lose the cascading form that makes them worth growing in the first place.
What You’re Actually Planting
It pays to understand the structure underneath before you dig a hole. Weeping mulberries arrive as grafted specimens—typically Morus alba ‘Pendula’ or related weeping cultivars grafted onto standard rootstock. The tree you’re buying isn’t a genetic weeper; it’s a human construction, with a weeping scion deliberately fused to vigorous roots below. That construction method shapes everything about how you’ll maintain it. Understanding this grafting process is crucial for successful growth.
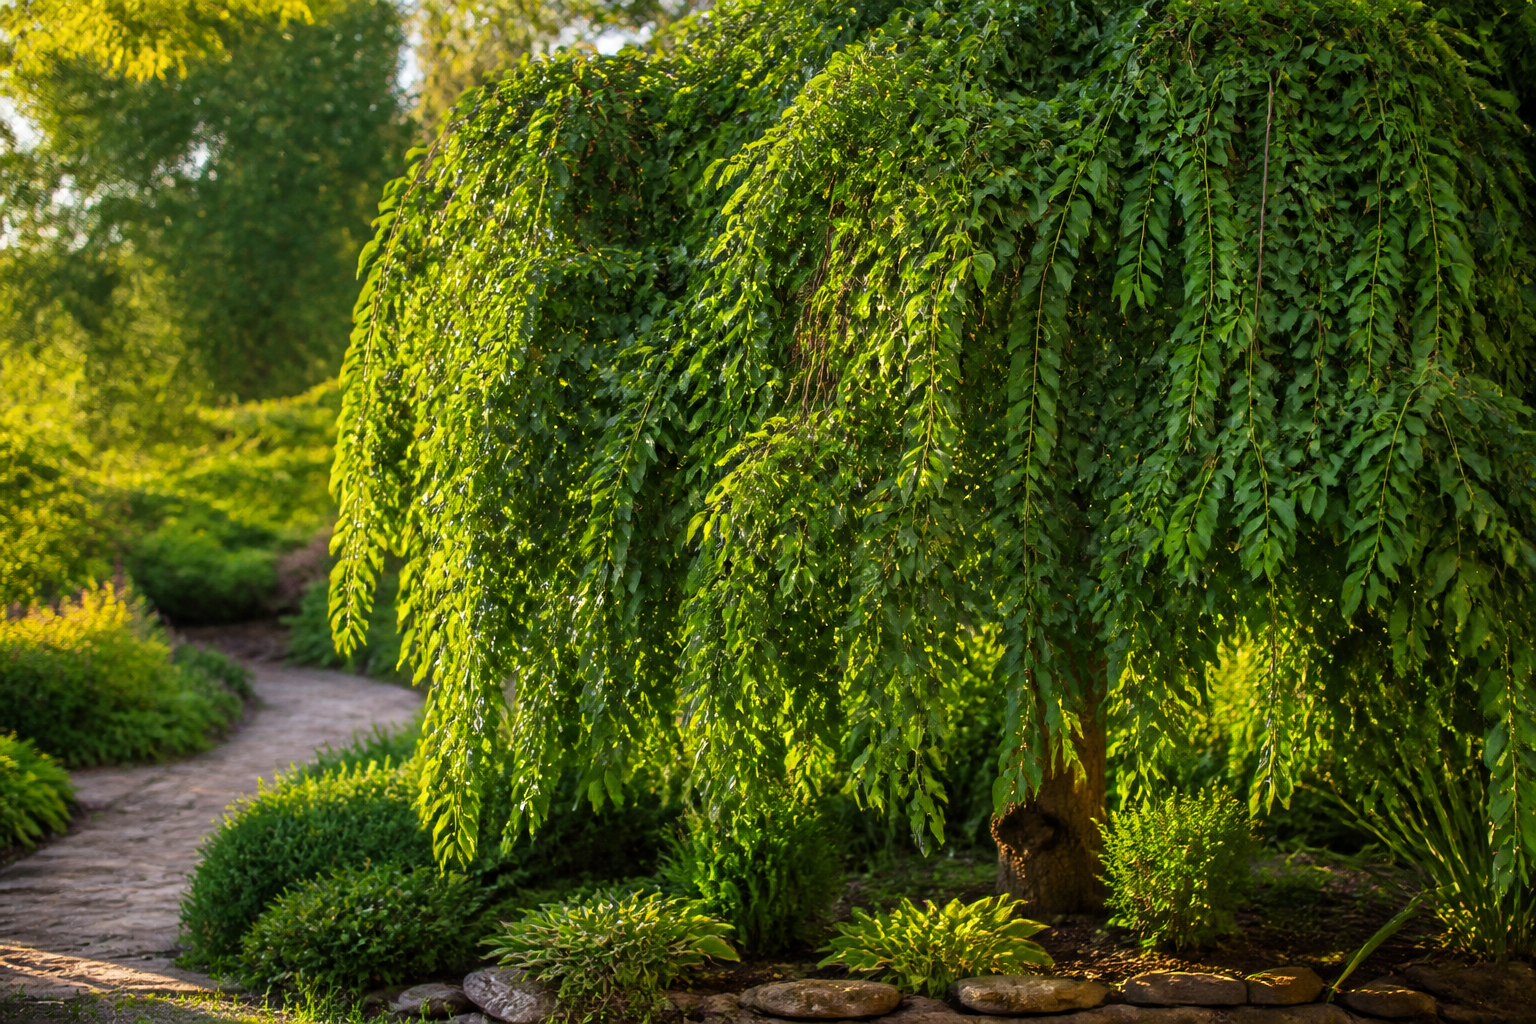
Dimensions vary considerably based on rootstock selection and regional climate, but expect mature specimens to sprawl 20–30 feet horizontally while topping out at 10–15 feet in height. The branches hang in a graceful downward arc, which is the whole aesthetic point. These trees prove reliably hardy between zones 4 and 8, though individual cultivar hardiness shifts somewhat. Cultivars like Black Beauty and Chinook are known to perform well in colder climates and northern regions.
| Cultivar | Hardiness Zones | Climate Suitability |
|---|---|---|
| Black Beauty | zones 4 and 8 | Pacific Northwest |
| Chinook | zones 4 and 8 | Pacific Northwest |
| Illini Star | zones 4 and 8 | Not specified |
| Ozark Premier | zones 4 and 8 | Not specified |
Getting the Planting Right From Day One
Sun exposure controls everything else that follows. Weeping mulberries demand a location receiving no fewer than 6–8 hours of direct sunlight daily; poorly sited specimens tend to produce sparse foliage and minimal fruit. Maximum sun translates to denser branching and genuinely abundant yields. Growers often report that relocating shaded trees to sunnier areas produces noticeable improvements in vigor and productivity.
Soil tolerance is one of the few things weeping mulberries do generously. They’ll grudgingly accept compacted, infertile ground where other trees sulk—but they’ll genuinely thrive if you amend the planting area. If clay dominates your yard, work in compost several inches deep before you plant. Your planting hole should measure roughly three times the width of the root ball, but—and this matters—no deeper than the ball itself. Plant too deep and root rot becomes inevitable. Trust me, I’ve lost a few plants to that mistake!
Shaping a weeping mulberry starts with having a reliable pair of shears in your hand — and this is one place where it pays to invest in quality over the cheapest option on the shelf. The DECERK® 8.5″ Professional Pruning Shears – Cuts 4X Easier with Ultra Sharp Japanese Steel Titanium Blade, Arthritis Friendly Garden Scissors & Plant Clippers, Effortlessly Prunes 3/4″ Branches are built around a high-grade Japanese steel blade that holds its edge through a full season of cutting, making them a smart choice for the repetitive shaping work a weeping mulberry demands. The ergonomic grip is a genuine bonus if you spend long stretches working through the canopy.
Timing depends on your climate zone. Cooler regions benefit from spring planting; if you live in warmer territory, fall gives you better results. Allow ample room for lateral spread—these trees become wide specimens, and putting one near a patio or walkway guarantees regular fruit stains on pavement unless you’re philosophical about seasonal mess. I once made that mistake with a Ozark Premier and learned to embrace the occasional splatter!
Pruning and Shaping the Weeping Form
The impulse to sculpt your new tree immediately will test your patience. Your weeping mulberry spends its first two years building a capable root system and stable branch framework. Let it grow with minimal intervention during this period—aggressive early pruning stalls the foundation you need. I remember when I got too eager with my first Chinook and pruned it way too early; it set back its growth for a whole season!
Starting in year three, intentional shaping becomes productive. I combine selective pruning with judicious heading-back cuts to nurture the weeping silhouette while keeping structural strength intact. Watch especially for upright shoots breaking from the graft union itself—these are rootstock shoots trying to take over, and they’ll eventually dominate the tree if you leave them. Remove them before they thicken. I’ve had to learn to be vigilant about this from my own experiences.
One trap many people fall into: cutting too aggressively, expecting the tree to reward them with denser form. Weeping mulberries react to heavy pruning by shooting upright regrowth—the exact opposite of what you want. Stick to moderate cuts, removing no more than 15–20 percent of total canopy in any given year. Work just above branch intersections, and only remove branches thicker than your thumb if there’s genuine structural reason. The weeping character emerges from long, drooping branches; you’re preserving and refining that, not rebuilding it.
The branches will naturally elongate and hang downward. Your pruning focuses on eliminating dead wood, removing crossing or rubbing branches, and clearing out growth patterns that muddle the tree’s overall shape. Late winter, right as active growth begins, is the optimal window for cutting—it reduces physiological stress on the tree. I’ve found that my trees respond well to this timing.
Moisture and Nutrition
Establishment season demands consistent water availability. For the first twelve months, I water thoroughly twice per week unless the season is particularly wet. After that initial year, established trees tolerate extended dry periods quite capably, though fruit quality and volume improve noticeably if you continue regular watering through hot, arid stretches. I remember one particularly dry summer when my Black Beauty rewarded me with an abundance of juicy fruit because I kept it well-watered.
For the detail cuts — thinning out crossing branches, trimming back the pendant shoots to a clean node, or tidying up the graft union — a well-balanced bypass pruner is hard to beat. The Fiskars Bypass Pruning Shears, 5/8″ Cut Capacity Garden Clippers have earned their reputation over decades for a reason: the low-friction blade glides cleanly through live wood without crushing the stem, which matters when you are pruning a grafted tree where clean wounds heal faster. They are also rugged enough to last years with nothing more than an occasional wipe-down and a pass on a sharpening stone.
Supplemental fertilizer usually proves unnecessary. A vigorously growing tree benefits most from restraint—excess nitrogen pushes vegetative growth while suppressing flowering and fruiting. Apply fertilizer only if the canopy looks thin or foliage begins yellowing, and choose a balanced formula rather than something nitrogen-heavy. I’ve learned this lesson after over-fertilizing a few trees, which led to too many leaves and not enough fruit!
Dealing With Problems
One genuine advantage weeping mulberries bring to the table: they’re tougher than most ornamental trees when it comes to pests and pathogens. My biggest actual headaches have involved spider mites during prolonged heat and humidity deficits, plus the inevitable bird competition for ripe fruit. I’ve found that regular monitoring and a proactive approach make all the difference.
Spider mites respond well to increased watering frequency and regular foliar misting—humidity suppresses them. The bird situation has no perfect solution; netting works but looks utilitarian, and I’ve chosen to harvest berries while they’re dark-colored but still slightly firm, then let them finish indoors rather than compete with wildlife for fully ripe fruit on the tree. It’s not ideal, but it saves me some of the hassle!
Cankers or dieback appearing on branches warrant prompt removal; don’t hesitate to cut them away flush. Adequate spacing between branches and regular pruning promote air movement, which prevents most fungal colonization. I’ve had to learn this lesson through experience, as I once let a canker fester too long and lost a branch.
Month-by-Month Tasks
Spring: Survey winter damage, execute dormant pruning cuts, refresh mulch layer to conserve soil moisture.
Summer: Supply water during heat and drought, watch for mite activity, start harvesting early-season berries.
Fall: Let the tree transition naturally to dormancy; avoid fertilizing as cold approaches.
Winter: Minimal work required; use this window to plan next season’s pruning strategy.
The Years Ahead
A weeping mulberry pays dividends for every year you invest in understanding how it grows. Temper your expectations about the pruning schedule, dedicate yourself to annual light shaping, and the tree rewards you with that distinctive fountain-like form that justifies the grafting craft. Across my twelve plantings, I’ve watched these specimens mature from gangly juveniles into genuinely stunning specimens. There’s a particular satisfaction in standing under one, feeling the branches move in wind, and knowing the care you put in shaped what you’re seeing. I can honestly say it’s one of the most rewarding pursuits I’ve engaged in!
Frequently Asked Questions
How wide and tall do weeping mulberry trees grow?
Mature weeping mulberries sprawl 20–30 feet horizontally while reaching 10–15 feet in height. The exact dimensions depend on your rootstock selection and regional climate, but expect them to develop that wide, graceful cascading form that makes them distinctive.
How much sun does a weeping mulberry need daily?
Weeping mulberries demand a location receiving no fewer than 6–8 hours of direct sunlight daily. Maximum sun translates to denser branching and more abundant yields. Poorly sited specimens often produce sparse foliage and minimal fruit.
When should I prune a weeping mulberry tree?
Your weeping mulberry spends its first two years building roots with minimal pruning. Starting in year three, late winter right as active growth begins is the optimal window for cutting. Stick to moderate cuts, removing no more than 15–20 percent of total canopy in any given year.
How often should I water a newly planted weeping mulberry?
For the first twelve months, water thoroughly twice per week unless the season is particularly wet. After that initial year, established trees tolerate extended dry periods quite capably, though fruit quality improves if you continue regular watering through hot, arid stretches.
Keep Reading
About This Article

Written by Ruth Nakamura. Ruth Nakamura is a backyard orchardist in the Pacific Northwest who has grown mulberries for fifteen years, cultivating twelve different varieties in her own backyard. Not a horticulturist by formal training - she shares what she has learned through hands-on growing, workshops, and connecting with nurseries and growers across the country. More about this site.
Scope and limits. Ruth is a backyard orchardist without formal horticultural training. Growing conditions vary enormously by region, so confirm variety, timing, and pest guidance with your local extension service.
Verify this against a primary source
Specifics change, and your situation may differ from the one described here. These are the authorities worth checking directly:
- USDA Plant Hardiness Zone Map — zone verification for your location
- Oregon State University Extension — fruit growing and pruning research
- USDA PLANTS Database — species range and identification