Standard fruit-tree nursery tags won’t tell you that black mulberries stubbornly resist cuttings, or that a seedling might spend a decade producing nothing but leaves and male flowers. Garden books treat mulberries as an afterthought, if they mention them at all. The propagation advice buried in those sources assumes you’re working with something cooperative—apples, pears, plums. Mulberries, especially certain kinds, play by their own rules. Success with mulberry propagation hinges entirely on picking the right method for the variety you’re cloning, not just copying instructions meant for something else.
When you stand in front of a mulberry you love and picture yourself growing more of it, you’re facing a genuine choice—not just one path to the same destination. Propagating mulberries isn’t a mystery, but it’s not universal either. The method that thrives depends on which cultivar you’re starting with and what trade-offs you’re willing to make. Some routes deliver results with minimal fuss; others demand patience, equipment, or sheer determination. My hands-on years have shown me which approaches actually deliver what they promise, and which ones mostly eat your time.
| Method | White/Hybrid Mulberry | Black Mulberry | Timing |
|---|---|---|---|
| Hardwood Cuttings | 50–80% success | ~20% success | Late fall through early winter |
| Softwood Cuttings | Responds reasonably well | Not recommended | June through July |
| Air Layering | Reliable | Most trustworthy approach | Late spring, May into June |
| Grafting | Exact reproduction possible | Exact reproduction possible | Late winter, February or March |
| Seed | No replication of parent | 7–10 years to maturity; coin flip for male/female | Requires 30–90 days cold stratification |
Why You Need to Know Your Mulberry Variety First
Before you strip a single twig, understand what kind of mulberry you’re propagating from. This detail shapes everything that follows, far more than most people realize. White mulberries and hybrid types cooperate readily; they surrender to cuttings and welcome most propagation tricks. Black mulberries are the stubborn branch of the family tree. Rooting a black mulberry cutting from dormant wood typically fails more than it succeeds—success hovers around 20%, versus the 50–80% you’ll see with white and hybrid types. That gap matters enormously.
I discovered this truth through repetitive failure. Forty black mulberry cuttings once yielded a single rooted plant. I spent weeks convinced the fault lay with me, the rooting powder, timing, or the phases of the moon. Eventually I accepted the real culprit: black mulberry’s own stubborn nature. When you’re trying to duplicate a black mulberry, forget about cutting attempts. Jump directly to air layering or grafting instead. Your sanity will appreciate it.
Hardwood Cuttings: The Most Reliable Method for Most Mulberries
This remains the best starting point for anyone learning to clone a mulberry. Hardwood cuttings from white or hybrid types root with impressive consistency, and the calendar makes sense: late fall straight through early winter, once dormancy sets in and branches firm up.
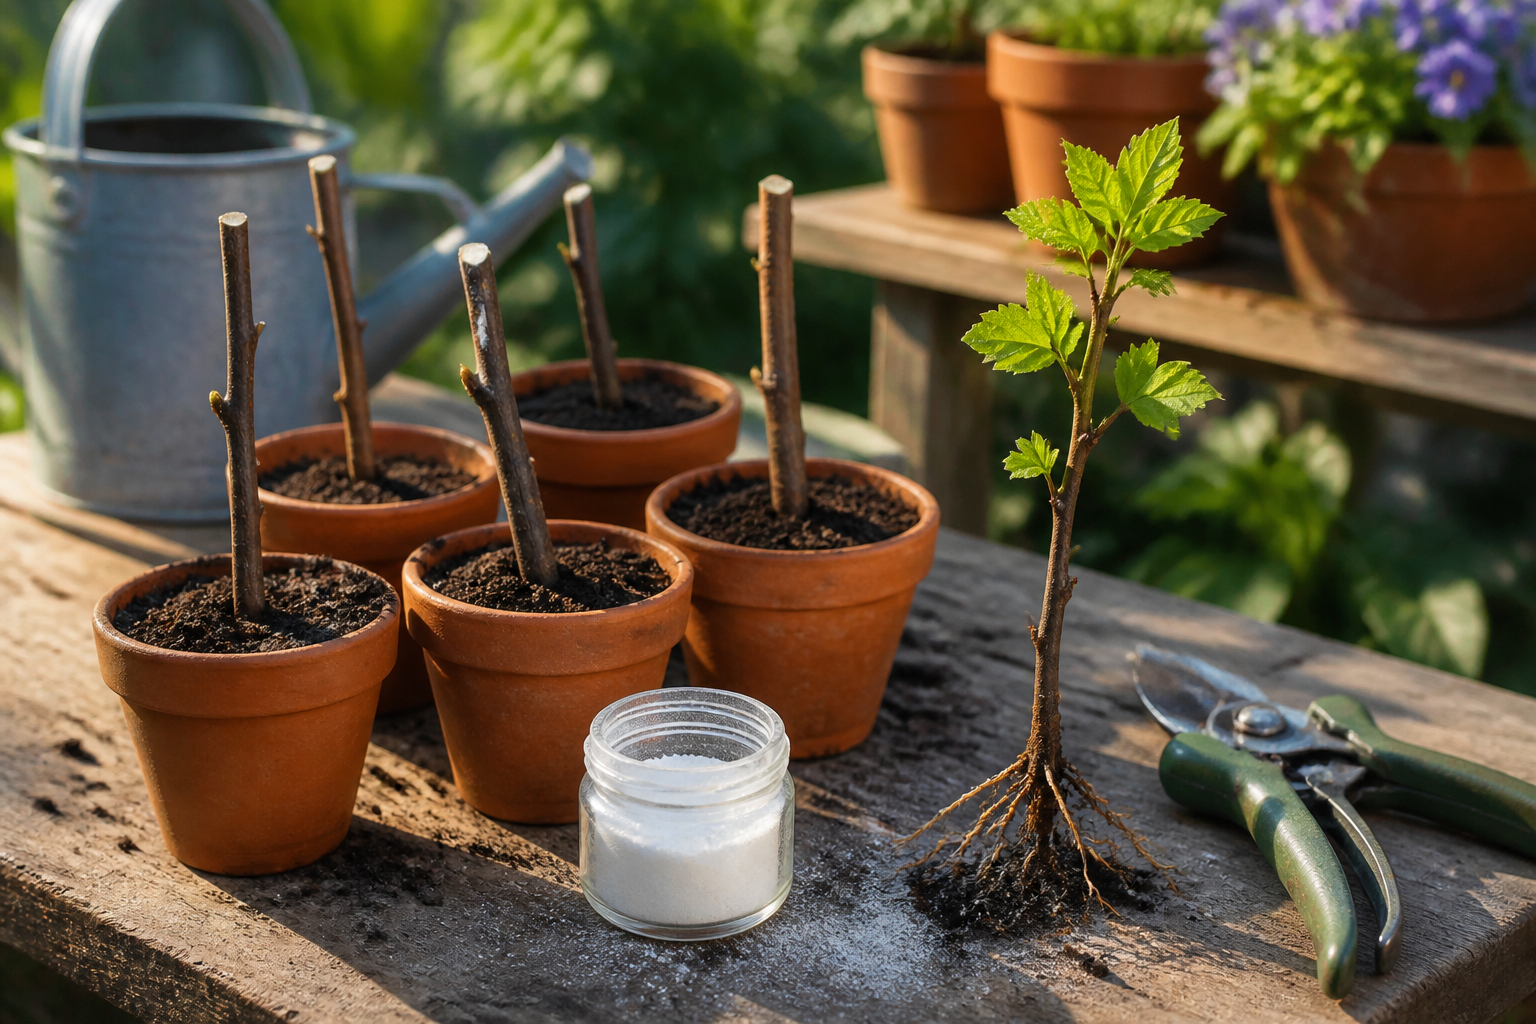
My own routine is this: I hunt for year-old wood—branches about pencil-thickness that still have enough flexibility to flex without cracking. I take 8- to 12-inch segments, slicing the top at a slant (a visual cue for which end stays up) and the bottom straight across. A quarter-inch down from the lower end, I score the bark lightly with my fingernail or a blade to expose the layer underneath. This small injury gives the rooting hormone a living surface to work with, speeding the chemistry along.
Into the rooting hormone next. I’ve tested several brands over the years, and Hormex Rooting Hormone Powder #3 is honestly the one that made a visible difference in my strike rate. Dip the bottom two-thirds of your cutting into the powder, tap off the excess, and pot it up immediately in moist potting mix — not garden soil, which stays too wet and rots the cutting.
Your growing medium sits roughly two-thirds buried, one-third exposed to air. Settle it firmly so the cutting contacts soil well, but stop short of crushing it. Drown the whole container with water. Next—and this step matters—position your pots in a spot that’s cool and carries decent humidity; a cold frame or unheated shed works perfectly. Your goal isn’t springing growth into action. You’re waiting for roots to emerge while the wood remains asleep.
The complete step-by-step walk lives in my full guide to growing mulberry from cuttings, where I document every stage from taking the cutting through having a baby plant ready for spring placement in the ground.
Softwood Cuttings: Faster, But Riskier
When impatience takes over—as it does for me—softwood cuttings present a tempting shortcut. You harvest them from tender, bursting-with-growth shoots midsummer, typically June through July in my region. Rooting speeds up dramatically; you’re watching for root emergence in three or four weeks rather than waiting out three or four months.
The tradeoff is demanding: they thirst for high humidity and steady warmth, and they’re magnets for fungal rot and bacterial trouble. You’ll want a humidity chamber—I drape clear plastic over mine to mimic a miniature greenhouse. Soil moisture stays critical, never drying but never waterlogged either. The labor is heavier than hardwood cuttings, yet for summer work with the right equipment in place, white and hybrid mulberries respond reasonably well to this method.
Air Layering: The Method for Black Mulberry and Problem Branches
This is the technique I wish I’d deployed on that branch overhanging my fence years ago. Movement is slower than cutting-based methods, yet the reliability soars—especially with black mulberry—and you’re working with thicker, older wood that develops into a sizable plant much faster after rooting.
Timing lands in late spring, typically May into June. Target a branch ranging from pencil to thumb thickness, one that’s actively extending. Strip or wound a ring of bark roughly half-inch across, exposing the cambium beneath. That wound acts as the trigger signaling the branch to manufacture roots.
Nestle the wound inside a compressed mass of damp sphagnum moss—the orchid-grade kind works brilliantly. Coat the entire moss ball with plastic sheet, sealing it airtight. Secure it with tape so moisture stays locked inside. Every ten to fourteen days, peek at your work. You’re hunting for white rootlets pushing from the wound into the surrounding moss, an event that typically unfolds across 6–10 weeks in warm conditions.
The instant roots are visible within the plastic wrapping, severe the branch immediately below the rooted section. Transfer it to a small pot with fresh potting soil. Maintain steady moisture and place it in bright shade for the first month while it adapts to living independently. Few propagation moments compare to watching this technique succeed for the first time, and it stands as the single most trustworthy approach for multiplying a black mulberry.
Growing from Seed: Why It’s Usually Not Worth It
Seeds hold obvious appeal. They cost nothing, occupy almost no space, and there’s romance in building a tree from scratch. Resist the attraction.
Mulberry seeds demand cold stratification—somewhere between 30–90 days chilled and wet—to germinate dependably. That part’s simple enough. The genuine trouble emerges afterward. Offspring from seed don’t replicate their parents. Growing from seed is essentially a wager. You might harvest fruit identical to what you wanted, or you might shepherd a tree for seven to ten years before realizing it’s male, sterile, producing no fruit whatsoever. The reason is simple: mulberries often split into male and female individuals. Each seedling is essentially a coin flip with unknown odds.
Occasionally I’ll nurture mulberry seedlings, but purely for use as rootstock that I later graft onto. If your objective is recreating a specific beloved tree, seeding is fundamentally the wrong approach. Employ one of the methods described above instead.
Grafting: The Professional Method for Exact Reproduction
Grafting is the mechanism nurseries employ to deliver you precisely what you ordered on the label. It’s also the surest pathway to installing a known cultivar onto fresh roots, proving invaluable if you’re retrofitting an older tree to yield a different fruit.
The dominant approach involves whip-and-tongue grafting or cleft grafting, executed in late winter just as buds break dormancy—February or March depending on your locale. You select a scion, a small budded branch from your target variety, and marry it to rootstock, a young mulberry grown from seed. When cambium aligns and the graft sits wrapped and sealed properly, tissue fusion happens, and you inherit a tree that’s an exact genetic match to the source plant, drawing nutrition from vigorous young roots.
There’s a learning arc to grafting, and speed isn’t its strong suit. Should you wonder whether grafting mulberry trees is actually worth the effort for home gardeners, I’ve prepared a full exploration weighing real advantages and genuine drawbacks. Bottom line: it’s worth mastering if you’re serious about collecting varieties or need to switch what an established tree produces.
Products I Use and Recommend
Throughout my years of hands-on work, I’ve assembled a small collection of actual tools and supplies that streamline the propagation work. Should you decide to tackle any of these methods, these resources genuinely help.
- Hormex Rooting Hormone Powder #3 — This is the rooting powder that made my cuttings actually root. I’ve tested others, and the difference in strike rate is noticeable. It’s worth having on hand.
- Zenport Grafting Tape — If you try grafting, good tape makes all the difference. This tape stretches as the graft heals and doesn’t girdle the delicate union.
- ZSYWODFO 5 Pack 60-Cell Silicone Seed Starter Trays with Humidity Dome — For softwood cuttings or seed stratification, a good humidity dome keeps things humid without constant misting. This set is durable and fits on a windowsill.
Which Method Should You Actually Use?
Here’s my straightforward breakdown. White or hybrid mulberry in your yard and seeking the simplest route? Hardwood cuttings win every time. They establish roots dependably, demand zero fancy gear, and the math works—tackle ten cuttings and five or six typically survive. Black mulberry on your land or a branch you’d rather not wait on? Air layering. It takes longer, but it prevails where cutting attempts collapse, and you’re rewarded with a substantial young tree rather than a twig. Set on duplicating one particular cultivar or transforming what an old tree bears? Grafting. The complexity is steeper, but nothing else guarantees the genetic copy you’re after on an established root system. Seed? Leave it alone unless you genuinely welcome mystery trees and have years to squander.
Years of hands-on work taught me that knowing how to propagate mulberry trees boils down to flexibility and judgment, not one superior technique. That hectic weekend when Ruth’s mulberry faced removal, I deployed every method simultaneously out of desperation—dormant cuttings, active growth cuttings, air layering, everything. Three plants took root in that frenzy, one now producing fruit. I didn’t possess a master plan; panic drove experimentation. You won’t need that urgency. Settle on the method matching your variety and your timeline, move ahead without hesitation. Mulberries themselves want to reproduce. They simply require the proper environment and your willingness to be patient.
Grab a branch this year. Coat it in rooting hormone. Settle it in soil. Come back in half a year or a full year, and you could be standing before a young tree, a genetic copy, tall enough to plant permanently in your yard, ready to feed you with the same fruit you’ve craved. That merit exceeds the modest labor.
Frequently Asked Questions
Why do black mulberry cuttings fail so often?
Black mulberries stubbornly resist cuttings—rooting success hovers around 20%, versus 50–80% with white and hybrid types. For black mulberries, air layering or grafting work far better than cutting attempts.
When should I take hardwood cuttings from mulberries?
Take hardwood cuttings late fall straight through early winter, once dormancy sets in and branches firm up. Harvest year-old wood about pencil-thickness, cutting 8- to 12-inch segments with a slant top and straight bottom.
How long does air layering take on a mulberry?
Air layering typically unfolds across 6–10 weeks in warm conditions. You’ll hunt for white rootlets pushing from the wound into the moss, and the instant roots are visible within the plastic wrapping, sever the branch immediately below the rooted section.
Why shouldn’t I grow mulberry trees from seed?
Seeds don’t replicate their parents. You might shepherd a tree for 7–10 years before realizing it’s male and sterile, producing no fruit whatsoever. Mulberries often split into male and female individuals, so each seedling is essentially a coin flip with unknown odds.
Keep Reading
About This Article

Written by Ruth Nakamura. Ruth Nakamura is a backyard orchardist in the Pacific Northwest who has grown mulberries for fifteen years, cultivating twelve different varieties in her own backyard. Not a horticulturist by formal training - she shares what she has learned through hands-on growing, workshops, and connecting with nurseries and growers across the country. More about this site.
Scope and limits. Ruth is a backyard orchardist without formal horticultural training. Growing conditions vary enormously by region, so confirm variety, timing, and pest guidance with your local extension service.
Verify this against a primary source
Specifics change, and your situation may differ from the one described here. These are the authorities worth checking directly:
- USDA Plant Hardiness Zone Map — zone verification for your location
- Oregon State University Extension — fruit growing and pruning research
- USDA PLANTS Database — species range and identification