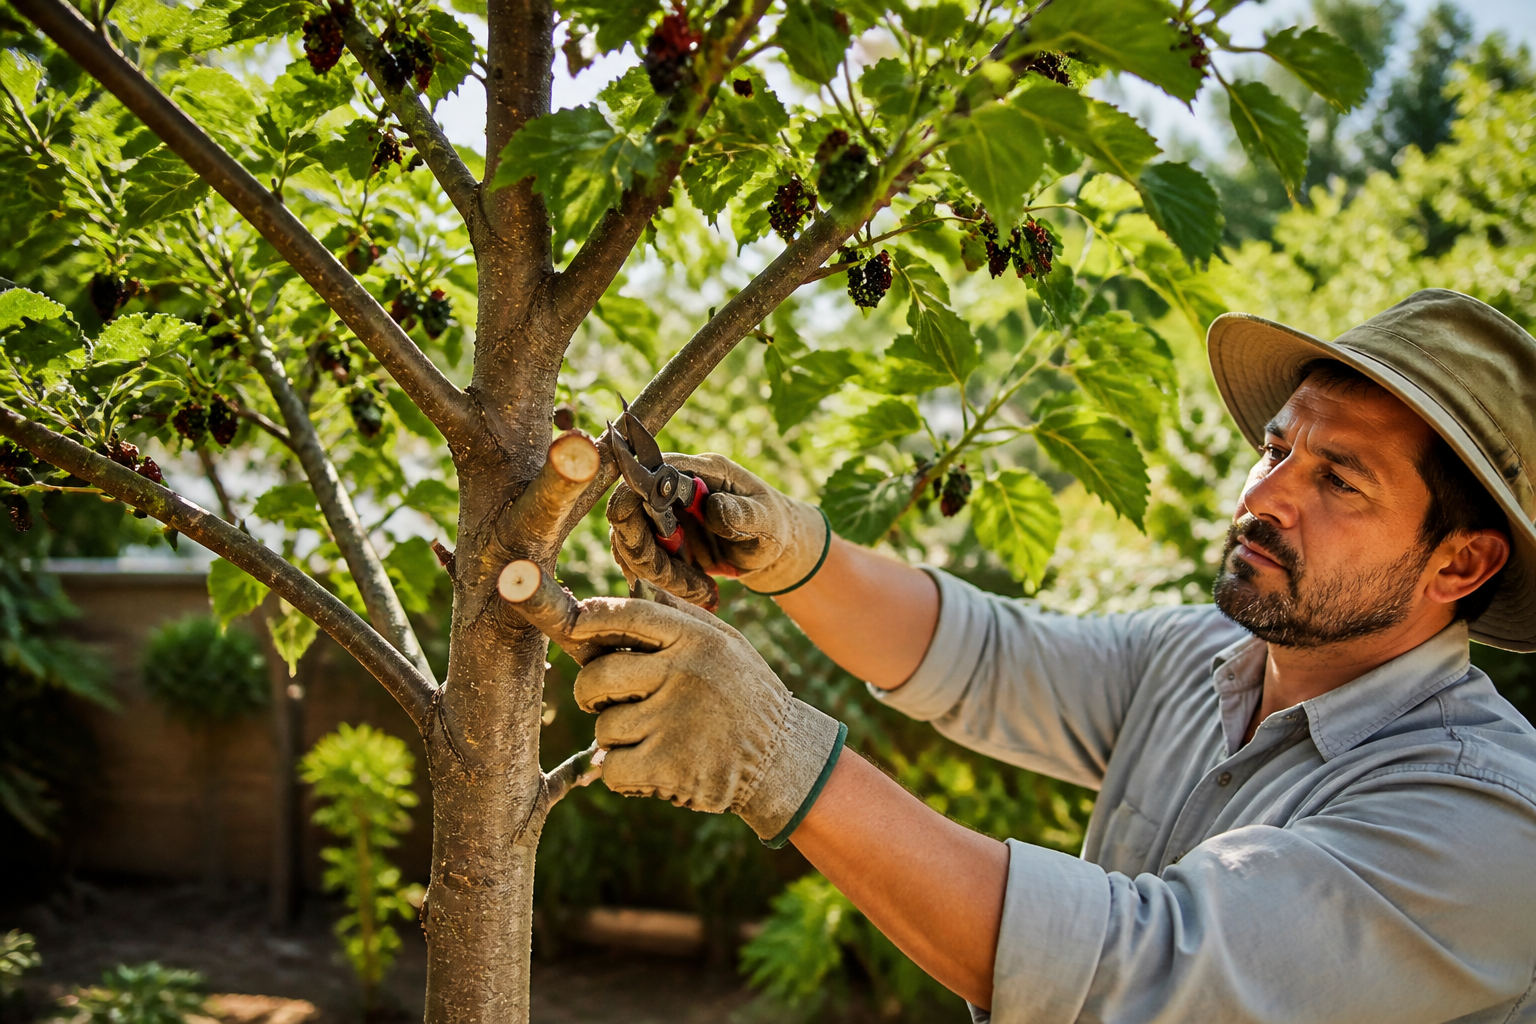
There’s a particular smell to a deck stain that’s been baking in the sun all summer—something between varnish and wood dust—and that’s exactly what I noticed the moment my neighbor appeared with that sheepish grin. A mulberry branch, thick as a small tree limb, lay sprawled across her fence line like an unwelcome guest. Beneath it, her white sedan had been transformed into something that looked like it had been dunked in grape juice. She laughed it off—the kind patient laugh that comes after the third time something like this has happened—but I understood the real message: my tree had become a neighborhood problem.
Pruning a mature mulberry can feel daunting. Branches often stretch far from the main trunk, and common internet warnings highlight real risks: incorrect cuts can damage structure, while over-pruning can leave you with years of unproductive, tangled regrowth. Proper technique matters.
What I did next was what I always do: nothing. Not that year, anyway. But eventually—pushed partly by guilt, partly by desperation—I buckled down and actually learned how to do this properly. Two seasons of careful, deliberate work taught me what works. One season of me getting reckless taught me what doesn’t. Today, I’m passing along everything I’ve figured out so you can skip the messy learning curve I went through.
When to Prune Your Mulberry Tree
Forget everything else for a moment and focus on this: when you prune matters more than almost anything else. The ideal window falls in late winter through the earliest days of spring—after the deep freeze has passed but before your tree wakes up and unfurls those tender new leaves. For most people in my region, that translates to February or March, though you’ll want to recalibrate depending on where you live.
Here’s why this timing is non-negotiable. Mulberries bleed sap like nothing else—this creamy, pale liquid oozes from every cut, and the first time you see it, you’re positive you’ve just killed your tree. (Spoiler: you haven’t.) But that bleeding is exponentially worse when your tree is actively growing. Prune during the sleeping months, and the sap flow stays manageable while your tree experiences way less overall stress. Second benefit: without foliage in the way, you can actually see what you’re doing. You can spot the crossed branches, identify the obviously dead wood, and find the congested growth points that need opening up. It’s impossible to do this precision work when you’re staring through a curtain of leaves.
One hard-learned lesson: never—and I mean never—prune in the fall. Autumn cutting tells your tree to send out a flush of tender new shoots that the first frost will obliterate. You end up stressing your tree and squandering its energy for nothing.
How to Prune Your Mulberry Tree: The Step-by-Step Process
The encouraging part about working with mulberries: they’re remarkably resilient. These trees laugh in the face of aggressive cutting. The even better part: you don’t need to go anywhere near aggressive to get fantastic results.
Step 1: Remove the Low-Hanging Fruit (Literally)
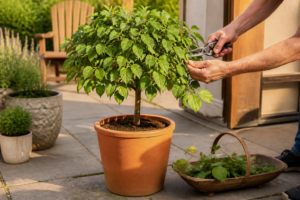
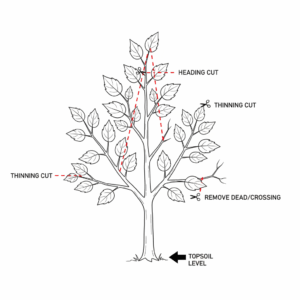
Start by removing any branches that are rubbing on structures, hanging over fences (hello, neighbor car), or growing downward into your walking space. These are your “problem branches,” and they’re safe, easy wins. I use my Fiskars PowerGear2 Bypass Lopper with its 2-inch cut capacity for anything thicker than a pencil. For smaller growth, the Fiskars 91095935J Steel Bypass Pruning Shears work beautifully and are honestly a joy to use.
Step 2: Remove Dead, Diseased, and Crossing Wood
Next, scan the entire tree for trouble spots. Dead branches announce themselves—they’re brittle, gray, lifeless. Look for any wood showing disease symptoms or evidence of pest activity. Then identify branches that arc over and cross other branches, or those that bend inward toward the tree’s center. This kind of crossing growth strangles your tree’s ability to move air through it, plus it makes picking fruit feel like you’re reaching into a tangle.
Step 3: Shorten Long Shoots by One-Third
This is where annual maintenance pruning enters the picture. Grab those vigorous, extended shoots and reduce them by roughly one-third of their current length. I realize this sounds backward—shouldn’t cutting back hurt your harvest? Wrong assumption. Mulberries produce fruit both on year-old spurs and on fresh growth from the current year. When you shorten those long branches back, you’re not erasing your fruit potential; you’re actually multiplying it. Each cut point branches into multiple new shoots, and every one of those shoots carries its own fruiting capacity.
During my second year I got carried away and cut way deeper than one-third—more like halfway down the branch. Yes, the tree survived. Yes, it bounced back. But I sacrificed an entire year’s fruit. Don’t be me. The one-third mark is where the real magic lives.
Step 4: Make Clean Cuts at 45-Degree Angles
Position each cut just beyond where the branch collar bulges out (that characteristic ring where branch meets trunk), angling downward at roughly forty-five degrees as you move away from the main stem. That slope is functional—it sheds water instead of collecting it. Ragged, crushed cuts linger open; sharp, clean ones seal themselves up quickly. Your pruners need to be genuinely sharp, or you’re just mangling wood.
Should You Use a Pruning Sealer?
I spent two seasons going back and forth on this question. Is a pruning sealer truly necessary after cutting mulberry branches?
Short answer: for large cuts (anything over 1 inch in diameter), yes. Applying a pruning sealer to bigger wounds helps reduce desiccation and creates a barrier against disease entry points. I use Treekote Tree Wound Dressing – 16oz Tub – Grafting, which goes on smoothly and actually reduces the dramatic sap bleed that looks so alarming. For smaller cuts under 1 inch, the tree’s own wound-healing ability is usually sufficient, especially if you’re pruning during dormancy.
The sealer itself isn’t an enormous expense, and for me it shifted the whole experience from feeling slightly reckless to feeling like I had things under control. That sense of actually knowing what I’m doing is worth something.
What to Do After Pruning Mulberry Trees
Nobody writes about this part, but it matters just as much: what happens after the cuts go in. Your mulberry is essentially healing from surgery, and how you support that recovery shapes everything that comes next.
Feed Your Tree
A week or two after pruning, apply a balanced fertilizer—a 10-10-10 formulation or an organic equivalent works well. The tree will enter a vigorous flush of new spring growth and needs adequate nutrition to fuel that expansion, especially after significant branch removal. While mulberries aren’t heavy feeders, post-pruning fertilization noticeably strengthens new growth and productivity.
Water Deeply
Send water down deep into the soil around your tree within a week of cutting. Think of it as offering reassurance to the root system—you’ve altered its framework, and it needs to know it’s still connected to a living, thriving whole. Thorough watering reduces shock and mobilizes the energy your tree needs for repair work and launching new branches. A genuine soaking out at the drip line—not a puddle right against the bark—is what you’re after.
The Pollarding Option for Serious Control
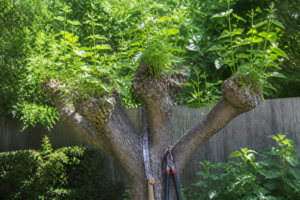
There’s an old technique from European orcharding that I’ve been studying and thinking about trying: pollarding. This method involves cutting nearly all the branches back to the main scaffolding (or almost flush to the trunk itself) every single winter without fail. It sounds extreme because it is.
Yet it genuinely works on mulberries. A pollarded mulberry stays bound in tight, reasonable dimensions—exactly what you want if space is limited or if you’re obsessed with making harvesting effortless. The shoots that emerge are vigorous and packed with fruit. The downside, though, is unforgiving: you have to commit. Without exception, every single year. Skip even one season and you’ll find yourself staring at an unpruned jungle that’s nearly impossible to reclaim.
My own tree hasn’t reached the pollarding stage yet—I genuinely treasure some of those long, established branches—but if you’re putting in a young mulberry and your primary goal is maximizing yields in a tiny space, this approach deserves a place in your original design.
The Tools That Make It All Possible
Mulberry wood is denser and stickier than most people expect, and the wrong tools turn a manageable morning into a genuine ordeal. After cycling through bargain-bin options that left my hands raw and my cuts ragged, I’ve settled on two tools that handle every scenario this tree throws at me—one for fine work on smaller stems, one for the thick, aggressive growth that needs real mechanical advantage.
The Hand Pruners: Fiskars Bypass Pruning Shears for Fine Work and Repetitive Cuts
Three years ago, I made it through exactly two trees before my hands started screaming. I was using whatever bypass pruners came in a bargain pack at the big-box store, and by the time I reached my Illinois Everbearing, my grip had turned into a shaky claw. The blades were slipping. My palms were raw. I was squeezing harder and harder just to get through stems that shouldn’t have required that kind of force.
What catches most people off guard with mulberry pruning is the sap. It’s sticky—genuinely, persistently sticky. Within minutes of cutting into new growth, both blade surfaces are coated in amber-colored gunk. If your shears aren’t engineered to manage that buildup, you’re fighting a losing battle: constantly stopping to wipe, watching the blade get duller by the minute, and squeezing with more force to compensate for friction you shouldn’t have to fight. When you stack multiple trees into a single morning, the physical toll becomes serious.
Where these shears genuinely shine
- That sap groove isn’t just marketing fluff—it actively channels away the sticky residue, letting you work through considerably more stems before you need to stop and clean the blades, which keeps momentum alive on a long pruning day.
- The blade itself resists dulling to a degree I wasn’t expecting; even through tree three, four, and five, each cut still feels crisp rather than mushy, and your hands don’t start begging for mercy halfway through the session.
- The handle texture and design prevent your grip from sliding even when your palms are damp or you’re reaching into awkward positions high in the canopy where balance is already tricky.
Where they fall short
- Branches thicker than roughly 5/8 of an inch—roughly the diameter of a standard pencil—demand a two-handed squeeze, which becomes frustrating far more regularly than you’d want when working with older, established wood on your larger trees.
- After two years of the kind of heavy use a serious orchardist puts them through, the spring mechanism shows real signs of fatigue; you’ll face a choice between hunting down replacement springs or graduating to a fresh pair.
The bypass mechanism deserves attention here. These work on scissor logic: one blade glides past a companion blade with a slight offset, creating a slicing motion rather than a crushing action. Compare that to anvil-style pruners, which press the stem against a flat platform. For mulberries, that distinction matters. A bypass cut heals cleaner and faster, which shrinks the window during which fungi, insects, or other damage can exploit the wound site.
I held some skepticism after that first month. The edge felt impossibly keen, the action was buttery smooth, and I wondered whether I was just experiencing new-tool optimism. Would they really maintain this sharpness once the initial gleam wore off? I’m now deep into my third season of reaching for these first, before I touch any other pruner sitting in my shed. That choice—made dozens of times without thinking—tells me everything I need to know about whether they deliver on their promise.
For anyone juggling multiple mulberry trees and wanting a tool that won’t betray you halfway through your work, these earn their place in your toolbox. They’re not engineered to tackle every branch size you’ll encounter, and they’re not a purchase-once-use-forever situation—but they’re the pruners I grab first when the work matters. For those chunky branches beyond the 5/8″ limit, pair them with a folding saw or a dedicated set of loppers for the really heavy-duty cuts.
Fiskars Bypass Pruning Shears, 5/8″ Cut Capacity Gardening Scissors, Self-Cleaning Sap Groove Prevents Sticking, Non-Slip Grip for Cutting Stems & Branches, Sharp Steel Blades w/ Low-Friction Coating
The Lopper That Finally Handles Branches Thicker Than Your Wrist
Once your mulberry reaches maturity, it cranks out branches that stop respecting your hand pruners’ limits. Those thick, wooden stems hanging over fences and into your neighbor’s gutters demand equipment with genuine cutting power. Wimpy tools leave behind mangled, crushed stems and leave you with throbbing hands.
My sister dropped by one afternoon in early May and watched me wrestling with a pair of hand pruners on my mulberry branches. “Why are you torturing yourself like that?” she asked, laughing a little. Good question. My fingers were already screaming, I’d barely made a dent in the season’s new growth, and I still had hours ahead of me. That’s what pushed me to get serious about loppers—and I genuinely wish I’d done it a couple seasons sooner.
Mulberries are absolute powerhouses when it comes to putting out new wood. Every spring my trees send up thick, aggressive shoots, and plenty of them end up thicker than what hand pruners were ever designed to handle. I found myself needing something with actual leverage and cutting capacity, but dragging out a pole saw every time I wanted to do basic maintenance felt like overkill.
What works
- The ability to cut up to 2 inches diameter means bypass pruners can power through wood that thick with clean cuts—the tree heals faster because the wounds aren’t crushed.
- PowerGear2 leveraging means repetitive cutting doesn’t destroy your hands; after knocking out 20-plus branches, my wrists feel normal the following morning instead of spent and sore the way they did with inferior models.
- Extended handles reach overhead growth without the ladder dance, which has prevented a repeat of the unfortunate incident with my neighbor’s vehicle.
- I can slice through branches pushing two inches in diameter without strain or multiple passes; each cut goes clean the first time through.
- The blades hold their edge through dozens and dozens of cuts on the dense, hard wood that mulberries develop, keeping performance consistent across a long pruning session.
What doesn’t
- These aren’t featherweight tools—thirty minutes of overhead work above your head and your shoulders are definitely making their objections known about this whole heavy-labor situation.
- Their 32-inch length makes navigating through thick, twiggy interior growth a real chore—you’ll need to shift your angle and reposition constantly on densely packed branches.
- After a full season of contact with hardwood mulberry material, the blades lose their edge and require sharpening; they don’t stay razor-sharp, and skipping maintenance brings back the crushing action.
I had one moment last June where the blades got sticky with mulberry sap buildup and I thought the PowerGear mechanism was failing, but it was just a cleaning issue—five minutes with a cloth and they were back to cutting like new. I almost returned mine after the first pruning session because I thought the leverage wasn’t making a difference, but I realized I was using the wrong grip—once I adjusted, these became indispensable.
If you’re serious about keeping your mulberry tree under control and your neighbors happy, the guide’s original recommendation stands—and so does this alternative 32-inch configuration. Grab the Fiskars PowerGear2 Bypass Lopper with its 2-inch cut capacity for overhead work and fence-line branches, or the Fiskars 32-Inch Loppers for Tree Trimming, Heavy Duty, Low-Friction Sharp Steel Blade, Branch Cutter up to 2-Inch Diameter Cut Capacity, PowerGear2 Technology that Multiplies Power for Less Effort if you want the lever action that stops hand cramping during long sessions.
Frequently Asked Questions
When is the best time to prune mulberry trees?
The ideal window is late winter through the earliest days of spring—after the deep freeze has passed but before your tree wakes up. For most people in the Pacific Northwest, that means February or March, though you’ll want to recalibrate depending on where you live. Never prune in the fall, since autumn cutting tells your tree to send out tender new shoots that the first frost will obliterate.
How much should I cut back mulberry branches?
Shorten long shoots by roughly one-third of their current length during annual maintenance pruning. Cutting deeper—like halfway down the branch—will sacrifice an entire year’s fruit. The one-third mark is where the real magic lives, because mulberries produce fruit on both year-old spurs and fresh current-year growth, so each cut point branches into multiple new fruiting shoots.
Do I need pruning sealer on mulberry tree cuts?
For large cuts over 1 inch in diameter, yes. Applying a pruning sealer helps reduce desiccation and creates a barrier against disease entry points. For smaller cuts under 1 inch, the tree’s own wound-healing ability is usually sufficient, especially if you’re pruning during dormancy when the tree is sleeping.
What should I do after pruning my mulberry tree?
A week or two after pruning, work in a balanced fertilizer like a 10-10-10 mix to fuel the vigorous new spring growth. Within a week of cutting, send water down deep into the soil around your tree at the drip line. This thorough watering reduces shock and mobilizes the energy your tree needs for repair work and launching new branches.
Keep Reading
About This Article

Written by Ruth Nakamura. Ruth Nakamura is a backyard orchardist in the Pacific Northwest who has grown mulberries for fifteen years, cultivating twelve different varieties in her own backyard. Not a horticulturist by formal training - she shares what she has learned through hands-on growing, workshops, and connecting with nurseries and growers across the country. More about this site.
Scope and limits. Ruth is a backyard orchardist without formal horticultural training. Growing conditions vary enormously by region, so confirm variety, timing, and pest guidance with your local extension service.
Verify this against a primary source
Specifics change, and your situation may differ from the one described here. These are the authorities worth checking directly:
- USDA Plant Hardiness Zone Map — zone verification for your location
- Oregon State University Extension — fruit growing and pruning research
- USDA PLANTS Database — species range and identification