Introduction: A 40% Canopy Loss Taught Me Everything About Pruning Wrong
Removing nearly two-fifths of a mature mulberry tree’s canopy in a single aggressive season may seem like it will open up airflow and trigger prolific new growth. Instead, this often produces a burst of leafy branches with almost no flowers and virtually no fruit. Pruning mistakes don’t just cost one season of berries—they can sabotage production for years.
Mulberry trees are resilient and forgiving, but they operate according to rules that don’t always match what instincts suggest. Common cultivars like Black Beauty, Chinook, and Illini Star respond predictably to care, and learning to avoid the five major pruning blunders below is what turns harvests from meager to abundant.
Mistake #1: Using the Wrong Tools and Making Crushing Cuts
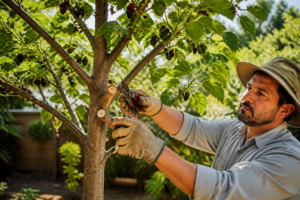
Damaged, crushed cuts rank among the fastest ways to sabotage a mulberry tree’s health and vigor. When I mangled wood instead of slicing through it cleanly, my trees struggled for months to recover from ragged wounds that refused to callus properly. I learned this the hard way after a particularly aggressive pruning session left my Chinook looking more like a war zone than a fruitful tree.
The implement you pick makes far more difference than most people suspect. Dull blades and inadequate leverage can lead to crushing cuts that can girdle the whole limb, starving it of water and nutrients. I remember the frustration of watching the branches of my Ozark Premier droop under the weight of their own foliage, all because I had used the wrong shears and made terrible cuts.
What Truly Delivers
- Anvil-style blades actually lacerate softer mulberry wood far less brutally than traditional bypass designs—in my experience, the wounds seal up noticeably faster, particularly on tender branches under half an inch in diameter.
- Keeping your blade edges sharp right through the whole intensive spring pruning cycle means you’re executing cuts decisively rather than forcing and crushing your way through each branch out of sheer frustration.
- The heft and mechanical advantage let you accomplish substantial cuts single-handed while stabilizing the limb with your opposite hand, giving you the control to score a proper, perpendicular cut rather than hacking at an angle.
What Falls Short
- The anvil configuration demands that you orient the blade side toward the tissue you’re keeping—rotate the tool wrong once and you’ll crush the exact section you meant to preserve, which I did repeatedly before muscle memory finally kicked in.
- Branches pushing beyond about three-quarters of an inch genuinely call for a pruning saw instead; shears will technically work but you’ll strain yourself and almost certainly botch the angle and cleanliness of the cut.
I almost gave up on anvil shears after that first rotated cut, convinced I’d wasted money, but the instruction moment paid off—within two seasons, I could see the difference in how my trees healed. If you’re tired of ragged cuts sabotaging your harvest, grab a pair of anvil pruning shears.
Mistake #2: Pruning at the Wrong Time of Year
When you wield your shears matters as much as how you wield them. I’ve made the mistake of slashing into branches too soon in spring, exposing tender emerging shoots to late freezes that killed them back. I remember one particularly brutal winter where I thought it was safe to prune my Illini Star, only to be left with sad, stunted growth that season. Wait too long, and you’re hacking away limbs that have already locked in their flower buds for the upcoming season. Both flavors of mistiming have left me staring at pathetic harvests.
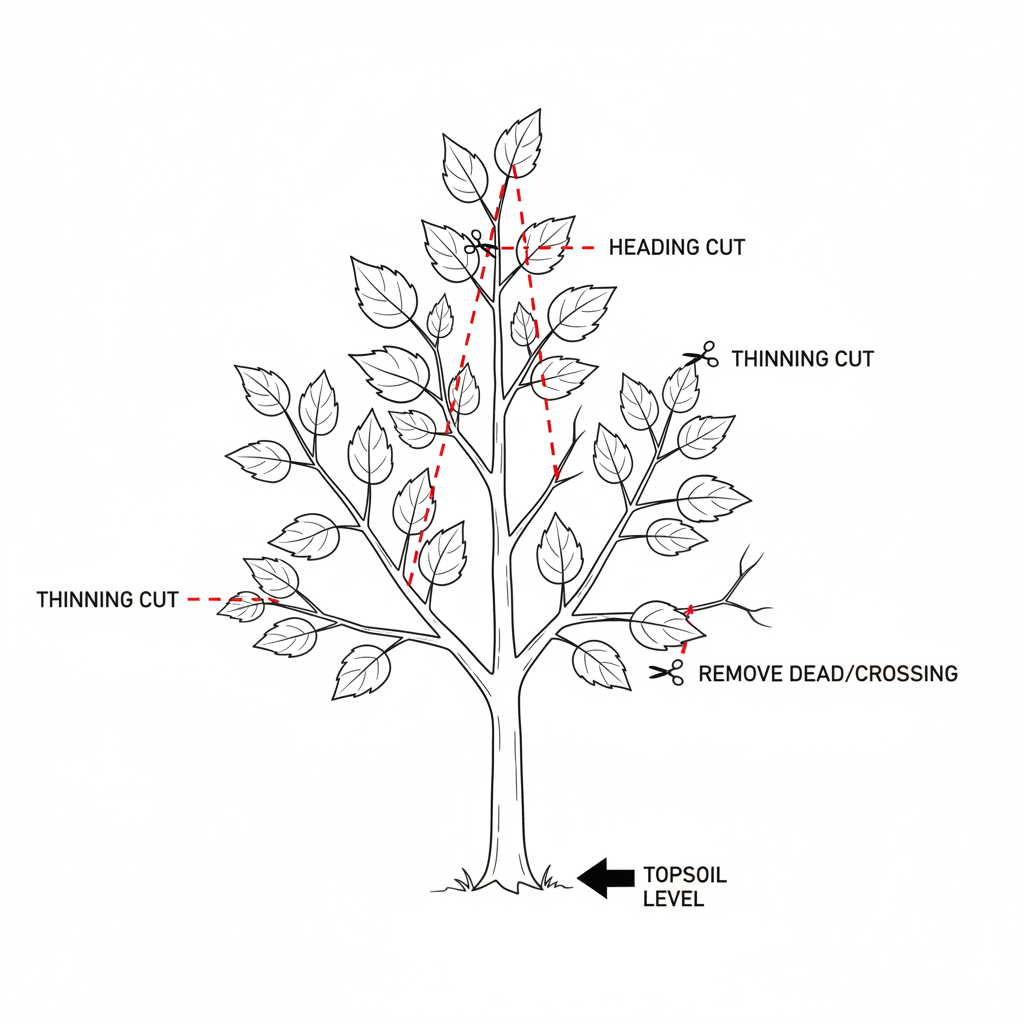
The sweet spot for substantial structural pruning sits in late winter—after the coldest snaps have passed but before the buds fatten and break dormancy. Working in this window lets your mulberry redirect its reserves toward sealing cuts before the surge of spring growth demands all its energy. Any pruning you do through the summer months ought to stay minimal and targeted—removing only visibly dead limbs and branches that cross and rub. Save the pruners for another year when it comes to fall work, since cutting then triggers a flush of tender growth that won’t toughen up in time for freezing temperatures.
Mistake #3: Over-Pruning and Removing Too Much Canopy
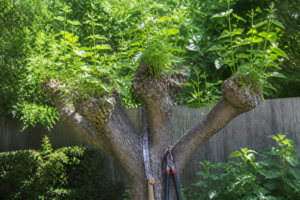
The assumption that heavier pruning automatically means heavier yields is seductively false. Carving away nearly 40% of a mature tree’s branch structure typically produces the opposite result: a wild profusion of vegetative shoots pushing upward with almost zero flowers or fruits attached. Trees treated this way often languish for a couple of years before recovering productivity.
A reliable guardrail is to shed no more than one-quarter of your tree’s total branch canopy over the course of a single growing season. Because mulberries manufacture fruit on both aged wood and fresh-cut growth, you risk annihilating established producing branches if you get knife-happy. Restraint in the pruning saw preserves your tree’s productivity engine while keeping it structurally sound and visually balanced.
Mistake #4: Neglecting the Three-Cut Method for Larger Branches
Branches exceeding an inch in diameter demand the three-cut protocol to avoid catastrophic bark stripping down toward the trunk. I learned this the hard way with one of my larger limbs that I decided to chop in one fell swoop, only to witness the bark ripping back toward the trunk. Begin with an undercut on the lower side of the branch, positioned roughly half a foot back from your intended final cut line. Next, make your top cut slightly past that undercut—this removes the bulk of the branch weight. The finishing cut then takes off the remaining stub, angled to slice just beyond the branch collar, that raised ring of tissue where branch meets trunk.
Abandoning this sequence in favor of one crude chop almost always rips bark back toward the main stem, creating an enormous wound that requires years for the tree to fully compartmentalize. Investing the extra thirty seconds per cut here yields dividends in how cleanly your tree heals and how robust your future harvests become.
Mistake #5: Ignoring Diseased or Crossing Branches
Mulberries boast solid resistance to most pathogens, though problems absolutely emerge when limbs are left to scrape against one another or when dead wood piles up unpruned. I’ve learned that branches rubbing in constant contact wear through bark at the contact point, opening wounds that never fully close. Dead timber becomes a motel for beetles and fungi that travel from that dead wood into living tissue. Addressing these trouble spots systematically keeps the tree capable of channeling energy into fruit rather than fighting infection. I nearly abandoned the whole pruning enterprise after years of underwhelming yields, ready to accept that my trees just weren’t going to deliver.
Everything shifted when I started working through these five blunders methodically, understanding what each one was costing me. My harvests tripled in just two seasons once I got my technique straightened out. Your mulberry wants to produce abundantly—it just needs you to prune in a way that supports rather than sabotages that goal.
Frequently Asked Questions
What branch size needs a pruning saw instead of shears?
Branches pushing beyond about three-quarters of an inch genuinely call for a pruning saw. Shears will technically work at that size, but you’ll strain yourself and almost certainly botch the angle and cleanliness of the cut. For anything exceeding an inch in diameter, I use the three-cut method so the bark doesn’t rip back toward the trunk.
Why did my mulberry grow leaves but no fruit after pruning?
Over-pruning is a common mistake. Removing more than about 40% of a mature tree’s branch structure can trigger excessive vegetative growth at the expense of flowers and fruit. Trees pruned too heavily may take a couple of seasons to return to productive fruiting. A safer approach is to remove no more than one-quarter of the canopy in a single season.
Can I prune mulberry trees in the fall?
I save the pruners for another year when it comes to fall work. Cutting then triggers a flush of tender growth that won’t toughen up in time for freezing temperatures. Late winter is my window for substantial structural pruning, after the coldest snaps have passed but before buds fatten and break dormancy.
Which way should anvil pruning shears face when cutting?
Orient the blade side toward the tissue you’re keeping. Rotate the tool wrong once and you’ll crush the exact section you meant to preserve, which I did repeatedly before muscle memory finally kicked in. I nearly gave up on anvil shears after that first rotated cut, but within two seasons I could see the difference in how my trees healed.
Keep Reading
About This Article

Written by Ruth Nakamura. Ruth Nakamura is a backyard orchardist in the Pacific Northwest who has grown mulberries for fifteen years, cultivating twelve different varieties in her own backyard. Not a horticulturist by formal training - she shares what she has learned through hands-on growing, workshops, and connecting with nurseries and growers across the country. More about this site.
Scope and limits. Ruth is a backyard orchardist without formal horticultural training. Growing conditions vary enormously by region, so confirm variety, timing, and pest guidance with your local extension service.
Verify this against a primary source
Specifics change, and your situation may differ from the one described here. These are the authorities worth checking directly:
- USDA Plant Hardiness Zone Map — zone verification for your location
- Oregon State University Extension — fruit growing and pruning research
- USDA PLANTS Database — species range and identification