Mulberry cultivation rewards patience and observation. Dwarf patio varieties like Mojo, Black Beauty, Chinook, Illini Star, and Ozark Premier offer practical options for home gardeners. Pruning these cultivars well requires understanding their growth habits and responding to what your plants tell you season by season. The following guidance draws on established horticultural practice for these popular types.
One of the most important lessons I’ve learned is about pruning dwarf mulberries. You’ll find all sorts of advice online, but much of it can be conflicting. I remember early on, I found two very different pieces of advice: one source suggested cutting back hard each year to keep the tree compact, while another warned against pruning below a certain point. I foolishly followed the first piece of advice and nearly lost my beloved Mojo mulberry. I’ll never forget that pruned tree transforming into a wild, unruly form, and it taught me a lesson I want to share with you so you can avoid my mistake.
In my second year with the Mojo, I got a little too enthusiastic with my pruning shears. I made cuts that went far deeper than necessary, and when spring rolled around, my supposed “dwarf” tree shot up like a beanstalk, complete with leaves that looked nothing like the delicate foliage I had originally chosen it for. I was bewildered and quite upset; how could something marketed as dwarf suddenly seem intent on becoming a full-size tree?
It was a conversation with a knowledgeable nursery staffer that unraveled the mystery. The stinging realization hit me: I had pruned right through the graft union. By doing so, I had effectively removed the Mojo variety and activated the vigorous rootstock beneath it, which was determined to grow wildly without restraint. The entire reason for growing a dwarf patio mulberry—its compact, weeping form—had been erased by my careless cuts.
If you’re holding pruning shears over a Mojo Berry, a Dwarf Everbearing, or any other compact grafted mulberry and you’re uncertain where to make your cuts, let me help you avoid the path I took. What follows is the information I wish I had received before making my first cut.
Understanding Your Grafted Mulberry: Why You Can’t Just Cut Anywhere
Understanding what separates a Mojo mulberry from its full-size cousins is crucial before you even think about picking up a pruning tool. This distinction is the one piece I overlooked initially, and it completely transformed my approach to caring for these small specimens.
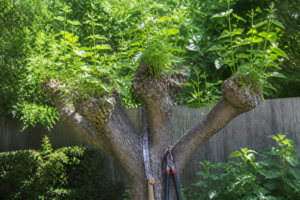
The vast majority of Mojo Berry mulberries sold in commerce arrive as grafted plants. So, what’s involved in grafting? A nursery propagator takes vegetative material from the Morus alba ‘Mojo’ cultivar—the selected dwarf form that naturally reaches just 4 to 6 feet with an elegant weeping silhouette—and fuses it atop a separate, far more robust rootstock. The rootstock sits underneath (providing vigor and hardiness), while the Mojo sits on top as the scion (providing the ornamental and fruiting characteristics). These two distinct plants are joined at a visible swelling or knob of grafted material called the graft union.
Here’s where this becomes critical for pruning work: the rootstock beneath the graft union has tremendous vigor and ambition. It yearns to grow outward and upward with abandon. The Mojo scion above the graft union, by contrast, carries the genetic code for restrained, weeping growth. When I sliced through the graft union, I eliminated the Mojo’s genetic restraint and handed complete control to the rootstock’s wild impulses. The result was uncontrolled, skyward growth with no natural limitation.
Never—and I cannot stress this strongly enough—make any pruning cut below the graft union on a grafted dwarf mulberry. This single principle will spare you from the regret I experienced.
Locating Your Tree’s Graft Union
How do you spot the graft union in the first place? Step outside and examine your mulberry’s main stem carefully. On a standard Mojo or comparable dwarf form, it’s quite visible: a slight ridge or thickening in the trunk, typically positioned somewhere between 1.5 and 3 feet above soil level. It frequently resembles a bump or a flange. The wood portion below that mark has a visibly different appearance than the wood portion above it—distinct coloration, surface texture, sometimes even evidence of the original grafting cut.
If you’re uncertain of the exact location, run your hand along the trunk. The graft union becomes unmistakably obvious through touch once you know what you’re searching for. It’s your boundary line. The upper section is fair game for pruning. The lower section is absolutely forbidden.
Consider mentally noting its position or even wrapping a small bit of horticultural tape around the trunk as a visual cue if you’re pruning for the first time and want built-in reassurance. Trust me on this—I did exactly this in my second season, and it completely eliminated any doubt.
Ideal Timing: When Your Mulberry Should Be Pruned
Timing determines success, something I discovered through repeated experimentation (mostly failures). The dormant period of late winter—before buds swell and growth resumes—represents the optimal window for your work. Picture late February through early March, modified based on your regional climate. The tree is resting, buds remain closed, and pruning carries minimal risk.
What’s the problem with springtime pruning? Mulberries produce fruit on wood generated during the active growing season. When you prune after buds have fattened and started unfurling in spring, you’re removing branches destined to bear fruit. You end up with a structurally pleasing tree but regrettably sparse berries. This lesson also came from my own missteps, which is exactly why I’m sharing it now: dormant-season pruning translates directly to abundant fruiting when warm weather arrives.
Steer clear of pruning during autumn or the first part of winter. The tree is shifting into its sleep phase, and cuts made at this time can provoke tender shoots that won’t tolerate winter conditions. The outcome is detrimental and exhausting for your tree.
The Philosophy: Enhancing Form, Not Restricting Size
Something critical took considerable time for me to recognize: pruning a Mojo or other compact patio mulberry isn’t fundamentally about limiting its dimensions. Its genes already enforce restraint in its growth pattern. The genuine purpose is establishing a light-filled, well-ventilated branch structure that promotes air movement around the canopy, jumpstarts productive fruiting, and sustains overall plant vigor.
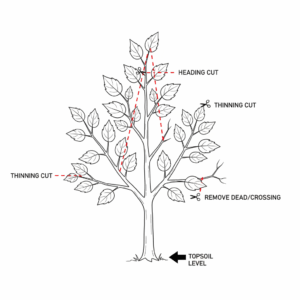
This perspective differs fundamentally from how you’d approach a standard-size mulberry. You’re not using heavy reduction cuts to manage overall height. You’re performing targeted removals to refine the tree’s character and structure. Consider “selective thinning” rather than “aggressive heading back.”
When you’re evaluating your Mojo’s structure, focus your pruning on:
- Eliminate any wood showing signs of death, disease, or damage
- Open up dense patches to allow sunlight deeper into the interior canopy
- Cut away branches oriented vertically or those growing at awkward angles
- Preserve the cultivar’s signature weeping or trailing form
You’re not stripping away a third of the tree’s mass. You’re selectively removing somewhere between 10 and 15 percent—mainly branches that stand out as problematic or that shade growth below them. Conservative pruning wins the day. Any remaining branch holds the possibility of bearing next summer’s harvest.
The Process: Pruning a Mojo Mulberry in Five Stages
Let me guide you through the actual mechanics. Pruning dwarf patio mulberries typically takes roughly 20 minutes:
- Stage 1: Survey the whole plant. Walk the perimeter and identify anything plainly dead, compromised by disease, or broken. These exit the tree immediately without hesitation.
- Stage 2: Identify rubbing or tangled branches. Are limbs contacting each other or overlapping in ways that create friction? Select the less vigorous specimen and extract it where it branches off from the other.
- Stage 3: Open the interior canopy. Do you spot sections where branches pack so densely that light cannot penetrate? Methodically remove some interior branches to improve light transmission. The objective is a canopy that permits you to see daylight through it.
- Stage 4: Remove upright or strongly angled growth. The signature of these weeping dwarf forms is their pendulous, downward-sweeping branching. Any branches reaching upward or at severe angles? Remove those. They contradict the tree’s innate growth pattern.
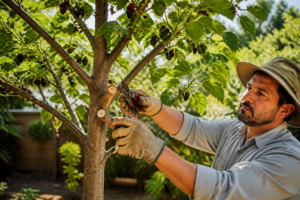
- Stage 5: Execute precise cuts. Always sever just past a leaf bud or at the collar region (the slight bulge where a side branch meets its parent branch or the central trunk). Avoid leaving stub segments. Disease loves stubs.
The entire experience must feel restrained and thoughtful. When you’re removing major wood sections, you’ve crossed into excessive pruning. Keep in mind: cutting too heavily now means fewer berries in the months ahead. The tree’s built-in tendency toward compact growth carries most of the weight.
Container Mulberries: Root Pruning and Renewal
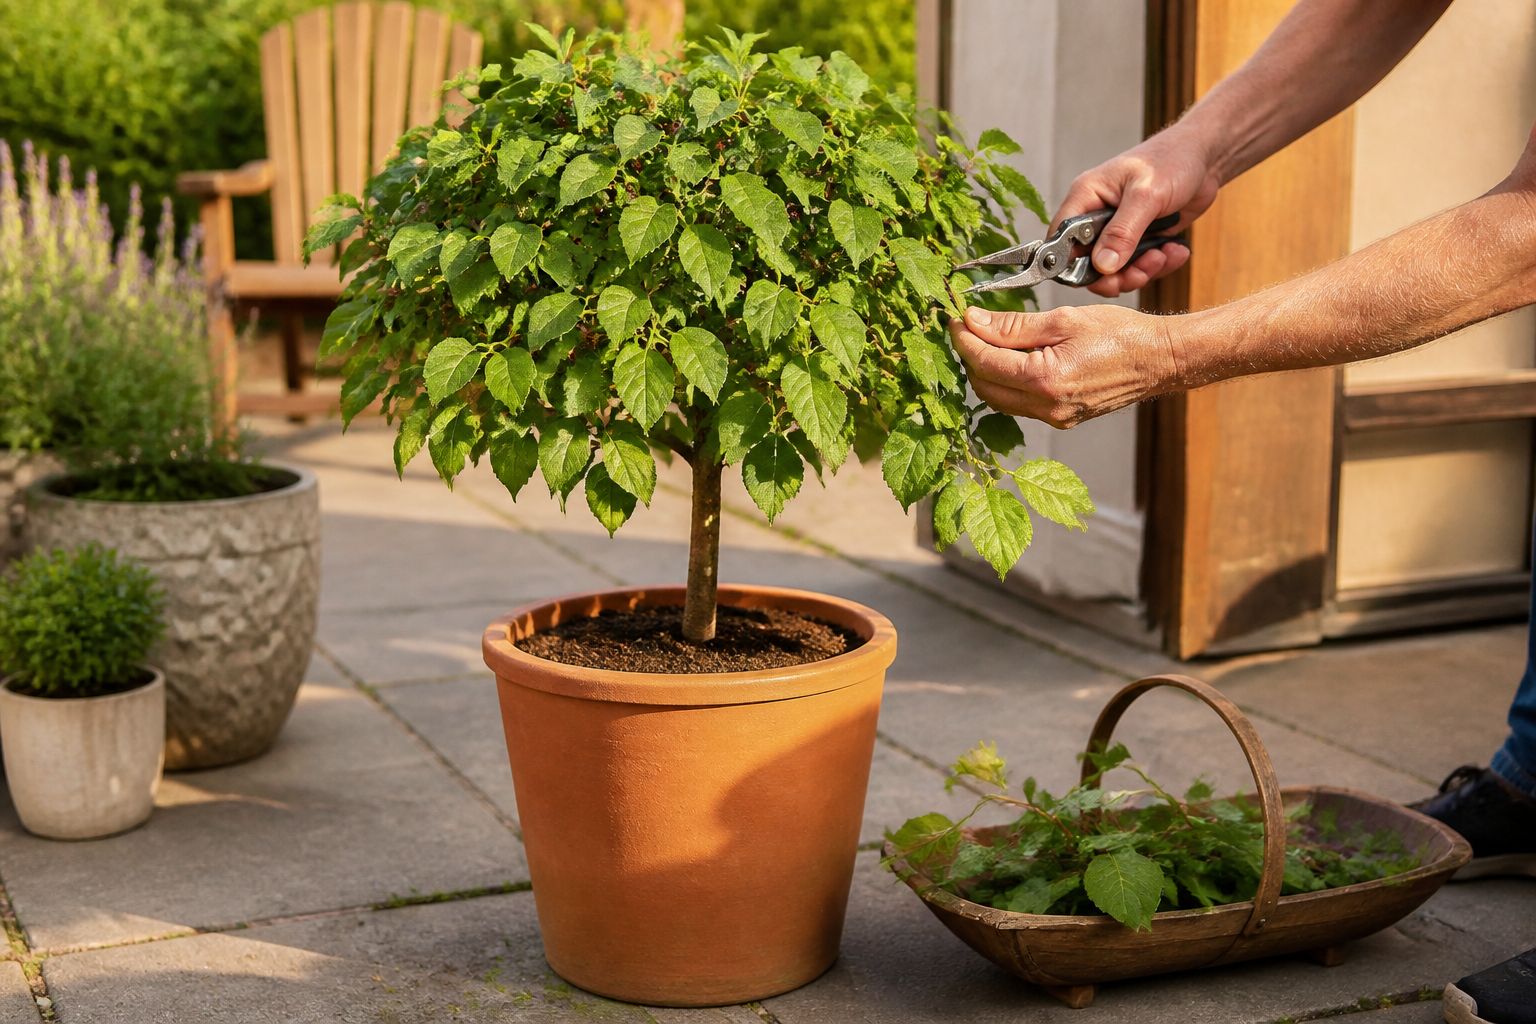
Since I maintain my Mojo in a terracotta pot—and frankly, potted growth suits patio mulberries beautifully—one additional technique delivers substantial results: managing roots when you repot the tree.
Each spring I lift the mulberry from its container and inspect the root mass closely. When roots have begun circling along the container’s interior (indicating they’ve run out of room), I carefully separate the roots and trim the longer ones back by roughly a third. Although counterintuitive, this practice stimulates formation of a more compact root system and avoids the stunted development and diminished fruit output that accompany severely restricted root quarters.
I then move the tree into fresh potting medium—typically identical container dimensions or a single increment larger. This seasonal reset maintains productive fruiting from my container specimen year to year. Without this practice, I’ve noticed berry size and abundance diminish noticeably after two or three seasons of neglect.
Equipment Selection: Tools That Simplify the Work
You won’t require specialized implements, but quality shears and saws produce superior results and reduce physical strain. These are the instruments I depend on regularly:
Fiskars 91095935J Steel Bypass Pruning Shears are my go-to. These 5/8″ garden clippers cut clean and sharp, they’re comfortable to grip, and they last forever. I’ve had mine for five years. The bypass design means you get a scissor-like cut rather than a crushing cut, which is gentler on the tree.
When cuts exceed what bypass shears can manage (an infrequent situation with dwarf varieties), a hand pruning saw works well. For most of the pruning work required on these diminutive specimens, bypass shears handle the job effectively.
I also keep Treekote Tree Wound Dressing – 16oz Tub – Grafting on hand. Mulberries are generally hardy and don’t require wound dressing for small cuts, but I use it on any cut larger than a pencil thickness, especially on the grafted portion. It seals out moisture and disease and gives me peace of mind. Especially after my graft-cutting disaster, I’m not taking chances.
Beyond Mojo: Other Compact Grafted Cultivars
While the Mojo is a popular grafted compact mulberry, it’s hardly the sole option available commercially. For those interested in alternatives, a comprehensive resource surveys top dwarf mulberry selections suited to confined spaces. These same pruning guidelines—honoring the graft union, scheduling cuts for dormancy, and emphasizing form development—apply uniformly across all such cultivars.
I’ve also constructed an extensive reference covering cultivation and maintenance of weeping mulberry trees, offering detailed exploration of the behavioral traits and horticultural needs particular to weeping-form varieties for additional learning.
Should you find yourself managing a conventional full-size mulberry—perhaps an established specimen inherited with your property—the methodology differs substantially. I’ve created a thorough reference guide addressing complete pruning of standard mulberry trees to equip you for that distinct situation.
Putting It Into Practice: Your Mojo’s Bright Future
The mulberry living in that terracotta pot remains on my patio today. It’s no longer the struggling, confused specimen that resulted from my careless pruning episode. During the past two growing seasons, it’s performed brilliantly—remaining compact and elegantly weeping, with branches bending under the weight of summer harvests. That transformation came from one source: learning the correct way to prune the Mojo.
You don’t need to walk my painful path to reach the same success. Identify where the graft union sits, use a marker if it helps you remember, delay pruning until dormancy arrives, and approach the task with restraint and an eye toward enhancing structure rather than cutting aggressively. The genetics of your tree already work toward compactness. Your responsibility is simply ensuring it expresses that potential beautifully and abundantly.
Head out there with your shears held confidently. The Mojo is far more resilient than you might worry—and infinitely more forgiving of mistakes than any full-size mulberry tree. That said, honoring the graft union from your very first cut is the fastest route to sustained, bountiful harvests and that exquisite, weeping silhouette that attracted you to the tree originally.
Frequently Asked Questions
What happens if you prune below the graft union on a Mojo mulberry?
Pruning below the graft union removes the Mojo variety and activates the vigorous rootstock beneath it, causing wild, uncontrolled upward growth. The rootstock loses the genetic restraint that keeps the tree compact and weeping, transforming it into an unruly full-size form instead of the dwarf specimen you purchased.
Where is the graft union located on a dwarf mulberry tree?
The graft union appears as a slight ridge, thickening, bump, or flange on the main stem, typically positioned somewhere between 1.5 and 3 feet above soil level. The wood below the union has visibly different coloration and texture than the wood above it, and you can feel it clearly by running your hand along the trunk.
When should you prune a Mojo mulberry for the best fruit harvest?
Prune during the dormant period of late winter—roughly late February through early March, adjusted for your regional climate. Pruning after spring buds swell removes branches destined to bear fruit, resulting in sparse berries. Avoid pruning in autumn or early winter, as cuts trigger tender shoots that won’t survive winter conditions.
How much of a Mojo mulberry should you remove when pruning?
Remove between 10 and 15 percent of the tree’s mass, focusing on selective thinning rather than aggressive cuts. Prune only dead, diseased, or damaged wood; branches rubbing together; dense interior patches blocking light; and upright growth that contradicts the weeping form. Conservative pruning preserves branches that will bear next summer’s harvest.
Keep Reading
About This Article

Written by Ruth Nakamura. Ruth Nakamura is a backyard orchardist in the Pacific Northwest who has grown mulberries for fifteen years, cultivating twelve different varieties in her own backyard. Not a horticulturist by formal training - she shares what she has learned through hands-on growing, workshops, and connecting with nurseries and growers across the country. More about this site.
Scope and limits. Ruth is a backyard orchardist without formal horticultural training. Growing conditions vary enormously by region, so confirm variety, timing, and pest guidance with your local extension service.
Verify this against a primary source
Specifics change, and your situation may differ from the one described here. These are the authorities worth checking directly:
- USDA Plant Hardiness Zone Map — zone verification for your location
- Oregon State University Extension — fruit growing and pruning research
- USDA PLANTS Database — species range and identification