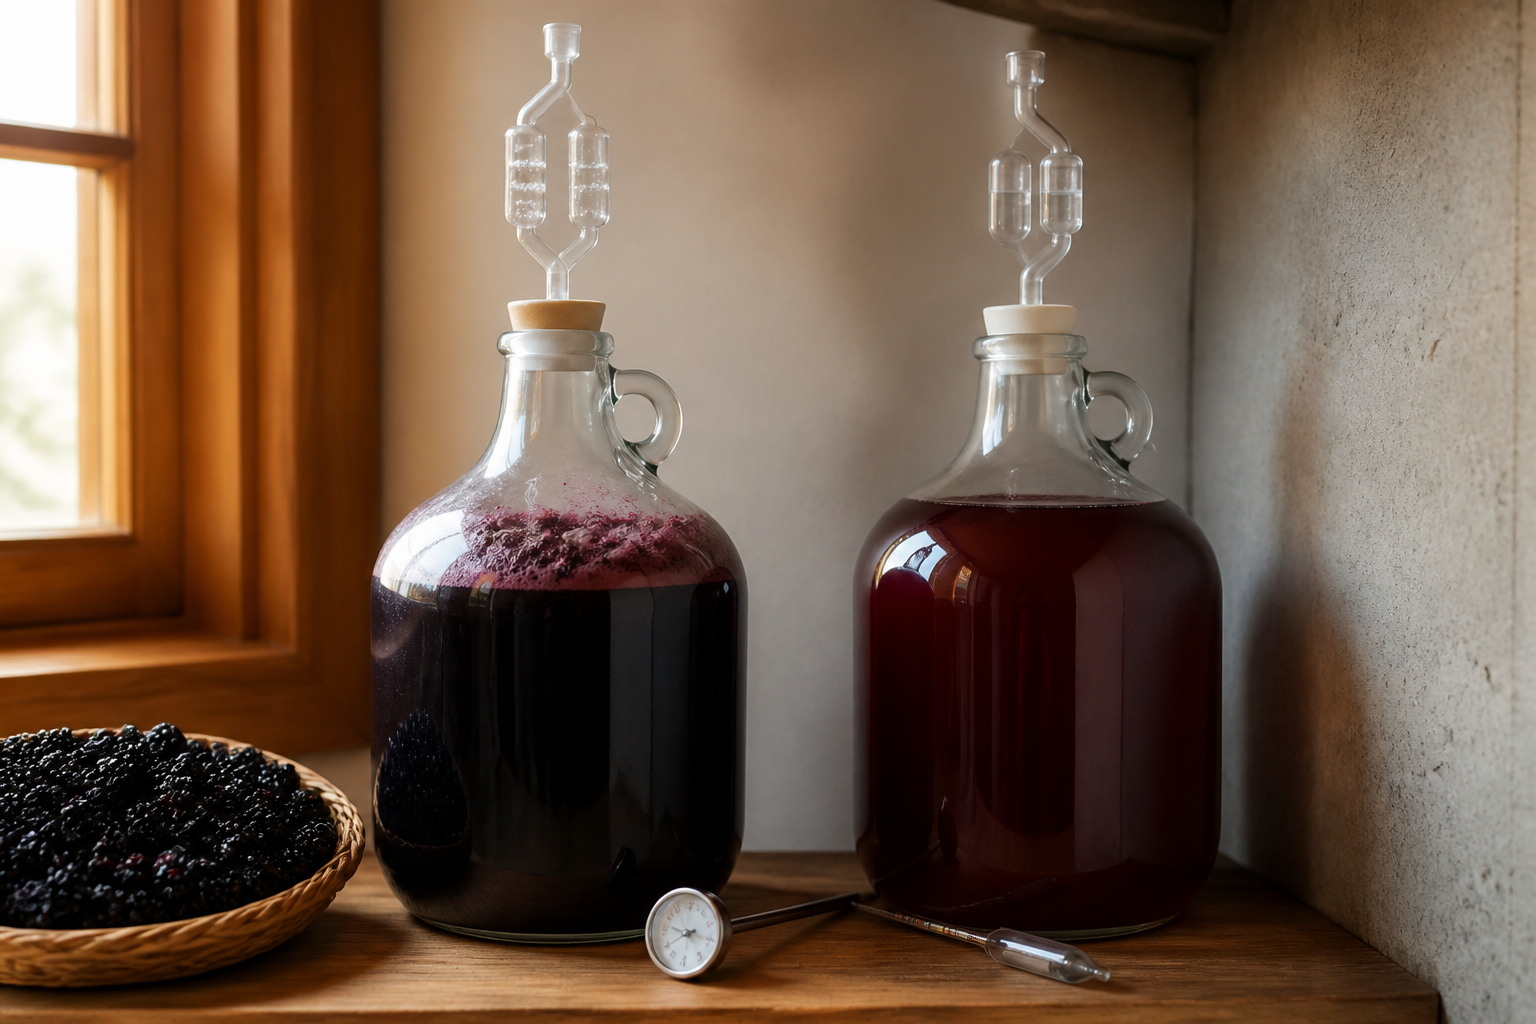
Fermentation temperature strongly affects mulberry wine flavor. Wine fermented at warm room temperature can develop harsh, burning, rubbing-alcohol notes, while the same recipe fermented in cooler conditions tends to produce deeper, jammier results with better balance. Temperature control during the three-week fermentation window is critical to final flavor quality.
When mulberry wine hits your palate with that burning, aggressive quality — when it tastes like pure alcohol rather than something made from fruit — the culprit is almost always lurking in plain sight: fermentation temperature. The good news is that this particular problem sits near the top of things you can actually fix in home winemaking.
I want to walk you through exactly what happened in that warm kitchen, what’s occurring at the cellular level when temperature gets out of hand, and the concrete, hands-on approach I’ve developed to keep every new batch tasting like wine instead of industrial solvent. Understanding this one thing eliminated my failed batches almost entirely.
Why Temperature Controls What Your Wine Actually Tastes Like
The thing I didn’t grasp back then was that yeast isn’t some passive ingredient passively converting sugars. It’s a living population with specific demands — and among those demands, temperature ranks at the absolute top.
Most wine yeasts thrive within a narrower band than you’d think: somewhere in the 65–75°F (18–24°C) range. Why does this matter? Because yeast creates far more than just ethanol. It’s simultaneously generating all those aromatic esters, flavor compounds, and subtle notes that transform your mulberry juice into something recognizable as wine. When conditions stay optimal, fermentation moves at a pace that lets complexity build.
Push the thermometer above that window — particularly into the low 80s and beyond — and yeast enters survival mode. Its metabolism goes into overdrive. Instead of channeling its energy into producing those delicate, fruity esters that define character, it starts churning out something entirely different: fusel alcohols. These are heavier, sharper alcohols with that characteristic bite — exactly the harsh, alcohol-forward profile you’re experiencing.
When fermentation temperatures hover around 78–80°F, yeast can ferment too rapidly, causing the sugar to convert before subtle fruit flavors have time to develop properly. The result is a wine dominated by alcohol notes with little of the mulberry character that makes the effort worthwhile.
Pinpointing Where Fermentation Heat Builds Up
An overheated fermentation sits at the root of nearly every batch I’ve encountered that tastes aggressively alcoholic. Let me share the specific locations where I’ve accidentally — and then deliberately — created these problems:
- Atop refrigerators or close to kitchen appliances: That flat surface on a fridge seemed ideal for keeping carboys out of traffic (I certainly thought so), yet kitchens often warm up substantially throughout the day, turning these spots into the hottest real estate in the house. Proximity to ovens, stoves, or running dishwashers compounds this effect exponentially.
- In reach of radiators or heating ductwork: Anybody fermenting near an active baseboard radiator or heating vent in colder months discovers how quickly temperatures spike. Early spring taught me this painful lesson when I’d leave a batch sitting beside a heater I’d forgotten was still running.
- On window ledges receiving direct sun: Beyond the separate concern about UV light harming your wine, a carboy positioned where sunlight pours in — particularly south-facing windows during warmer seasons — can climb well above 80°F, especially when glass acts as a heat concentrator.
- Inside detached garages or garden sheds: Many home winemakers underestimate this one. That garage feels pleasantly cool at dawn but transforms into an 82–85°F oven by afternoon. If fermentation’s happening inside, you’re essentially exposing yeast to constant temperature swings, and those swings themselves trigger stress and off-flavor production.
Fermentation held between 62–68°F produces noticeably better results. The slower pace allows flavor compounds to develop, yielding wine that tastes unmistakably like mulberries rather than pure alcohol.
Why Slower Fermentation Preserves Your Mulberry’s True Character
Professional winemakers obsess over temperature regulation because they understand something fundamental: fermentation conducted in the low-to-mid 60s °F range unfolds gradually enough that yeast has space to generate the fruity esters and allow all those mulberry flavor molecules to fully express themselves. It runs counter to intuition — shouldn’t quicker equal superior? — but temperature relationships in fermentation work precisely the opposite direction. Patience beats speed every time.
Imagine preparing mulberry preserves on your stovetop. Crank the burner to high and you get thick jam in minutes — but your delicate fruit flavors evaporate into the steam. Reduce it gently over low heat and that berry character deepens, becomes richer, more pronounced. Fermentation operates under identical logic.
This clarifies how identical fruit, identical yeast starter, and identical recipes can produce wildly divergent outcomes when one sits fermenting in a warm environment and another works quietly in a cool, stable zone. Same starting materials, dramatically different results — all determined by temperature’s influence on the fermentation process.
When you’re working through my full step-by-step mulberry wine recipe, this single factor — more than any other component — controls whether your outcome rivals commercial wines or tastes unpleasantly burning.
Getting Your Fermentation Back on Track: A Practical Approach
Let me share the systematic process I’ve worked into my routine, repeated reliably for batch after batch:
Step 1: Measure Your Fermentation Environment’s Temperature Range
Grab an affordable thermometer — elaborate equipment isn’t necessary — and position it immediately beside your carboy. Document the temperature multiple times throughout the day: sunrise, midday, evening. Repeat across three separate days. You’re establishing both the typical temperature and how dramatically it swings between highs and lows. Should you find readings consistently above 75°F or experiencing substantial daily fluctuation, you’ve identified your problem.
Scout Out a Superior Fermentation Location
An unfinished basement represents the gold standard — it’s consistently cool, naturally dark, and temperature-stable throughout seasons. A seldom-used bedroom closet in a north-facing room functions admirably. Even a dedicated wine refrigerator works beautifully for smaller batches if budget permits. You’re aiming for 65–72°F without dramatic hourly swings. Temperature stability actually matters as much as absolute coolness — yeast experiences stress from both excessive heat and from constant temperature shifts between daylight and nighttime hours, and either one can trigger the production of unpleasant compounds.
Step 3: Relocate Your Active Fermentation Immediately
Should your current batch still be actively fermenting, transfer it to that cooler zone without hesitation. I recognize the temptation to assume you’ve already wasted the batch — resist that assumption. When visible activity persists in your airlock, fermentation continues. Shifting to a cooler spot right now can substantially enhance the ultimate flavor outcome, even if partway through the process.
Step 4: Employ a Hydrometer to Establish Whether Fermentation Has Genuinely Concluded
Here’s something that rescued me from declaring batches ruined when they actually weren’t: occasionally wine registering as excessively “hot” or “sharp” hasn’t actually finished its fermentation cycle. A hydrometer measurement capturing both the beginning gravity reading and the ending gravity reading is your definitive answer for whether fermentation actually terminated. Wine containing leftover fermentable sugar can register harsh and aggressive because sweetness masks the alcohol. Should your final gravity reading exceed what you anticipated, extend fermentation in that cool location. The result might surprise you pleasantly.
Most fermentation kits include basic hydrometers. If yours doesn’t, purchase one separately — they cost minimal amounts and become genuinely indispensable once you get serious about this.
The Equipment I Actually Keep in My Fermentation Area
Managing fermentation temperature successfully doesn’t require investing substantially in specialized gear. These are the items I’ve assembled in my basement right now:
- A simple battery-powered thermometer ($5–10 range) mounted near fermentation vessels, permitting regular temperature checks without disturbing the carboys
- A compact circulation fan (entirely optional, but promotes airflow in rooms that feel stagnant)
- Shelving positioned in my coldest room, positioned away from all heat-generating sources
- For those just beginning their fermentation journey, the Home Brew Ohio Upgraded 1 Gallon Wine from Fruit Kit delivers the complete experience including sensible temperature guidelines
- Those seeking more comprehensive instruction should explore the Craft A Brew Fruit Wine Making Kit, which excels for people starting fresh and incorporates detailed fermentation oversight information
I’ve personally tested these particular wine-making kits before sharing recommendations, so you’re receiving real hands-on perspective rather than generic suggestions — both deliver genuine results with mulberry fermentations.
Understanding How Fermentation Unlocks Your Mulberries’ Potential
Wanting to understand precisely why temperature exerts such profound influence? Consider what happens when fermentation converts plain mulberry juice into actual wine. This transcends basic sugar-into-alcohol conversion. This represents the act of drawing forth your mulberries’ finest expression. Temperature functions as the primary lever determining whether you receive that luxurious, wine-like, genuinely pleasurable outcome or something that tastes like a laboratory byproduct.
Taking Control: Your Temperature Adjustment Strategy
When your mulberry wine currently registers as hot and unpleasantly alcoholic — that astringent, burning sensation that makes you question whether you’re actually drinking wine — avoid discarding it. Begin by positioning a thermometer next to your carboy and recording what you discover. Transport your batch into the coolest, most temperature-consistent area you can locate. Should bubble activity persist in your airlock, allow additional time in that cool environment. Break out the hydrometer and verify that fermentation has genuinely terminated.
And starting with your next fermentation? Lock in your cool spot first, monitor its temperature behavior across several days, then commence fermentation there from the very beginning. This single adjustment transforms everything.
Once I grasped what temperature orchestrates within my yeast, I quit experiencing those ruined batches with that horrible harsh taste — and that basement experiment? It established the benchmark against which I evaluate every subsequent batch. You can arrive at that same point. Select a cool location, verify its temperature using a simple thermometer, and let your mulberries demonstrate their actual complexity.
Frequently Asked Questions
What temperature should mulberry wine ferment at?
Most wine yeasts thrive in the 65–75°F range, with 65–72°F being ideal without dramatic hourly fluctuations. Temperature stability matters as much as absolute coolness — yeast experiences stress from both excessive heat and constant temperature shifts, either triggering unpleasant compounds. Aim for steady conditions in the 62–68°F range for best results.
Why does my mulberry wine taste like alcohol?
When fermentation temperature climbs above 75°F, yeast enters survival mode and churns out fusel alcohols instead of fruity esters. These heavier alcohols create that characteristic harsh, burning bite. My kitchen carboy hovering around 78–80°F produced exactly this problem — volume of alcohol with almost nothing else.
Can I fix mulberry wine that tastes too hot?
If visible activity persists in your airlock, fermentation continues. Relocate your batch to a cooler spot immediately — shifting to a cooler zone partway through can substantially enhance the ultimate flavor outcome. Use a hydrometer to verify whether fermentation actually terminated, since leftover fermentable sugar can mask alcohol and register as sharp.
Where should I ferment mulberry wine at home?
An unfinished basement represents the gold standard — consistently cool, naturally dark, and temperature-stable. A seldom-used bedroom closet in a north-facing room works well. Avoid refrigerator tops, windows receiving direct sun, proximity to ovens or stoves, radiators, heating vents, and detached garages that swing between 82–85°F.
Keep Reading
About This Article

Written by Ruth Nakamura. Ruth Nakamura is a backyard orchardist in the Pacific Northwest who has grown mulberries for fifteen years, cultivating twelve different varieties in her own backyard. Not a horticulturist by formal training - she shares what she has learned through hands-on growing, workshops, and connecting with nurseries and growers across the country. More about this site.
Scope and limits. Ruth is a backyard orchardist without formal horticultural training. Growing conditions vary enormously by region, so confirm variety, timing, and pest guidance with your local extension service.
Verify this against a primary source
Specifics change, and your situation may differ from the one described here. These are the authorities worth checking directly:
- USDA Plant Hardiness Zone Map — zone verification for your location
- Oregon State University Extension — fruit growing and pruning research
- USDA PLANTS Database — species range and identification