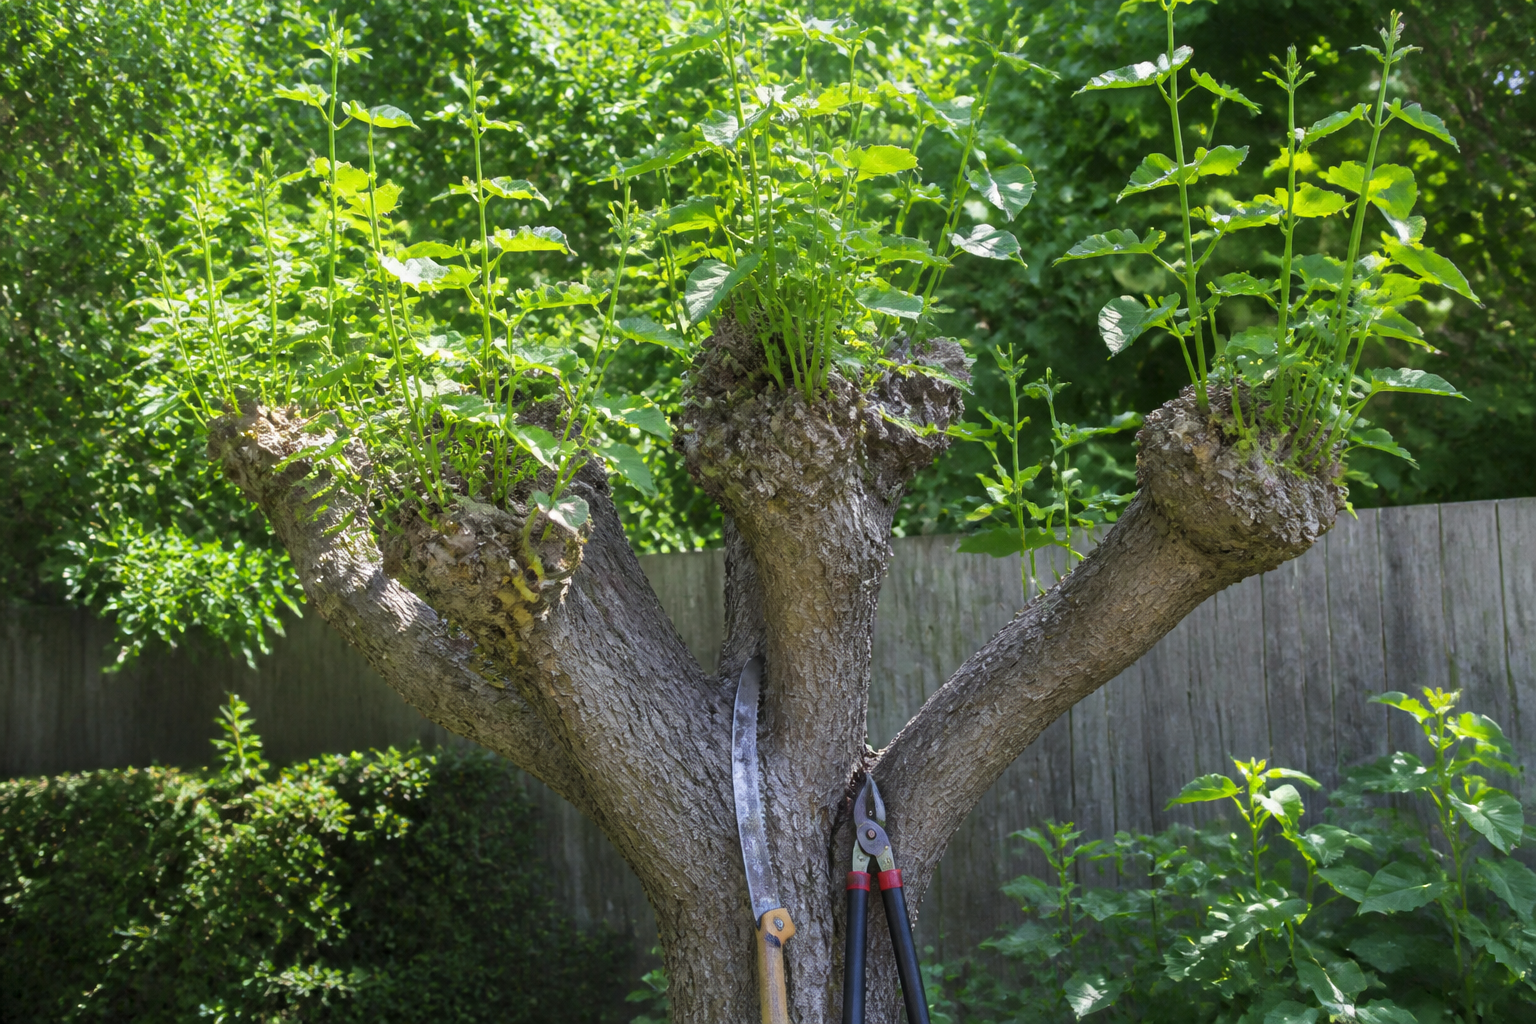
Are you staring at a mulberry tree with those strange knobby stumps at the top, wondering if something went terribly wrong — or if this was actually intentional? Yes: someone did this on purpose, and it’s been done to mulberries for centuries. But before you assume you should do the same, there’s something crucial you need to understand about what you’re actually trading away.
The technique is called pollarding, and it’s one of the oldest management practices in the mulberry-growing toolkit. A reader from the UK sent me a photo last spring that sparked this whole post — her tree had been pollarded years back and was covered in that wild, chaotic crown of thin new shoots sprouting everywhere. Her first instinct was alarm, but the real question wasn’t whether the tree was dying. It was whether this approach would actually serve her goals. That’s the conversation we need to have.
Every year, someone reaches out with a version of this situation. Maybe they’ve inherited an oddly-shaped mulberry with that distinctive knobby structure. Maybe they spotted pollarded specimens along a European village green or old park — those elegant, formally-maintained trees — and got inspired. Some folks are drawn to it for pure aesthetic reasons. Others stumble into the question by accident. What matters is that I address it head-on: what pollarding actually accomplishes, where the technique originated, why mulberries respond to it so favorably, and most urgently: whether it genuinely serves your aspirations as a home fruit grower. That last part is where most people need to pause and think.
What Is Pollarding, Exactly?
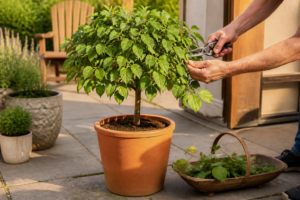
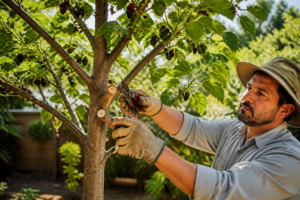
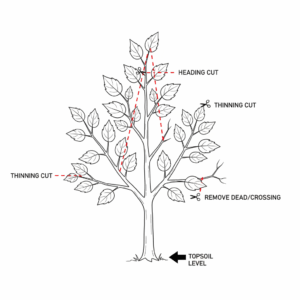
The mechanics of pollarding are deceptively simple to describe. You select a tree’s primary limbs and cut them back to the same thick stubs or knuckles on a regular schedule — typically yearly or every other year. Those cut sites stay constant; year after year, you return to the identical spots. The tree responds by thrusting out vigorous new growth from those permanent framework points, eventually forming a distinctly bulbous, heavily-branched canopy atop a maintained trunk.
Centuries of European and Asian orchardists relied on this method, and mulberries featured prominently in their practices. Here’s the historical reality that changes everything: fruit production was rarely the main goal. What they were really after was foliage — specifically, tender young leaves destined for silkworm feeding. Pollarded mulberries became the workhorse of sericulture operations, delivering reliable, fast-regenerating leaf crops. Any berries that happened to develop were merely incidental.
You might hear coppicing mentioned alongside pollarding, and while they sound similar, they’re fundamentally different approaches. Coppicing means you cut the entire tree down nearly to ground level and allow it to regenerate from the root system — faster recovery, but your fruiting timeline gets significantly delayed. Pollarding maintains a permanent trunk with those consistent knuckles at a fixed height, which matters considerably for mulberries because the height at which you maintain your cutting points directly influences how quickly the tree bounces back to bearing fruit.
Why Mulberries Take So Well to This Aggressive Approach
If you’ve dug into my full breakdown of how to prune mulberry trees effectively, you’re already familiar with how remarkably resilient mulberries are when you cut into them. These trees are naturally vigorous, they heal quickly from major pruning wounds, and they seem almost desperate to generate fresh growth. That’s precisely why pollarding took root as a technique with this species in the first place.
Once a pollarded mulberry has reached maturity, each knuckle can explode into several feet of brand-new growth during a single growing season. We’re talking lush, strong, enthusiastic shoots branching in every direction. The tree doesn’t retreat or languish. It doesn’t show distress. Instead, it surges forward with impressive vigor. From a purely horticultural standpoint, this capacity for recovery is genuinely remarkable, and it explains why the practice has persisted through so many centuries specifically on mulberries rather than on other species.
There’s a critical catch, though. This kind of reliable response only happens if you start pollarding when the tree is still quite young. You build your knuckle structure on branches that are 2–4 years old, then you’re obligated to stick with that cycle — every year or every other year, indefinitely. Jump in late with an old tree that’s never been pollarded, or abandon the schedule midway through and restart years later, and you risk triggering weak branch attachments, stubborn dieback, or branches that simply won’t cooperate. Pollarding requires absolute consistency.
The Central Tradeoff: Harvest Volume Takes a Hit
Let me be straightforward with you here, because this is the decision point for most home orchardists.
If filling your bowls with ripe, juicy mulberries every summer is your objective — if you’re drawn to this plant primarily for the fruit — then pollarding is almost always going to work against you. Those aggressive annual cuts remove the bulk of the wood that would otherwise carry fruit for you. The fresh shoots that emerge afterward are leafy and energetic, sure, but they’re far less inclined to flower and set berries in that same year. You end up sacrificing genuine productivity in exchange for maintaining those decorative knobs.
This is precisely why pollarding developed as a practice for sericulture and as an ornamental management strategy — contexts where leaves or visual form mattered more than yield. If your intention is to harvest baskets of berries, pollarding pushes directly against that goal.
I’ve catalogued the biggest pruning errors that tank mulberry harvests, and excessive cutting sits at the top of that list. You’re not executing the technique incorrectly from a mechanical standpoint. You’re directing your effort toward the wrong priority.
Where Pollarding Actually Fits in a Home Setting
That doesn’t mean pollarding has no place for home growers. There are genuine circumstances where it can be the right choice. Consider these scenarios:
- You’ve taken on a tree that was already being pollarded and you want to honor that structure and its visual or historical significance
- Your growing space is severely constrained and you need a mulberry that stays exceptionally small and tightly managed
- Your primary harvest goal is leaves rather than berries — perhaps you’re raising silkworms, or you forage mulberry foliage for brewed tea
- The visual aesthetic of a pollarded form genuinely excites you enough that you’re content trading berry production for that specific look
If you recognize yourself in any of these categories, I can absolutely guide you through the steps of building and maintaining a pollarded mulberry from the beginning. But if berry abundance is your driving motivation, I’d strongly suggest exploring conventional pruning strategies instead. You’ll harvest more fruit, your tree will reach full productivity more quickly, and you’ll spend less time managing the structure.
It’s equally worth knowing that your tree’s development trajectory depends enormously on how you approach pruning — realistic expectations for mulberry growth timelines shift based on your pruning choices. A standard-pruned tree reaches fruit-bearing capability far sooner than one being heavily managed through pollarding.
Equipment for Tackling Heavy Pruning Work
Should you move forward with pollarding as your approach, having dependable tools becomes essential. The cutting work required to establish and maintain a pollard framework — particularly those initial knuckle-building cuts — demands quality equipment, otherwise you’ll be exhausted and frustrated partway through the job.
The Fiskars PowerGear2 Bypass Lopper — 28″ with 2″ Cut Capacity has been my workhorse for years. The 28-inch length gives you reach and leverage, and that 2-inch cut capacity means you can handle the branches you’ll encounter on a mature mulberry without wearing your hands out. The bypass action is clean and doesn’t crush the wood, which matters when you’re making those precise cuts on your pollard knuckles.
After you’ve made those cuts, protecting them matters. Treekote Tree Wound Dressing – 16oz Tub – Grafting is what I use to seal fresh cuts on my trees. It encourages proper healing and keeps out moisture that could otherwise invite disease. Mulberries are tough, but they appreciate a little aftercare when you’ve cut them hard.
Matching the Technique to Your Actual Goals
What I want you to hold onto is this: pollarding mulberry trees isn’t inherently flawed. It’s a genuine, time-tested practice with legitimate applications. But it’s also specialized, and it demands specific tradeoffs that frequently diverge from what home orchardists are actually hoping to achieve.
Before you start cutting your young tree into a pollard framework, sit with yourself and answer this honestly: am I drawn to this for its form and appearance, or because I want maximum fruit production? Your answer to that question shapes everything that follows. There’s no wrong choice — I just want you making it with complete clarity about what you’re gaining and what you’re giving up.
The UK reader I mentioned at the beginning? She and I talked through her situation, and we concluded that maintaining that old pollarded structure wasn’t actually supporting what she wanted anymore. The technique had been abandoned, and the tree was stuck in an awkward middle state that was sapping its vigor. Once we reframed the conversation around productivity instead of preserving the historical form, a fresh path opened up. She let the tree transition back toward a more fruit-focused structure. Her last update told me the mulberry had become strong and bountiful again.
I’m here to support whatever direction you choose. If you’re wrestling with whether pollarding suits your specific situation, reach out and let’s talk it through. If you’d rather explore pruning methods centered on maximizing your berry yield, dig into my other resources and we’ll work through that together. Getting your mulberry tree right matters, and you deserve guidance that matches your actual vision.
Frequently Asked Questions
Does pollarding mulberry trees reduce fruit production?
Yes, significantly. Those aggressive annual cuts remove most of the wood that would otherwise carry fruit, and the fresh shoots that emerge afterward are far less inclined to flower and set berries that same year. You’re trading berry abundance for maintaining the decorative knob structure.
What age should mulberry trees be for pollarding?
You need to start when the tree is quite young, building your knuckle structure on branches that are 2–4 years old. Once you begin, you’re obligated to stick with the cycle every year or every other year indefinitely, or you risk weak branch attachments and dieback.
How much can a pollarded mulberry branch grow per year?
Once a pollarded mulberry has reached maturity, each knuckle can explode into several feet of brand-new growth during a single growing season. The tree produces lush, strong, enthusiastic shoots branching in every direction.
Is pollarding worth doing if I want mulberry berries?
No. If filling your bowls with ripe, juicy mulberries every summer is your objective, pollarding is almost always going to work against you. Conventional pruning strategies will give you a higher harvest and faster productivity.
Keep Reading
About This Article

Written by Ruth Nakamura. Ruth Nakamura is a backyard orchardist in the Pacific Northwest who has grown mulberries for fifteen years, cultivating twelve different varieties in her own backyard. Not a horticulturist by formal training - she shares what she has learned through hands-on growing, workshops, and connecting with nurseries and growers across the country. More about this site.
Scope and limits. Ruth is a backyard orchardist without formal horticultural training. Growing conditions vary enormously by region, so confirm variety, timing, and pest guidance with your local extension service.
Verify this against a primary source
Specifics change, and your situation may differ from the one described here. These are the authorities worth checking directly:
- USDA Plant Hardiness Zone Map — zone verification for your location
- Oregon State University Extension — fruit growing and pruning research
- USDA PLANTS Database — species range and identification