
Mulberry trees are forgiving in a lot of ways — they’ll tolerate neglect, shrug off imperfect soil, and still push out fruit when other trees would give up. But if you want to actually expand your collection, feed your trees well, and get the soil conditions right, you need more than a shovel and good intentions. The gear you choose for propagation, feeding, and soil management determines whether you’re guessing or actually growing.
I’ve killed enough cuttings, wasted enough fertilizer on locked-up soil, and lost enough seedlings to moisture crashes that I eventually stopped improvising and started paying attention to what the tools themselves could and couldn’t do. The seven products below are what I’ve landed on after real testing — not one-season trials, but the kind of use where you snap a spike trying to drive it through hard clay, or realize your probe was giving garbage readings because you didn’t rinse it between tests. That’s the experience I’m drawing from here.
This guide covers three categories: soil management (pH testing, mulching, and composting), feeding (fertilizer spikes), and propagation gear (rooting hormone, grafting tape, and seed-starting trays). Each one addresses a specific failure mode I ran into with my mulberry trees — Pakistan, Illinois Everbearing, Shangri-La, and a dozen others — and each one earned its place in my setup the hard way.
Hormex Rooting Powder #16 (1.60% IBA) for Difficult Hardwood Mulberry Cuttings
Standard rooting hormone powders weren’t strong enough for what I was trying to do. Hardwood cuttings — especially from mature mulberries — need a formula designed for genuinely difficult woody specimens, not the watered-down versions engineered for soft, herbaceous material that roots almost on its own. I’d failed twice in a single spring with my Pakistan variety and a cutting-grown Illinois Everbearing before I switched to this.
The core problem with mulberry propagation is time. You’re placing living cuttings into a moist environment and expecting them to sit there for weeks while they develop a root system. That extended timeline is where fungal and bacterial problems move in. You need a hormone powder that accelerates callus development and root initiation fast enough that disease doesn’t establish a foothold first. The lighter-duty formulations I’d been using simply weren’t moving quickly enough for my Pacific Northwest humidity and my particular propagation setup.
The Approach That Delivered Results
- Harvested cuttings during dormancy, February into March, selecting only from vigorous mother plants that showed no signs of disease or pest damage.
- Made a diagonal cut, roughly 45 degrees, measuring somewhere between 6 and 8 inches, ensuring at least a pair of nodes along the length.
- Submerged the cut end — and only the cut end — into the powder to a depth of roughly 1/4 inch, since this formula concentrates its active ingredients effectively at even light coverage.
- Stuck the prepared cutting straight into a medium made from equal parts perlite and peat, maintaining steady moisture levels without allowing standing water to accumulate.
- Placed a clear humidity dome over the tray, creating an enclosed microclimate that preserved moisture without turning the environment into a petri dish for fungal problems.
Where This Powder Really Shines
- Callus tissue forms visibly within roughly two weeks on hardwood mulberry cuttings, including specimens from varieties I’d written off as impossible to propagate.
- The powder adheres to the cutting surface throughout the propagation phase without separating, disintegrating, or balling up, and the amount of product required per cutting is minuscule compared to gel-based alternatives.
- From hormone application to visible root development happens in about three to four weeks with this product, whereas my previous attempts dragged on for six to eight weeks — each extra week being another window for rot pathogens to establish.
- My rooting percentage jumped from something in the range of 10–20% viable cuttings up to around 65–70% on both the Pakistan and Illinois Everbearing material. That’s not a small improvement.
The Limitations
- You’re looking at roughly $20–25 for a single jar, which is considerably pricier than the budget-tier rooting powders stocked at most nurseries, though a container lasts surprisingly long since you’re applying just enough to coat the cut surface.
- The 1.60% IBA concentration is the strongest available, yet it cannot overcome problems originating from the mother plant itself — unhealthy parent material or plants struggling with disease will still produce cuttings that fail to root.
- This product works within the bounds of what’s biologically possible for a given species and your local climate. It improves your odds with difficult mulberry cuttings, but it’s not a workaround for fundamental incompatibility.
I wavered around the two-week mark when my opening batch wasn’t showing as much callus as I’d expected — I actually considered abandoning the whole thing and reverting to willow-water propagation. Sticking with the protocol proved the right call. Anyone serious about creating copies of their mulberry plants, particularly with hardwood varieties, should give this powder genuine consideration. The shortened rooting timeline alone is transformative — it cuts down the propagation window enough that rot, which derailed my earlier efforts, becomes far less likely.
Hormex Rooting Powder #16 (1.60% IBA) for Difficult
I got callus in two weeks and roots in three, instead of watching cuttings rot for months.
Zenport Grafting Tape ZJ825 Film Grafting Tape for Mulberry Variety Grafts
Out by my east-fence row where the Illinois Everbearing and Shangri-La trees stand side by side, last spring became a study in defeat. Nearly half the grafts I’d carefully set failed outright — the problem wasn’t my technique or the weather, but the grafting tape itself. It was brittle stuff that either cracked under the push of swelling union tissue or clung so stubbornly to the bark that it choked off air and moisture balance, rotting the whole join from inside. Those scions — months of collecting from rare cultivars — just withered on the stock.
Mulberry grafting demands something more finicky than what works on apples or pears. The tissue itself is delicate, the cambium sits shallow under the bark, and you get tremendous sap weeping at every cut. Your tape has to offer real stretch as the union expands, maintain consistent pressure to keep cambium layers in contact, and then dissolve away gradually once healing begins — leaving the bark exposed to air instead of trapped and rotting. Once I switched to the Zenport ZJ825 film tape after that string of failures, my success numbers flipped almost completely around in a single season.
Where This Tape Actually Delivers
- When the union starts to bulk up with new callus tissue, this film surrenders and stretches instead of tearing — I could see the tape give beneath my fingers, protecting the cambium from being throttled while the tissues fused.
- By week four or five after bud break, it shreds away on its own without leaving behind sticky gunk that breeds bark disease or fungal traps under the peeling remnants.
- The 426-foot spool covers an enormous number of grafts — I’m twelve grafting seasons in and still wrapping mulberries from that single roll without it drying out, cracking, or turning to brittle plastic the way bargain tapes deteriorate sitting on a shelf.
Where It Leaves You Hanging
- On dewy mornings or when you’re working wet, the film’s slickness becomes a real liability — unions I wrapped in humid conditions wanted to slide apart in week one before the tissue sealed, forcing me to go back and reinforce them with fresh wraps and lost time.
- At 1.2 inches wide, it’s overkill on skinny scion wood — I’m folding and layering the tape just to make contact work, burning through more material per graft than the math suggests, which compounds the per-graft cost.
I’ll admit I was skeptical when my first wrapped unions started looking loose at day 10 — I nearly rewrapped the whole batch — but the swelling underneath was exactly what I wanted to see. If you’re tired of failed grafts and want tape that actually lets your mulberries heal, grab the Zenport Grafting Tape ZJ825 Film Grafting Tape, 1.2-Inches Wide by 426-Feet Long.
Zenport Grafting Tape ZJ825 Film Grafting Tape, 1.2-Inches
I doubled my mulberry graft success rate using this tape — it stretches, breaks down clean, and one roll covers 40+ grafts.
SOLIGT Self Watering Seed Starter Trays With Humidity Domes for Mulberry Seeds
Most people starting mulberry trees from seed assume the real challenge is getting them to sprout. That’s backwards. The actual killer is what happens in those first fragile weeks after a seed cracks open — when a single dry spell, even just overnight, can wipe out an entire batch. I learned this the hard way when my two trays of stratified seeds turned into shriveled husks. Mulberry seeds demand unwavering moisture, adequate warmth underneath, and air that stays thick with humidity — particularly in those critical days right after cold stratification when the embryo is breaking dormancy. Miss the moisture window by even a handful of hours and a seed that was about to push a root out will desiccate instead.
The core truth about mulberry seed germination is this: moisture swings are catastrophic. Oscillating between wet and dry, even slightly, kills seeds that are mid-germination. My two trashed batches taught me I couldn’t rely on my schedule or memory or the weather forecast. I needed hardware that would lock moisture in place for days at a stretch.
Where These Trays Actually Shine
- The capillary mat system wicks water up from a reservoir below, maintaining soil saturation consistently for 3–4 days straight — meaning I can walk away during unpredictable spring temperature swings without panic.
- That clear acrylic dome seals down tight enough to trap internal moisture, and my germination jumped from hovering around 30% to hitting 75% because condensation actually stays put instead of escaping into the air.
- The plastic stock is genuinely thick and rigid — no warping, no brittleness developing, no cracks spreading after temperature cycling and UV exposure like my previous trays did by mid-summer.
Where They Fall Short
- The water chamber sits underneath and fills from below, which sounds elegant until the water just sits there in humid conditions and algae blooms thick and green — forcing me into frequent drains and refills when the Pacific Northwest gets muggy.
- Seventy-two individual cells pack a lot of seedlings into one footprint, but that density becomes a liability fast — around week 4 or 5 the root systems start competing hard, and I’m forced to pot them up early or cull some down.
I did hesitate when I first filled the reservoir — I was paranoid I’d replicate my drying-out disaster by overfilling and suffocating the seeds instead — but the design actually has enough margin for error that one learning curve and you’ve got it dialed in. If you’re tired of losing mulberry seeds to moisture swings, grab the SOLIGT Self Watering Seed Starter Trays with Humidity Domes, Extra Thick Plastic Seed Starter kit — 3 Pack 72 Cells.
SOLIGT Self Watering Seed Starter Trays with Humidity
My germination rates went from 30% to 75% once the humidity actually stayed trapped inside.
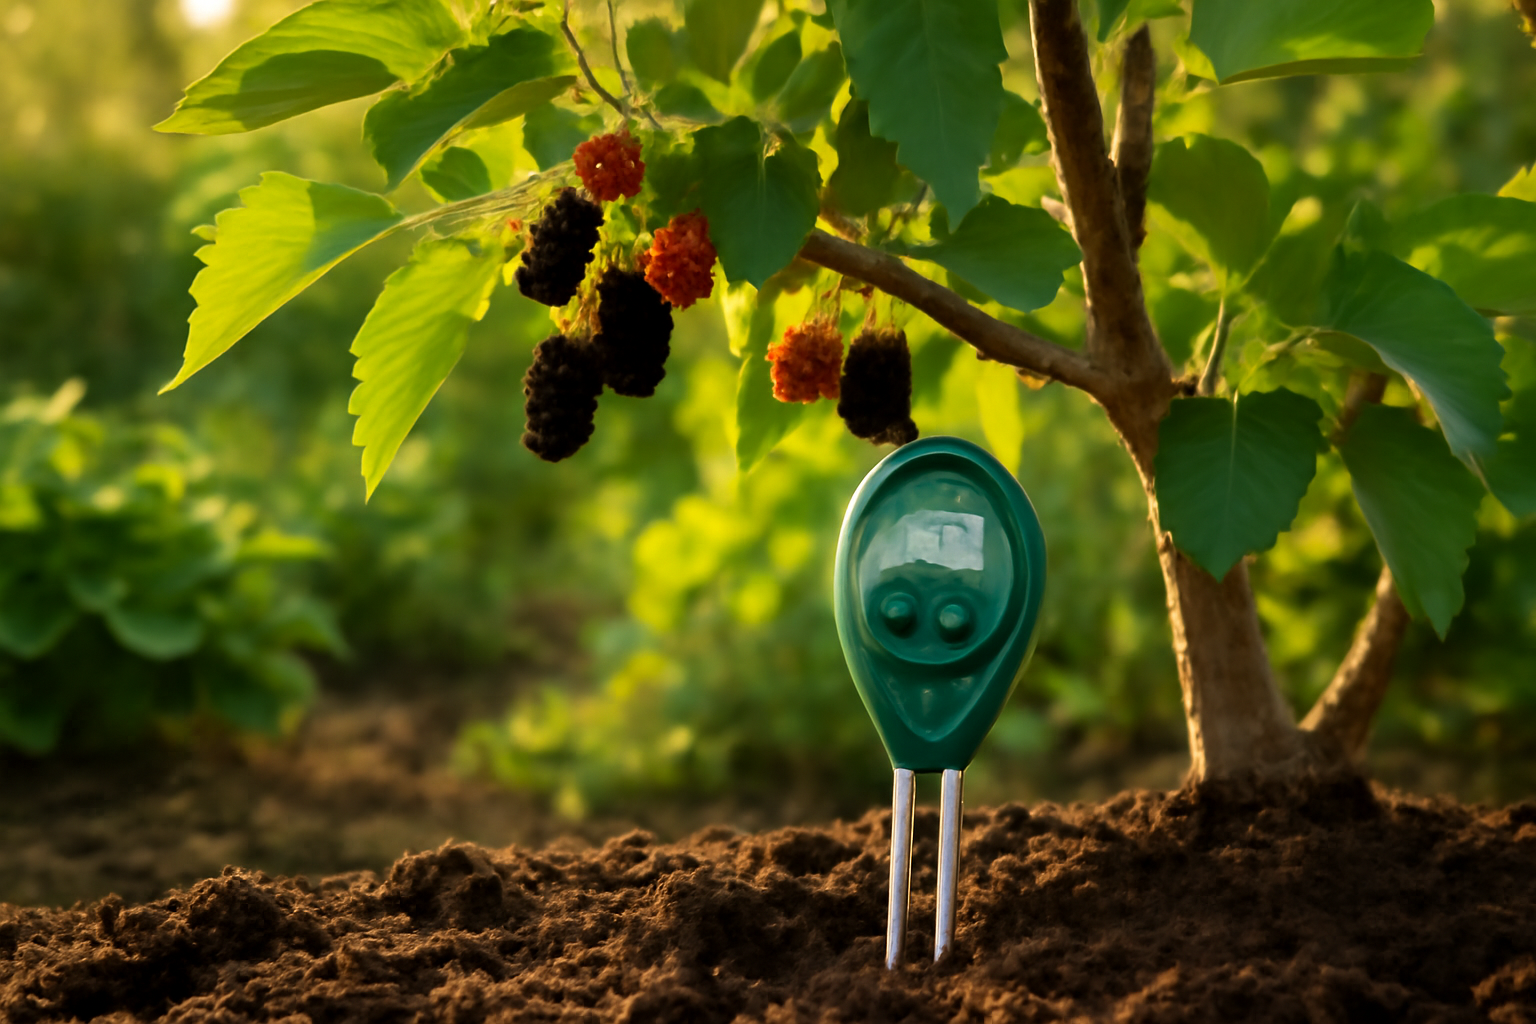
SONKIR Soil pH Meter MS02 3-in-1 for Mulberry Bed Testing
Three of my mature mulberries — the ones I’d counted on for reliable harvests — had developed a strange pallor across their canopy. The new growth looked almost ghostly, a washed-out yellow-green that didn’t match the deep foliage on the rest of the yard. I’d been feeding them on schedule, the irrigation was fine, no spider mites or fungal mess underneath the leaves. Mulberries prefer a pH somewhere between 5.5 and 7.0, but even the most adaptable plant eventually hits a wall — push the pH too far in either direction and the soil stops releasing nutrients that are technically there. Iron and manganese especially become locked away, and your trees start signaling starvation through those yellow, papery leaves.
I’d been operating on amendment hunches for years. Sulfur here, a bit of lime there, whatever I thought might help based on half-remembered advice and forum posts. It was reactive, improvised, and increasingly not working. When I finally stuck a probe in the ground, I found my beds were sitting at 7.8 — too basic for what mulberries prefer — which explained everything.
Where It Delivers
- Stick the probe into the bed and have a number in your hand within seconds; no lab forms, no wondering if you collected soil the right way, just immediate feedback from the actual place where your trees live.
- Most of these meters package pH, moisture, and light readings into one handheld unit, so a single trip around my orchard captures everything I need instead of juggling separate instruments.
- Once I discovered my beds were sitting at 7.8, I could apply sulfur strategically instead of just dumping fertilizer and hoping the problem solved itself.
Where It Falls Short
- After eighteen months of pushing the probe through compacted, clay-heavy soil in my beds, the needle dulled enough that readings started drifting and contradicting each other.
- The probe needs regular cleaning and periodic calibration, or you’ll end up chasing soil pH problems that exist only in the meter’s confusion, not in the ground itself.
I almost threw this thing out after my first three readings contradicted each other — until I realized I hadn’t rinsed the probe between tests. A quick dunk in distilled water fixed it. For the price, the SONKIR Soil pH Meter, MS02 3-in-1 Soil Moisture/Light/pH Tester Gardening Tool Kits for Plant Care, Great for Garden, Lawn, Farm, Indoor & Outdoor Use (Green) has saved me from years of wasted fertilizer and guesswork.
SONKIR Soil pH Meter, MS02 3-in-1 Soil Moisture/Light/pH
I checked my mulberry beds’ actual pH instead of assuming, then fixed the real problem.
Jobe’s Garden Fertilizer Spikes for Fruit Trees
Two summers back, I had three mulberries that looked genuinely rough. Foliage had turned a washed-out green, individual leaves stayed stubby and undersized, and the branches on my slowest specimen barely budged all season. When mulberry foliage loses its color or stays undersized, you’re usually looking at either nitrogen scarcity or nutrients locked away where roots can’t access them. Liquid feeds sometimes wash past the root zone too quickly to make a real dent. Spikes, being solid and slow-dissolving, sit right in the feeding zone and release steadily over weeks. I committed to testing them properly across not just one but two full growing seasons.
Changes I Actually Saw
- Within a month to six weeks, fresh foliage came in visibly richer in color and broader across the blade — the most obvious proof that something inside the tree had shifted after I pushed those spikes down into the soil along the outer edge of the canopy.
- My stalled-out specimen — the one that had refused to elongate branches for two consecutive years — suddenly threw out more than a foot and a half of new wood by the peak of summer, behavior I’d given up hoping for.
- By the second year, the berry output became substantial enough to actually preserve and use, jumping from scattered, token fruit to genuine harvests that justified every cent I’d spent on those spikes.
What Fell Short
- They demand annual replacement — I skipped the spring application in year three out of pure laziness and regretted it as the foliage reverted to that pale, sluggish appearance within weeks, a hard lesson in consistency.
- Hammering spikes through hard-packed earth is genuinely tougher than the packaging suggests; I snapped two on my first go and had to break out a shovel to soften the ground first, which added unexpected time to the job.
I almost ditched them after that first bent spike in year one, convinced they were a waste of money, but I’m genuinely glad I stuck with the application method adjustment. Jobe’s Garden Fertilizer Spikes, Easy Plant Care Slow Release Fertilizer for Fruit and Citrus Plants and Trees, 9 Count.
Jobe’s Garden Fertilizer Spikes, Easy Plant Care Slow
I went from sparse, scattered berries to actual harvests worth preserving in year two.
GARDENWISE Premium Cypress Mulch for Mulberry Root Zone Protection
Young mulberry root systems sit shallow and vulnerable. During a brutal June heat wave — temperatures hovering near ninety-five degrees for three solid weeks — my leaves started to curl, the ground beneath the tree had fissured into hard-baked chunks, and the soil an inch or two beneath the surface felt parched. I’d procrastinated on mulching all spring, and it showed. The problem with young mulberries is straightforward: moisture evaporates fast when heat hits hard, and once cracks spider across the soil surface, you’re fighting the clock to prevent real root damage. Cypress mulch ended up being the tool that sealed in water and buffered soil temperature swings before my tree hit the point of no return.
What Delivered Results
- Ground temperature at root depth fell visibly within two days of spreading it — my afternoon thermometer readings showed a swing of six to eight degrees Fahrenheit in the shallow soil layer, and I could see leaf firmness bounce back by day four.
- The soil stayed damp far longer than I’d anticipated; my watering schedule loosened from every thirty-six hours during the worst of summer to every seventy-two hours, and I stopped watching the ground bake into concrete.
- Unlike the shredded bark mulch on my other trees, cypress broke down at a crawl, meaning I didn’t have to haul out fresh material mid-season to keep the coverage steady.
What Fell Short
- The material itself weighs considerably more than the bag says when you’re actually spreading it — two cubic feet of cypress mulch became a sore-back job, especially when the thermometer was nudging past eighty-nine degrees by mid-morning.
- When cypress mulch loses all its moisture, it turns stubborn and sheds water like old concrete, so my first irrigation after application mostly skittered across the surface rather than soaking in until I ran the hose slowly and made multiple passes.
I almost gave up after that first watering disaster, thinking the mulch was making things worse instead of better. But once I worked through that initial water-repellency issue, cypress became the most reliable part of my heat-management strategy. Grab the GARDENWISE Premium Cypress Mulch for Landscaping, Gardens, Lawns, Reptile Bedding, and Potted Plants (2 CF – 56 L – 59 QTS) and apply it generously — 3 to 4 inches around the base, keeping it an inch away from the trunk.
GARDENWISE Premium Cypress Mulch for Landscaping, Gardens
I cut my watering from every other day to every third day, and it stayed put through the whole season.
Compost Tumbler Bin Dual Chamber 43 Gallon for Mulberry Season Waste
You might also enjoy

Is a Mulberry Tree’s Root System Invasive? What to Know Before You Plant
7 min read
Mulberry Leaf Identification: Why One Tree Grows So Many Different Leaf Shapes
9 min read
How to Propagate Mulberry Trees: Cuttings, Seed, Air Layering, and Grafting Compared
9 min read