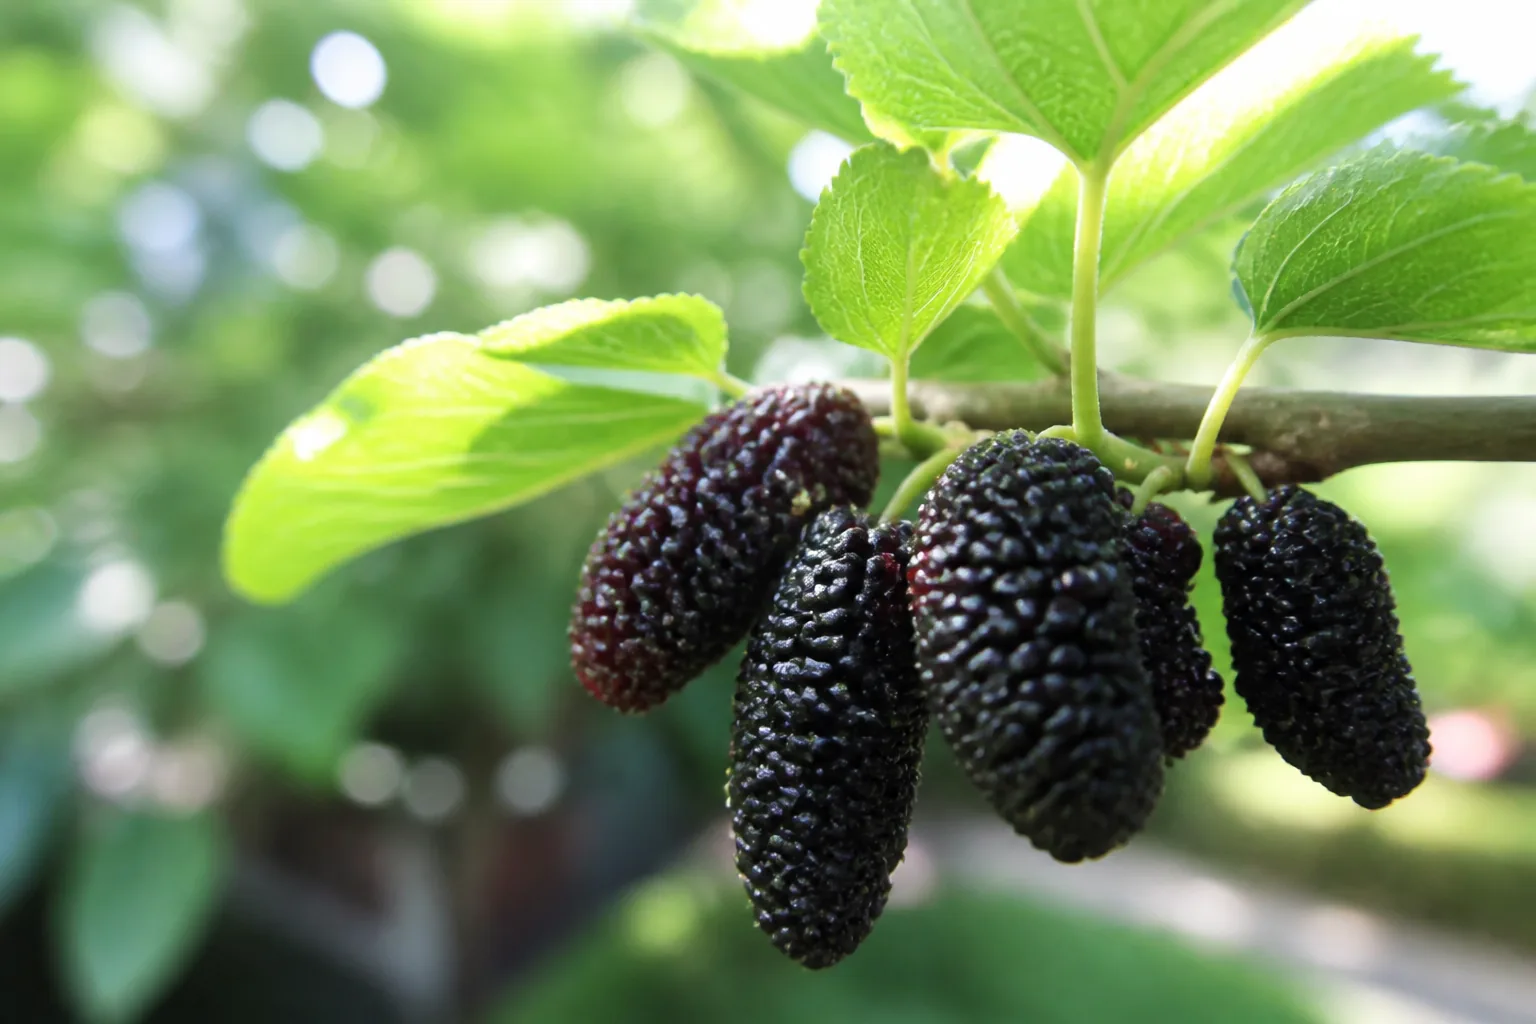
The Complete Guide to Mulberry Trees — Varieties, Growing, and Harvest

36 min read

Eliminate branches that cross one another, remove anything dead, and cut away shoots that angle inward toward the tree’s center. Target an open vase configuration that permits light and moving air throughout the canopy. Prune in late spring or summer and you’ll trigger profuse sap bleeding—it’s not lethal but it’s messy and depletes the tree’s reserves. Winter pruning avoids this issue. For a detailed walkthrough with photos from my own trees, head here.

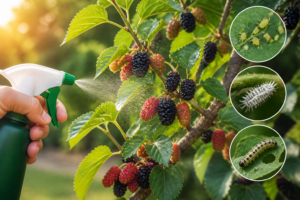
Common Mulberry Pests and Diseases

This is one of the traits that makes me love growing mulberries. They evade the vast catalog of pest and disease mayhem that ransacks apples or cherries. A few issues do warrant your attention, though, so you can intercept them early if they do show up.

If your mulberry tree has been allowed to grow tall — or you planted a vigorous variety like Illinois Everbearing — you’ll quickly discover that a standard picker won’t cut it for the upper canopy. The SISIUPASSIE 26FT Reach Fruit Picker, Apple Picker Pole with Basket Telescoping Tool for Apple Lemon Orange Mango Avocado Fruit Tree Picking extends to a full 26 feet, bringing those high clusters within reach safely from the ground. Investing in a tool with genuine reach means less fruit left to drop and ferment — and a noticeably better harvest yield.

Birds

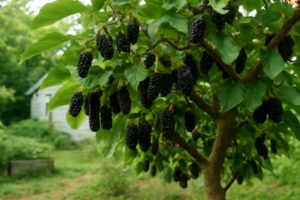
Birds represent your most formidable “pest” when harvest arrives. They fight intensely for ripe fruit. For trees on the smaller side, bird netting is your most effective solution. Larger trees—mine stretch 15–20 feet tall—make full netting logistically annoying. My strategy has shifted to harvesting frequently and planting surplus trees so there’s enough fruit for both the birds and me. Usually it works.

Fungal Issues

Popcorn disease (the culprit is the fungus Ciboria carunculoides) can strike mulberry fruit, causing berries to balloon grotesquely and fail to develop normally. It’s more prevalent in areas with persistent wetness and humidity. Affected berries become swollen and discolored and need to be picked off and thrown away—don’t compost them. Increasing air circulation via thoughtful pruning helps tremendously with reducing both this and other fungal problems.

Scale Insects and Whitefly

Scale insects sometimes settle into mulberry bark in clusters, looking like tiny brown bumps arranged along the branches. When populations get heavy, they weaken the tree and slash fruit output. A dormant-oil spray applied during winter is the conventional remedy and works reliably if you follow label directions. Whitefly occasionally appears on trees in warm, sheltered locations, but even when it shows up, healthy, properly maintained trees rarely suffer serious consequences.

Harvesting Mulberries: Timing, Techniques, and Storage

Mulberry harvesting operates on totally different principles than harvesting nearly every other fruit crop. You’re not out there picking individual berries one by one—you’re shaking the tree. This paradigm shift changes your entire approach to the harvest season.

When Are Mulberries Ripe?

Ripening schedules shift depending on species and cultivar. White mulberry and its red mulberry hybrids (think ‘Illinois Everbearing’) typically peak between late May and July in regions with temperate climates. Black mulberries transition to ripeness much later, usually from July onward into August. A berry has achieved full ripeness when it drops from its stem with barely any pressure—when the connection feels barely there. Full, deep color is another indicator. The most foolproof test is flavor: ripe mulberries explode with sweetness and intensity, while unripe ones taste tart and somewhat chalky.

The Tarp Method

Stretch a broad sheet or heavy canvas beneath the canopy and gently shake the branches. The ripe berries fall freely—unripe ones cling and stay behind. This is by far the fastest way to harvest a medium-sized or large tree. Scoop berries from the tarp into a bowl, and sort out any twigs or leaf debris. Using this technique, I can walk away with 5–8 pounds from a mature tree in less than half an hour. It’s genuinely one of my favorite rituals of the entire year.

Storing Fresh Mulberries

Mulberries spoil quickly. Your window in the refrigerator is narrow—roughly 2–3 days—even if you’re careful with handling. Spread them in a single layer across a baking sheet and place them in the freezer for 2 hours before sliding them into freezer bags. Frozen mulberries stay excellent for up to 12 months. For keeping mulberries throughout the year, I turn to jam, syrup, and fermentation. Check here for a decade’s worth of preservation projects I’ve honed and tested.

Culinary Uses: What to Do With All Those Mulberries

The year my ‘Illinois Everbearing’ hit full maturity, I was looking at over 30 pounds of ripe berries crammed into a six-week window. That abundance demanded creativity. Mulberries reveal themselves to be wonderfully flexible in the kitchen—sweeter than blackberries, less acidic, adaptable to both desserts and savory applications.

Fresh Eating and Simple Preparations

Nothing surpasses eating them fresh, straight off the branch, warm from the sun. Beyond that straightforward pleasure, mulberries integrate beautifully into smoothies, stirred into yogurt, scattered across oatmeal, or mixed into fruit salads. A quick mulberry compote—finished in 10 minutes—transforms pancakes, ice cream, or a cheese platter into something special. Because mulberries are naturally sweet, they typically demand less added sugar than other berry recipes call for.

Preservation and Pantry Uses

Mulberry jam has become my signature gift—it’s practically impossible to find someone who doesn’t love it. The berries themselves are loaded with natural pectin, which means you can usually create a set jam without adding commercial pectin. Mulberry syrup (nothing but berries, sugar, and water, simmered down) keeps in the refrigerator for weeks and works wonderfully swirled into cocktails, mixed into lemonade, or poured across cakes and desserts. If you’re feeling ambitious, mulberry wine is genuinely outstanding—ruby-deep, richly textured, complex.

Dried Mulberries

White mulberries dry beautifully and develop a caramel-toned sweetness through the process. Run them through a food dehydrator set to 135°F for 10–14 hours, or use a low conventional oven (150°F) with the door cracked slightly open. Dried mulberries work well in granola mixes, trail mixes, and baked applications. They’re also among the few mulberry products available commercially, which gives you a useful reference for what properly dried mulberry should taste like.

Common Mistakes and Beginner Questions

Mistake #1: Planting Too Close to Structures

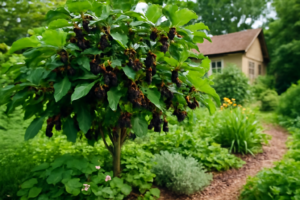
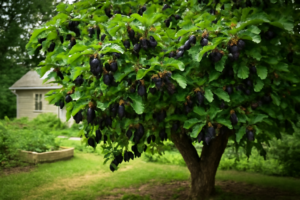
Standard mulberry varieties can stretch to 30–50 feet tall and equally wide at maturity, depending on cultivar. Many people new to the plant underestimate this eventual size and tuck their tree too close to walls, fences, or neighboring trees. Allocate at least 15–20 feet of unobstructed space in every direction for standard varieties. Dwarf cultivars like ‘Gerardi Dwarf’ are comfortable at 6–8 feet. Misjudging this creates problems years later—you’re facing either severe pruning or removal entirely.

Mistake #2: Expecting Fast Fruit from Black Mulberry

Black mulberry trees test your patience relentlessly. Inexperienced growers plant one, watch year two and three pass with no fruit, then worry that something’s broken. Nothing’s broken. Black mulberries operate on their own timeline—often 5–10 years from planting to anything you’d call a genuine crop. If you’re craving fruit soon, begin with ‘Illinois Everbearing’ or ‘Oscar.’ Plant your black mulberry elsewhere as a long-term commitment. The flavor payoff eventually justifies every year of waiting.

Mistake #3: Ignoring the Staining Risk

Mulberry pigment binds permanently to almost everything it touches. Wear disposable clothes during harvest. Reach for stainless steel or glass containers—plastic absorbs the color and never releases it. Any concrete or stone directly beneath the tree’s canopy will discolor as fruit falls. Some growers layer bark mulch under the canopy annually to buffer the staining. Plan for this reality before you dig that planting hole, not in July when it’s too late.

FAQ: Do Mulberries Need a Pollinator?

Most named mulberry cultivars pollinate themselves—you need only one tree to generate a respectable harvest. Certain cultivars do show improved fruit set when a second tree occupies the same space, though. ‘Illinois Everbearing’ and standard white mulberry cultivars are self-fertile without hesitation. If space and budget allow for two trees, go that direction. You’ll almost always see increased production. But a single well-selected mulberry, standing alone, produces generously anyway.

FAQ: Are Mulberries Safe to Eat?

Ripe mulberries—fully colored, soft, sweet—are safe and nutritious for humans and most animals. Unripe white mulberries and the tree’s milky sap are different stories; they contain compounds that can cause digestive upset and hallucinogenic effects if eaten in substantial quantities. NC State Extension categorizes Morus alba as low-toxicity overall, with the unripe fruit and sap flagged as the problematic parts. In practical terms, this almost never matters—unripe mulberries taste so terrible that no one eats them willingly anyway. Berries at full ripeness carry no toxicity concerns whatsoever. As always, if you’re harvesting from an unfamiliar tree, verify its identity confidently before eating significant quantities.

Final Thoughts: Your Complete Guide to Mulberry Trees Starts Here

This complete guide anchors everything I publish on this site. But guides can only carry you so far. Inevitably, you have to put a shovel in the ground and plant the actual tree. I’m telling you with total confidence: a thoughtfully chosen mulberry positioned in the right spot transforms into one of your garden’s most gratifying plants. My own trees have outlasted flower beds that got ripped out, perennial borders that fell out of fashion, and countless “superfoods” that failed to deliver anything resembling their marketing promises.

The essential recipe is straightforward: pick your cultivar based on climate and available space, plant in genuine sunlight with drainage that actually drains, give the tree time to settle in, and then step back. Let it do what mulberries do naturally. For most situations, that cultivar is ‘Illinois Everbearing’—productive early, dependably tasty, and comfortable across a spectrum of conditions.

I’ve walked through 12 different cultivars across my 15 years. Some fell short of my hopes. Most blew past my expectations. Each one handed me something to learn. Get your first good tree in the ground, live with it through its seasons, taste what it produces, and I’m wagering you’ll be planning number two before that first harvest wraps up. Come join the mulberry growers. You’re going to find it tremendously rewarding.

This post contains affiliate links. As an Amazon Associate, I earn from qualifying purchases at no extra cost to you.

For an in-depth examination of each of these, with detailed flavor comparisons pulled from my own tastings, check here.

Mulberries ripen fast and grow high, so having the right harvesting tool before the season peaks makes a real difference. The DonSail Fruit Picker Pole Tool with Basket Long Handle, 35-65 Inch Adjustable Apple Orange Picker Pole Tool with Basket for Avocado Acorn Lemon Pear Mango Tree Picker adjusts from 35 to 65 inches, letting you reach fruit on mid-height branches without a ladder and without bruising the delicate berries. It’s a sturdy, reusable piece of kit that will earn its place in your garden shed for years of harvests to come.

Fruitless vs. Fruiting Varieties

It bears mentioning: the mulberry world includes trees bred to produce no fruit whatsoever. These fruitless types are marketed as ornamental or shade trees, and they’ve been engineered specifically to eliminate the staining mess that comes with fruit-bearing varieties. Before you accept a mulberry recommendation without question, always verify that it’s actually a fruiting cultivar. For everything discussed in this post, we’re talking exclusively about varieties that produce edible berries.

How to Plant a Mulberry Tree

Mulberries rank among the most accommodating fruit trees you can buy. They don’t fuss the way stone fruits do, and they avoid the temperamental behavior that figs sometimes display in marginal climates. Still, planting methodology matters enormously. A tree planted thoughtfully establishes itself faster and performs better for decades afterward. I’ve planted trees both correctly and poorly, and the gap in first-year establishment speed is striking.

Site Selection

You’ll want a location bathed in sunlight—minimum of 6–8 hours of unobstructed direct sun every single day. Mulberries technically survive in partial shade, but fruit production noticeably declines. Equally important: consider the mess factor. During harvest season, ripe mulberries shed themselves constantly. They leave behind deep purple stains on concrete, paving stones, and clothing that don’t wash out. Position your tree no closer than 15–20 feet from hardscaping you care about. I learned this particular lesson the slow way: my first tree landed 8 feet from a concrete path, and now every June involves scrubbing that path until my hands cramp.

Soil and Drainage

Mulberries exist contentedly in all sorts of soil—sandy soils, clay soils, loamy soils. They’re not fussy. The one absolute requirement is drainage. Mulberry roots despise waterlogging. If your ground is predominantly clay, create a mound or raised bed to funnel water away from the root zone. Aim for a soil pH window between 5.5 and 7.0. Most garden soils naturally fall somewhere in this range, so soil amendment is usually unnecessary.

Planting Steps

  1. Excavate a planting hole between two and three times as wide as the root ball itself, matched in depth to the root ball’s height.
  2. Position your tree so the root flare—the widened section where the roots meet the trunk—sits exactly at grade or slightly proud of the soil surface. Never bury it.
  3. Refill using the soil you removed. Skip the temptation to blend in compost; it often causes drainage headaches.
  4. Deliver water slowly and deliberately right after planting until the soil is thoroughly saturated—roughly 10–15 gallons for a standard nursery container.
  5. Lay down a 3-inch blanket of wood chip mulch across a 3-foot radius, keeping it 3 inches clear of the trunk itself.

Bare-root mulberries should enter the ground in early spring, well before the growing season accelerates. Container-grown stock can be planted anytime from spring through early autumn, though spring planting yields the strongest establishment.

Mulberry Tree Care: Water, Fertilizer, and Ongoing Maintenance

An established mulberry tree demands surprisingly little from you. The first two years after planting are different, though. During that window, attentive care produces noticeable benefits. A mulberry with roots well-established handles heat stress, drought, and indifferent soil with equanimity. A newly planted mulberry cannot yet do any of those things.

Watering

During the first full growing season after planting, supply newly planted trees with deep, soaking watering once or twice per week. Frequency depends on rainfall and how hot it gets. Once the tree’s roots have truly established—generally by the beginning of year two—most mulberries in typical climates need almost no supplemental watering. During an extended dry period, a thorough watering every two or three weeks prevents stress. The more frequent mistake isn’t underwatering; it’s overwatering an already-settled tree.

Fertilizing

Mulberries are modest feeders and don’t clamor for additional nutrition. Once established, most mulberries growing in residential garden soil need zero supplemental fertilization. For young, establishing trees, a balanced-formula fertilizer (something like 10-10-10) applied in early spring—using roughly 1 pound per inch of trunk diameter—supports vigorous development. Avoid nitrogen-heavy products; they channel energy into foliage production at the cost of fruit. In my own orchard, I’ve largely abandoned purchased fertilizers in favor of yearly wood chip mulch as a slow-release nutrient source. The trees have responded beautifully.

Pruning Mulberry Trees

Mulberry pruning is considerably less complicated than pruning most other fruit trees. Your primary objective during the first three years involves building a solid framework. After that, annual pruning keeps things tidy and maintains productivity. Late winter or early spring—right before the tree’s buds swell—is the optimal window. The tree is dormant and won’t bleed sap excessively.

Eliminate branches that cross one another, remove anything dead, and cut away shoots that angle inward toward the tree’s center. Target an open vase configuration that permits light and moving air throughout the canopy. Prune in late spring or summer and you’ll trigger profuse sap bleeding—it’s not lethal but it’s messy and depletes the tree’s reserves. Winter pruning avoids this issue. For a detailed walkthrough with photos from my own trees, head here.

Common Mulberry Pests and Diseases

This is one of the traits that makes me love growing mulberries. They evade the vast catalog of pest and disease mayhem that ransacks apples or cherries. A few issues do warrant your attention, though, so you can intercept them early if they do show up.

If your mulberry tree has been allowed to grow tall — or you planted a vigorous variety like Illinois Everbearing — you’ll quickly discover that a standard picker won’t cut it for the upper canopy. The SISIUPASSIE 26FT Reach Fruit Picker, Apple Picker Pole with Basket Telescoping Tool for Apple Lemon Orange Mango Avocado Fruit Tree Picking extends to a full 26 feet, bringing those high clusters within reach safely from the ground. Investing in a tool with genuine reach means less fruit left to drop and ferment — and a noticeably better harvest yield.

Birds

Birds represent your most formidable “pest” when harvest arrives. They fight intensely for ripe fruit. For trees on the smaller side, bird netting is your most effective solution. Larger trees—mine stretch 15–20 feet tall—make full netting logistically annoying. My strategy has shifted to harvesting frequently and planting surplus trees so there’s enough fruit for both the birds and me. Usually it works.

Fungal Issues

Popcorn disease (the culprit is the fungus Ciboria carunculoides) can strike mulberry fruit, causing berries to balloon grotesquely and fail to develop normally. It’s more prevalent in areas with persistent wetness and humidity. Affected berries become swollen and discolored and need to be picked off and thrown away—don’t compost them. Increasing air circulation via thoughtful pruning helps tremendously with reducing both this and other fungal problems.

Scale Insects and Whitefly

Scale insects sometimes settle into mulberry bark in clusters, looking like tiny brown bumps arranged along the branches. When populations get heavy, they weaken the tree and slash fruit output. A dormant-oil spray applied during winter is the conventional remedy and works reliably if you follow label directions. Whitefly occasionally appears on trees in warm, sheltered locations, but even when it shows up, healthy, properly maintained trees rarely suffer serious consequences.

Harvesting Mulberries: Timing, Techniques, and Storage

Mulberry harvesting operates on totally different principles than harvesting nearly every other fruit crop. You’re not out there picking individual berries one by one—you’re shaking the tree. This paradigm shift changes your entire approach to the harvest season.

When Are Mulberries Ripe?

Ripening schedules shift depending on species and cultivar. White mulberry and its red mulberry hybrids (think ‘Illinois Everbearing’) typically peak between late May and July in regions with temperate climates. Black mulberries transition to ripeness much later, usually from July onward into August. A berry has achieved full ripeness when it drops from its stem with barely any pressure—when the connection feels barely there. Full, deep color is another indicator. The most foolproof test is flavor: ripe mulberries explode with sweetness and intensity, while unripe ones taste tart and somewhat chalky.

The Tarp Method

Stretch a broad sheet or heavy canvas beneath the canopy and gently shake the branches. The ripe berries fall freely—unripe ones cling and stay behind. This is by far the fastest way to harvest a medium-sized or large tree. Scoop berries from the tarp into a bowl, and sort out any twigs or leaf debris. Using this technique, I can walk away with 5–8 pounds from a mature tree in less than half an hour. It’s genuinely one of my favorite rituals of the entire year.

Storing Fresh Mulberries

Mulberries spoil quickly. Your window in the refrigerator is narrow—roughly 2–3 days—even if you’re careful with handling. Spread them in a single layer across a baking sheet and place them in the freezer for 2 hours before sliding them into freezer bags. Frozen mulberries stay excellent for up to 12 months. For keeping mulberries throughout the year, I turn to jam, syrup, and fermentation. Check here for a decade’s worth of preservation projects I’ve honed and tested.

Culinary Uses: What to Do With All Those Mulberries

The year my ‘Illinois Everbearing’ hit full maturity, I was looking at over 30 pounds of ripe berries crammed into a six-week window. That abundance demanded creativity. Mulberries reveal themselves to be wonderfully flexible in the kitchen—sweeter than blackberries, less acidic, adaptable to both desserts and savory applications.

Fresh Eating and Simple Preparations

Nothing surpasses eating them fresh, straight off the branch, warm from the sun. Beyond that straightforward pleasure, mulberries integrate beautifully into smoothies, stirred into yogurt, scattered across oatmeal, or mixed into fruit salads. A quick mulberry compote—finished in 10 minutes—transforms pancakes, ice cream, or a cheese platter into something special. Because mulberries are naturally sweet, they typically demand less added sugar than other berry recipes call for.

Preservation and Pantry Uses

Mulberry jam has become my signature gift—it’s practically impossible to find someone who doesn’t love it. The berries themselves are loaded with natural pectin, which means you can usually create a set jam without adding commercial pectin. Mulberry syrup (nothing but berries, sugar, and water, simmered down) keeps in the refrigerator for weeks and works wonderfully swirled into cocktails, mixed into lemonade, or poured across cakes and desserts. If you’re feeling ambitious, mulberry wine is genuinely outstanding—ruby-deep, richly textured, complex.

Dried Mulberries

White mulberries dry beautifully and develop a caramel-toned sweetness through the process. Run them through a food dehydrator set to 135°F for 10–14 hours, or use a low conventional oven (150°F) with the door cracked slightly open. Dried mulberries work well in granola mixes, trail mixes, and baked applications. They’re also among the few mulberry products available commercially, which gives you a useful reference for what properly dried mulberry should taste like.

Common Mistakes and Beginner Questions

Mistake #1: Planting Too Close to Structures

Standard mulberry varieties can stretch to 30–50 feet tall and equally wide at maturity, depending on cultivar. Many people new to the plant underestimate this eventual size and tuck their tree too close to walls, fences, or neighboring trees. Allocate at least 15–20 feet of unobstructed space in every direction for standard varieties. Dwarf cultivars like ‘Gerardi Dwarf’ are comfortable at 6–8 feet. Misjudging this creates problems years later—you’re facing either severe pruning or removal entirely.

Mistake #2: Expecting Fast Fruit from Black Mulberry

Black mulberry trees test your patience relentlessly. Inexperienced growers plant one, watch year two and three pass with no fruit, then worry that something’s broken. Nothing’s broken. Black mulberries operate on their own timeline—often 5–10 years from planting to anything you’d call a genuine crop. If you’re craving fruit soon, begin with ‘Illinois Everbearing’ or ‘Oscar.’ Plant your black mulberry elsewhere as a long-term commitment. The flavor payoff eventually justifies every year of waiting.

Mistake #3: Ignoring the Staining Risk

Mulberry pigment binds permanently to almost everything it touches. Wear disposable clothes during harvest. Reach for stainless steel or glass containers—plastic absorbs the color and never releases it. Any concrete or stone directly beneath the tree’s canopy will discolor as fruit falls. Some growers layer bark mulch under the canopy annually to buffer the staining. Plan for this reality before you dig that planting hole, not in July when it’s too late.

FAQ: Do Mulberries Need a Pollinator?

Most named mulberry cultivars pollinate themselves—you need only one tree to generate a respectable harvest. Certain cultivars do show improved fruit set when a second tree occupies the same space, though. ‘Illinois Everbearing’ and standard white mulberry cultivars are self-fertile without hesitation. If space and budget allow for two trees, go that direction. You’ll almost always see increased production. But a single well-selected mulberry, standing alone, produces generously anyway.

FAQ: Are Mulberries Safe to Eat?

Ripe mulberries—fully colored, soft, sweet—are safe and nutritious for humans and most animals. Unripe white mulberries and the tree’s milky sap are different stories; they contain compounds that can cause digestive upset and hallucinogenic effects if eaten in substantial quantities. NC State Extension categorizes Morus alba as low-toxicity overall, with the unripe fruit and sap flagged as the problematic parts. In practical terms, this almost never matters—unripe mulberries taste so terrible that no one eats them willingly anyway. Berries at full ripeness carry no toxicity concerns whatsoever. As always, if you’re harvesting from an unfamiliar tree, verify its identity confidently before eating significant quantities.

Final Thoughts: Your Complete Guide to Mulberry Trees Starts Here

This complete guide anchors everything I publish on this site. But guides can only carry you so far. Inevitably, you have to put a shovel in the ground and plant the actual tree. I’m telling you with total confidence: a thoughtfully chosen mulberry positioned in the right spot transforms into one of your garden’s most gratifying plants. My own trees have outlasted flower beds that got ripped out, perennial borders that fell out of fashion, and countless “superfoods” that failed to deliver anything resembling their marketing promises.

The essential recipe is straightforward: pick your cultivar based on climate and available space, plant in genuine sunlight with drainage that actually drains, give the tree time to settle in, and then step back. Let it do what mulberries do naturally. For most situations, that cultivar is ‘Illinois Everbearing’—productive early, dependably tasty, and comfortable across a spectrum of conditions.

I’ve walked through 12 different cultivars across my 15 years. Some fell short of my hopes. Most blew past my expectations. Each one handed me something to learn. Get your first good tree in the ground, live with it through its seasons, taste what it produces, and I’m wagering you’ll be planning number two before that first harvest wraps up. Come join the mulberry growers. You’re going to find it tremendously rewarding.

This post contains affiliate links. As an Amazon Associate, I earn from qualifying purchases at no extra cost to you.

This is one of the traits that makes me love growing mulberries. They evade the vast catalog of pest and disease mayhem that ransacks apples or cherries. A few issues do warrant your attention, though, so you can intercept them early if they do show up.

If your mulberry tree has been allowed to grow tall — or you planted a vigorous variety like Illinois Everbearing — you’ll quickly discover that a standard picker won’t cut it for the upper canopy. The SISIUPASSIE 26FT Reach Fruit Picker, Apple Picker Pole with Basket Telescoping Tool for Apple Lemon Orange Mango Avocado Fruit Tree Picking extends to a full 26 feet, bringing those high clusters within reach safely from the ground. Investing in a tool with genuine reach means less fruit left to drop and ferment — and a noticeably better harvest yield.

Birds

Birds represent your most formidable “pest” when harvest arrives. They fight intensely for ripe fruit. For trees on the smaller side, bird netting is your most effective solution. Larger trees—mine stretch 15–20 feet tall—make full netting logistically annoying. My strategy has shifted to harvesting frequently and planting surplus trees so there’s enough fruit for both the birds and me. Usually it works.

Fungal Issues

Popcorn disease (the culprit is the fungus Ciboria carunculoides) can strike mulberry fruit, causing berries to balloon grotesquely and fail to develop normally. It’s more prevalent in areas with persistent wetness and humidity. Affected berries become swollen and discolored and need to be picked off and thrown away—don’t compost them. Increasing air circulation via thoughtful pruning helps tremendously with reducing both this and other fungal problems.

Scale Insects and Whitefly

Scale insects sometimes settle into mulberry bark in clusters, looking like tiny brown bumps arranged along the branches. When populations get heavy, they weaken the tree and slash fruit output. A dormant-oil spray applied during winter is the conventional remedy and works reliably if you follow label directions. Whitefly occasionally appears on trees in warm, sheltered locations, but even when it shows up, healthy, properly maintained trees rarely suffer serious consequences.

Harvesting Mulberries: Timing, Techniques, and Storage

Mulberry harvesting operates on totally different principles than harvesting nearly every other fruit crop. You’re not out there picking individual berries one by one—you’re shaking the tree. This paradigm shift changes your entire approach to the harvest season.

When Are Mulberries Ripe?

Ripening schedules shift depending on species and cultivar. White mulberry and its red mulberry hybrids (think ‘Illinois Everbearing’) typically peak between late May and July in regions with temperate climates. Black mulberries transition to ripeness much later, usually from July onward into August. A berry has achieved full ripeness when it drops from its stem with barely any pressure—when the connection feels barely there. Full, deep color is another indicator. The most foolproof test is flavor: ripe mulberries explode with sweetness and intensity, while unripe ones taste tart and somewhat chalky.

The Tarp Method

Stretch a broad sheet or heavy canvas beneath the canopy and gently shake the branches. The ripe berries fall freely—unripe ones cling and stay behind. This is by far the fastest way to harvest a medium-sized or large tree. Scoop berries from the tarp into a bowl, and sort out any twigs or leaf debris. Using this technique, I can walk away with 5–8 pounds from a mature tree in less than half an hour. It’s genuinely one of my favorite rituals of the entire year.

Storing Fresh Mulberries

Mulberries spoil quickly. Your window in the refrigerator is narrow—roughly 2–3 days—even if you’re careful with handling. Spread them in a single layer across a baking sheet and place them in the freezer for 2 hours before sliding them into freezer bags. Frozen mulberries stay excellent for up to 12 months. For keeping mulberries throughout the year, I turn to jam, syrup, and fermentation. Check here for a decade’s worth of preservation projects I’ve honed and tested.

Culinary Uses: What to Do With All Those Mulberries

The year my ‘Illinois Everbearing’ hit full maturity, I was looking at over 30 pounds of ripe berries crammed into a six-week window. That abundance demanded creativity. Mulberries reveal themselves to be wonderfully flexible in the kitchen—sweeter than blackberries, less acidic, adaptable to both desserts and savory applications.

Fresh Eating and Simple Preparations

Nothing surpasses eating them fresh, straight off the branch, warm from the sun. Beyond that straightforward pleasure, mulberries integrate beautifully into smoothies, stirred into yogurt, scattered across oatmeal, or mixed into fruit salads. A quick mulberry compote—finished in 10 minutes—transforms pancakes, ice cream, or a cheese platter into something special. Because mulberries are naturally sweet, they typically demand less added sugar than other berry recipes call for.

Preservation and Pantry Uses

Mulberry jam has become my signature gift—it’s practically impossible to find someone who doesn’t love it. The berries themselves are loaded with natural pectin, which means you can usually create a set jam without adding commercial pectin. Mulberry syrup (nothing but berries, sugar, and water, simmered down) keeps in the refrigerator for weeks and works wonderfully swirled into cocktails, mixed into lemonade, or poured across cakes and desserts. If you’re feeling ambitious, mulberry wine is genuinely outstanding—ruby-deep, richly textured, complex.

Dried Mulberries

White mulberries dry beautifully and develop a caramel-toned sweetness through the process. Run them through a food dehydrator set to 135°F for 10–14 hours, or use a low conventional oven (150°F) with the door cracked slightly open. Dried mulberries work well in granola mixes, trail mixes, and baked applications. They’re also among the few mulberry products available commercially, which gives you a useful reference for what properly dried mulberry should taste like.

Common Mistakes and Beginner Questions

Mistake #1: Planting Too Close to Structures

Standard mulberry varieties can stretch to 30–50 feet tall and equally wide at maturity, depending on cultivar. Many people new to the plant underestimate this eventual size and tuck their tree too close to walls, fences, or neighboring trees. Allocate at least 15–20 feet of unobstructed space in every direction for standard varieties. Dwarf cultivars like ‘Gerardi Dwarf’ are comfortable at 6–8 feet. Misjudging this creates problems years later—you’re facing either severe pruning or removal entirely.

Mistake #2: Expecting Fast Fruit from Black Mulberry

Black mulberry trees test your patience relentlessly. Inexperienced growers plant one, watch year two and three pass with no fruit, then worry that something’s broken. Nothing’s broken. Black mulberries operate on their own timeline—often 5–10 years from planting to anything you’d call a genuine crop. If you’re craving fruit soon, begin with ‘Illinois Everbearing’ or ‘Oscar.’ Plant your black mulberry elsewhere as a long-term commitment. The flavor payoff eventually justifies every year of waiting.

Mistake #3: Ignoring the Staining Risk

Mulberry pigment binds permanently to almost everything it touches. Wear disposable clothes during harvest. Reach for stainless steel or glass containers—plastic absorbs the color and never releases it. Any concrete or stone directly beneath the tree’s canopy will discolor as fruit falls. Some growers layer bark mulch under the canopy annually to buffer the staining. Plan for this reality before you dig that planting hole, not in July when it’s too late.

FAQ: Do Mulberries Need a Pollinator?

Most named mulberry cultivars pollinate themselves—you need only one tree to generate a respectable harvest. Certain cultivars do show improved fruit set when a second tree occupies the same space, though. ‘Illinois Everbearing’ and standard white mulberry cultivars are self-fertile without hesitation. If space and budget allow for two trees, go that direction. You’ll almost always see increased production. But a single well-selected mulberry, standing alone, produces generously anyway.

FAQ: Are Mulberries Safe to Eat?

Ripe mulberries—fully colored, soft, sweet—are safe and nutritious for humans and most animals. Unripe white mulberries and the tree’s milky sap are different stories; they contain compounds that can cause digestive upset and hallucinogenic effects if eaten in substantial quantities. NC State Extension categorizes Morus alba as low-toxicity overall, with the unripe fruit and sap flagged as the problematic parts. In practical terms, this almost never matters—unripe mulberries taste so terrible that no one eats them willingly anyway. Berries at full ripeness carry no toxicity concerns whatsoever. As always, if you’re harvesting from an unfamiliar tree, verify its identity confidently before eating significant quantities.

Final Thoughts: Your Complete Guide to Mulberry Trees Starts Here

This complete guide anchors everything I publish on this site. But guides can only carry you so far. Inevitably, you have to put a shovel in the ground and plant the actual tree. I’m telling you with total confidence: a thoughtfully chosen mulberry positioned in the right spot transforms into one of your garden’s most gratifying plants. My own trees have outlasted flower beds that got ripped out, perennial borders that fell out of fashion, and countless “superfoods” that failed to deliver anything resembling their marketing promises.

The essential recipe is straightforward: pick your cultivar based on climate and available space, plant in genuine sunlight with drainage that actually drains, give the tree time to settle in, and then step back. Let it do what mulberries do naturally. For most situations, that cultivar is ‘Illinois Everbearing’—productive early, dependably tasty, and comfortable across a spectrum of conditions.

I’ve walked through 12 different cultivars across my 15 years. Some fell short of my hopes. Most blew past my expectations. Each one handed me something to learn. Get your first good tree in the ground, live with it through its seasons, taste what it produces, and I’m wagering you’ll be planning number two before that first harvest wraps up. Come join the mulberry growers. You’re going to find it tremendously rewarding.

This post contains affiliate links. As an Amazon Associate, I earn from qualifying purchases at no extra cost to you.

My most productive mulberry—a ‘Illinois Everbearing’—yields over 30 pounds of fruit in a single season with virtually zero effort from me. That staggering output, repeated year after year, is what convinced me that backyard mulberry growing isn’t just possible—it’s a game-changer for home orchardists. Fifteen years ago, I bit into a sun-warmed black mulberry fresh from the branch and knew immediately that my entire approach to fruit trees needed to shift. Within months, I’d removed a struggling apple and planted two mulberries to take its place. That decision hasn’t just paid dividends; it’s become the anchor of everything I grow and everything I write about here.

Strangely, mulberries remain nearly invisible in mainstream gardening conversations. Nurseries keep their shelves stocked with apples, peaches, and blueberries while mulberries languish in obscurity—when they’re stocked at all. Most people’s only exposure to mulberries comes from the nursery rhyme, not from actually tasting one. It’s a missed opportunity on a massive scale, because these trees deliver something almost no other fruit tree can: extraordinary productivity with minimal fussing, minimal pest pressure, and flavors that range from simple sweetness to wine-like complexity. I’ve watched my ‘Illinois Everbearing’ pump out 30-plus pounds annually with almost no intervention from my side.

What follows here is the complete picture: the three main species you’ll encounter, how to narrow down which cultivar actually makes sense for your specific situation, planting methodology, ongoing care routines, pruning strategy, disease and pest issues you might face, harvest timing and technique, and ways to actually use the fruit beyond just eating berries straight from your hand. Whether you’re starting from zero or you’ve already got a tree producing and want to squeeze more potential from it, save this page. I revise it continually as my own backyard teaches me new lessons each season.

The Three Main Species of Mulberry Trees

Many people are surprised to learn that mulberries aren’t just one tree—they’re actually several species, each with its own distinct personality and growing requirements. Knowing how these differ from one another will prevent you from buying the wrong species for your particular region or what you’re hoping to harvest. I’ve personally grown specimens from all three, and they’ve each earned their spot in my yard for completely different reasons.

Black Mulberry (Morus nigra)

If mulberries had a flavor hierarchy, black mulberry would sit at the very top. The berries themselves pack layers of flavor—a balance of sweetness and tartness with almost wine-like undertones that linger. This species originated in western Asia and gravitates toward warm, protected microclimates. The real challenge with black mulberry isn’t climate or pests—it’s patience. These trees frustrate beginners because they’re glacially slow to begin bearing. My ‘Chelsea’ black mulberry ate up seven full years before it delivered anything resembling a respectable crop. But here’s the payoff: once mature, a well-tended black mulberry can live for centuries, making it less of an investment in your lifetime and more of a gift to future generations.

White Mulberry (Morus alba)

White mulberry is the overachiever of the trio—fastest-growing, hardiest, most forgiving. It traces its origins back to China, where it was historically grown in massive quantities to feed silkworms destined for silk production. Depending on which cultivar you plant, the berries themselves shift color dramatically: white, or pale rose, or deep plum-purple. Flavor-wise, white mulberry plays it safe—sweetness without the complexity you get in black mulberry. It’s pleasant, approachable, less challenging to the palate. But white mulberry compensates for its straightforward taste with extraordinary adaptability. These trees laugh at poor soil, drought, and temperatures down to USDA Zone 4. If your climate is anything but ideal, white mulberry is almost certainly your answer.

Red Mulberry (Morus rubra)

Red mulberry is the native North American option—it’s the only mulberry species that actually originated on this continent. Its fruit runs toward the larger side, with color a deep burgundy and flavor that lands somewhere between white and black in terms of complexity and punch. I find red mulberry criminally underused among home growers, perhaps because it doesn’t get marketed the way other species do. It reaches USDA Zone 4 without breaking a sweat, handles humidity superbly, and produces with genuine consistency. The real obstacle is sourcing authentic red mulberry. This species cross-pollinates freely with white mulberry, so many trees sold under the red mulberry label are actually hybrids. Before you hand over your money, quiz your nursery about lineage and origin.

Choosing the Best Mulberry Variety for Your Garden

Species is only the beginning of the conversation. Each species contains named cultivars that differ wildly from one another—different sizes, different flavors, different ripening windows, different growth patterns. Picking the correct cultivar at the outset rescues you from years of frustration and wasted space. Below are the cultivars that have lived in my backyard, ones I’ve tasted repeatedly, and ones I recommend without hesitation.

Top Cultivars Worth Growing

  • ‘Illinois Everbearing’ — A hybrid of Morus alba and Morus rubra. Produces tremendous volumes of fruit across a 4–6 week window. Works equally well for fresh consumption and preservation. My top pick for anyone starting out with zero mulberry experience.
  • ‘Oscar’ — Enormous berries, deep red shifting to black, intensely sweet. Grows as a compact tree. Begins fruiting in year two or three. Excellent choice when square footage is limited.
  • ‘Chelsea’ — A textbook black mulberry. Fruits take their time to arrive, but the payoff in flavor is extraordinary. Best suited to Zone 6 and milder regions.
  • ‘Kokuso’ — A Korean-origin white mulberry. Produces aggressively, extends its fruiting season considerably, and survives reliably to Zone 5.
  • ‘Gerardi Dwarf’ — A white mulberry that never exceeds 6 feet. Purpose-built for containers or when you’re working with very tight spatial constraints.
  • ‘Pakistan’ — Grows berries of extraordinary length—sometimes exceeding 3 inches. Delivers rich, concentrated flavor. Requires Zone 7 warmth and genuinely benefits from heat; it’s not worth the effort in cooler regions.

For an in-depth examination of each of these, with detailed flavor comparisons pulled from my own tastings, check here.

Mulberries ripen fast and grow high, so having the right harvesting tool before the season peaks makes a real difference. The DonSail Fruit Picker Pole Tool with Basket Long Handle, 35-65 Inch Adjustable Apple Orange Picker Pole Tool with Basket for Avocado Acorn Lemon Pear Mango Tree Picker adjusts from 35 to 65 inches, letting you reach fruit on mid-height branches without a ladder and without bruising the delicate berries. It’s a sturdy, reusable piece of kit that will earn its place in your garden shed for years of harvests to come.

Fruitless vs. Fruiting Varieties

It bears mentioning: the mulberry world includes trees bred to produce no fruit whatsoever. These fruitless types are marketed as ornamental or shade trees, and they’ve been engineered specifically to eliminate the staining mess that comes with fruit-bearing varieties. Before you accept a mulberry recommendation without question, always verify that it’s actually a fruiting cultivar. For everything discussed in this post, we’re talking exclusively about varieties that produce edible berries.

How to Plant a Mulberry Tree

Mulberries rank among the most accommodating fruit trees you can buy. They don’t fuss the way stone fruits do, and they avoid the temperamental behavior that figs sometimes display in marginal climates. Still, planting methodology matters enormously. A tree planted thoughtfully establishes itself faster and performs better for decades afterward. I’ve planted trees both correctly and poorly, and the gap in first-year establishment speed is striking.

Site Selection

You’ll want a location bathed in sunlight—minimum of 6–8 hours of unobstructed direct sun every single day. Mulberries technically survive in partial shade, but fruit production noticeably declines. Equally important: consider the mess factor. During harvest season, ripe mulberries shed themselves constantly. They leave behind deep purple stains on concrete, paving stones, and clothing that don’t wash out. Position your tree no closer than 15–20 feet from hardscaping you care about. I learned this particular lesson the slow way: my first tree landed 8 feet from a concrete path, and now every June involves scrubbing that path until my hands cramp.

Soil and Drainage

Mulberries exist contentedly in all sorts of soil—sandy soils, clay soils, loamy soils. They’re not fussy. The one absolute requirement is drainage. Mulberry roots despise waterlogging. If your ground is predominantly clay, create a mound or raised bed to funnel water away from the root zone. Aim for a soil pH window between 5.5 and 7.0. Most garden soils naturally fall somewhere in this range, so soil amendment is usually unnecessary.

Planting Steps

  1. Excavate a planting hole between two and three times as wide as the root ball itself, matched in depth to the root ball’s height.
  2. Position your tree so the root flare—the widened section where the roots meet the trunk—sits exactly at grade or slightly proud of the soil surface. Never bury it.
  3. Refill using the soil you removed. Skip the temptation to blend in compost; it often causes drainage headaches.
  4. Deliver water slowly and deliberately right after planting until the soil is thoroughly saturated—roughly 10–15 gallons for a standard nursery container.
  5. Lay down a 3-inch blanket of wood chip mulch across a 3-foot radius, keeping it 3 inches clear of the trunk itself.

Bare-root mulberries should enter the ground in early spring, well before the growing season accelerates. Container-grown stock can be planted anytime from spring through early autumn, though spring planting yields the strongest establishment.

Mulberry Tree Care: Water, Fertilizer, and Ongoing Maintenance

An established mulberry tree demands surprisingly little from you. The first two years after planting are different, though. During that window, attentive care produces noticeable benefits. A mulberry with roots well-established handles heat stress, drought, and indifferent soil with equanimity. A newly planted mulberry cannot yet do any of those things.

Watering

During the first full growing season after planting, supply newly planted trees with deep, soaking watering once or twice per week. Frequency depends on rainfall and how hot it gets. Once the tree’s roots have truly established—generally by the beginning of year two—most mulberries in typical climates need almost no supplemental watering. During an extended dry period, a thorough watering every two or three weeks prevents stress. The more frequent mistake isn’t underwatering; it’s overwatering an already-settled tree.

Fertilizing

Mulberries are modest feeders and don’t clamor for additional nutrition. Once established, most mulberries growing in residential garden soil need zero supplemental fertilization. For young, establishing trees, a balanced-formula fertilizer (something like 10-10-10) applied in early spring—using roughly 1 pound per inch of trunk diameter—supports vigorous development. Avoid nitrogen-heavy products; they channel energy into foliage production at the cost of fruit. In my own orchard, I’ve largely abandoned purchased fertilizers in favor of yearly wood chip mulch as a slow-release nutrient source. The trees have responded beautifully.

Pruning Mulberry Trees

Mulberry pruning is considerably less complicated than pruning most other fruit trees. Your primary objective during the first three years involves building a solid framework. After that, annual pruning keeps things tidy and maintains productivity. Late winter or early spring—right before the tree’s buds swell—is the optimal window. The tree is dormant and won’t bleed sap excessively.

Eliminate branches that cross one another, remove anything dead, and cut away shoots that angle inward toward the tree’s center. Target an open vase configuration that permits light and moving air throughout the canopy. Prune in late spring or summer and you’ll trigger profuse sap bleeding—it’s not lethal but it’s messy and depletes the tree’s reserves. Winter pruning avoids this issue. For a detailed walkthrough with photos from my own trees, head here.

Common Mulberry Pests and Diseases

This is one of the traits that makes me love growing mulberries. They evade the vast catalog of pest and disease mayhem that ransacks apples or cherries. A few issues do warrant your attention, though, so you can intercept them early if they do show up.

If your mulberry tree has been allowed to grow tall — or you planted a vigorous variety like Illinois Everbearing — you’ll quickly discover that a standard picker won’t cut it for the upper canopy. The SISIUPASSIE 26FT Reach Fruit Picker, Apple Picker Pole with Basket Telescoping Tool for Apple Lemon Orange Mango Avocado Fruit Tree Picking extends to a full 26 feet, bringing those high clusters within reach safely from the ground. Investing in a tool with genuine reach means less fruit left to drop and ferment — and a noticeably better harvest yield.

Birds

Birds represent your most formidable “pest” when harvest arrives. They fight intensely for ripe fruit. For trees on the smaller side, bird netting is your most effective solution. Larger trees—mine stretch 15–20 feet tall—make full netting logistically annoying. My strategy has shifted to harvesting frequently and planting surplus trees so there’s enough fruit for both the birds and me. Usually it works.

Fungal Issues

Popcorn disease (the culprit is the fungus Ciboria carunculoides) can strike mulberry fruit, causing berries to balloon grotesquely and fail to develop normally. It’s more prevalent in areas with persistent wetness and humidity. Affected berries become swollen and discolored and need to be picked off and thrown away—don’t compost them. Increasing air circulation via thoughtful pruning helps tremendously with reducing both this and other fungal problems.

Scale Insects and Whitefly

Scale insects sometimes settle into mulberry bark in clusters, looking like tiny brown bumps arranged along the branches. When populations get heavy, they weaken the tree and slash fruit output. A dormant-oil spray applied during winter is the conventional remedy and works reliably if you follow label directions. Whitefly occasionally appears on trees in warm, sheltered locations, but even when it shows up, healthy, properly maintained trees rarely suffer serious consequences.

Harvesting Mulberries: Timing, Techniques, and Storage

Mulberry harvesting operates on totally different principles than harvesting nearly every other fruit crop. You’re not out there picking individual berries one by one—you’re shaking the tree. This paradigm shift changes your entire approach to the harvest season.

When Are Mulberries Ripe?

Ripening schedules shift depending on species and cultivar. White mulberry and its red mulberry hybrids (think ‘Illinois Everbearing’) typically peak between late May and July in regions with temperate climates. Black mulberries transition to ripeness much later, usually from July onward into August. A berry has achieved full ripeness when it drops from its stem with barely any pressure—when the connection feels barely there. Full, deep color is another indicator. The most foolproof test is flavor: ripe mulberries explode with sweetness and intensity, while unripe ones taste tart and somewhat chalky.

The Tarp Method

Stretch a broad sheet or heavy canvas beneath the canopy and gently shake the branches. The ripe berries fall freely—unripe ones cling and stay behind. This is by far the fastest way to harvest a medium-sized or large tree. Scoop berries from the tarp into a bowl, and sort out any twigs or leaf debris. Using this technique, I can walk away with 5–8 pounds from a mature tree in less than half an hour. It’s genuinely one of my favorite rituals of the entire year.

Storing Fresh Mulberries

Mulberries spoil quickly. Your window in the refrigerator is narrow—roughly 2–3 days—even if you’re careful with handling. Spread them in a single layer across a baking sheet and place them in the freezer for 2 hours before sliding them into freezer bags. Frozen mulberries stay excellent for up to 12 months. For keeping mulberries throughout the year, I turn to jam, syrup, and fermentation. Check here for a decade’s worth of preservation projects I’ve honed and tested.

Culinary Uses: What to Do With All Those Mulberries

The year my ‘Illinois Everbearing’ hit full maturity, I was looking at over 30 pounds of ripe berries crammed into a six-week window. That abundance demanded creativity. Mulberries reveal themselves to be wonderfully flexible in the kitchen—sweeter than blackberries, less acidic, adaptable to both desserts and savory applications.

Fresh Eating and Simple Preparations

Nothing surpasses eating them fresh, straight off the branch, warm from the sun. Beyond that straightforward pleasure, mulberries integrate beautifully into smoothies, stirred into yogurt, scattered across oatmeal, or mixed into fruit salads. A quick mulberry compote—finished in 10 minutes—transforms pancakes, ice cream, or a cheese platter into something special. Because mulberries are naturally sweet, they typically demand less added sugar than other berry recipes call for.

Preservation and Pantry Uses

Mulberry jam has become my signature gift—it’s practically impossible to find someone who doesn’t love it. The berries themselves are loaded with natural pectin, which means you can usually create a set jam without adding commercial pectin. Mulberry syrup (nothing but berries, sugar, and water, simmered down) keeps in the refrigerator for weeks and works wonderfully swirled into cocktails, mixed into lemonade, or poured across cakes and desserts. If you’re feeling ambitious, mulberry wine is genuinely outstanding—ruby-deep, richly textured, complex.

Dried Mulberries

White mulberries dry beautifully and develop a caramel-toned sweetness through the process. Run them through a food dehydrator set to 135°F for 10–14 hours, or use a low conventional oven (150°F) with the door cracked slightly open. Dried mulberries work well in granola mixes, trail mixes, and baked applications. They’re also among the few mulberry products available commercially, which gives you a useful reference for what properly dried mulberry should taste like.

Common Mistakes and Beginner Questions

Mistake #1: Planting Too Close to Structures

Standard mulberry varieties can stretch to 30–50 feet tall and equally wide at maturity, depending on cultivar. Many people new to the plant underestimate this eventual size and tuck their tree too close to walls, fences, or neighboring trees. Allocate at least 15–20 feet of unobstructed space in every direction for standard varieties. Dwarf cultivars like ‘Gerardi Dwarf’ are comfortable at 6–8 feet. Misjudging this creates problems years later—you’re facing either severe pruning or removal entirely.

Mistake #2: Expecting Fast Fruit from Black Mulberry

Black mulberry trees test your patience relentlessly. Inexperienced growers plant one, watch year two and three pass with no fruit, then worry that something’s broken. Nothing’s broken. Black mulberries operate on their own timeline—often 5–10 years from planting to anything you’d call a genuine crop. If you’re craving fruit soon, begin with ‘Illinois Everbearing’ or ‘Oscar.’ Plant your black mulberry elsewhere as a long-term commitment. The flavor payoff eventually justifies every year of waiting.

Mistake #3: Ignoring the Staining Risk

Mulberry pigment binds permanently to almost everything it touches. Wear disposable clothes during harvest. Reach for stainless steel or glass containers—plastic absorbs the color and never releases it. Any concrete or stone directly beneath the tree’s canopy will discolor as fruit falls. Some growers layer bark mulch under the canopy annually to buffer the staining. Plan for this reality before you dig that planting hole, not in July when it’s too late.

FAQ: Do Mulberries Need a Pollinator?

Most named mulberry cultivars pollinate themselves—you need only one tree to generate a respectable harvest. Certain cultivars do show improved fruit set when a second tree occupies the same space, though. ‘Illinois Everbearing’ and standard white mulberry cultivars are self-fertile without hesitation. If space and budget allow for two trees, go that direction. You’ll almost always see increased production. But a single well-selected mulberry, standing alone, produces generously anyway.

FAQ: Are Mulberries Safe to Eat?

Ripe mulberries—fully colored, soft, sweet—are safe and nutritious for humans and most animals. Unripe white mulberries and the tree’s milky sap are different stories; they contain compounds that can cause digestive upset and hallucinogenic effects if eaten in substantial quantities. NC State Extension categorizes Morus alba as low-toxicity overall, with the unripe fruit and sap flagged as the problematic parts. In practical terms, this almost never matters—unripe mulberries taste so terrible that no one eats them willingly anyway. Berries at full ripeness carry no toxicity concerns whatsoever. As always, if you’re harvesting from an unfamiliar tree, verify its identity confidently before eating significant quantities.

Final Thoughts: Your Complete Guide to Mulberry Trees Starts Here

This complete guide anchors everything I publish on this site. But guides can only carry you so far. Inevitably, you have to put a shovel in the ground and plant the actual tree. I’m telling you with total confidence: a thoughtfully chosen mulberry positioned in the right spot transforms into one of your garden’s most gratifying plants. My own trees have outlasted flower beds that got ripped out, perennial borders that fell out of fashion, and countless “superfoods” that failed to deliver anything resembling their marketing promises.

The essential recipe is straightforward: pick your cultivar based on climate and available space, plant in genuine sunlight with drainage that actually drains, give the tree time to settle in, and then step back. Let it do what mulberries do naturally. For most situations, that cultivar is ‘Illinois Everbearing’—productive early, dependably tasty, and comfortable across a spectrum of conditions.

I’ve walked through 12 different cultivars across my 15 years. Some fell short of my hopes. Most blew past my expectations. Each one handed me something to learn. Get your first good tree in the ground, live with it through its seasons, taste what it produces, and I’m wagering you’ll be planning number two before that first harvest wraps up. Come join the mulberry growers. You’re going to find it tremendously rewarding.

This post contains affiliate links. As an Amazon Associate, I earn from qualifying purchases at no extra cost to you.

Eliminate branches that cross one another, remove anything dead, and cut away shoots that angle inward toward the tree’s center. Target an open vase configuration that permits light and moving air throughout the canopy. Prune in late spring or summer and you’ll trigger profuse sap bleeding—it’s not lethal but it’s messy and depletes the tree’s reserves. Winter pruning avoids this issue. For a detailed walkthrough with photos from my own trees, head here.

Common Mulberry Pests and Diseases

This is one of the traits that makes me love growing mulberries. They evade the vast catalog of pest and disease mayhem that ransacks apples or cherries. A few issues do warrant your attention, though, so you can intercept them early if they do show up.

If your mulberry tree has been allowed to grow tall — or you planted a vigorous variety like Illinois Everbearing — you’ll quickly discover that a standard picker won’t cut it for the upper canopy. The SISIUPASSIE 26FT Reach Fruit Picker, Apple Picker Pole with Basket Telescoping Tool for Apple Lemon Orange Mango Avocado Fruit Tree Picking extends to a full 26 feet, bringing those high clusters within reach safely from the ground. Investing in a tool with genuine reach means less fruit left to drop and ferment — and a noticeably better harvest yield.

Birds

Birds represent your most formidable “pest” when harvest arrives. They fight intensely for ripe fruit. For trees on the smaller side, bird netting is your most effective solution. Larger trees—mine stretch 15–20 feet tall—make full netting logistically annoying. My strategy has shifted to harvesting frequently and planting surplus trees so there’s enough fruit for both the birds and me. Usually it works.

Fungal Issues

Popcorn disease (the culprit is the fungus Ciboria carunculoides) can strike mulberry fruit, causing berries to balloon grotesquely and fail to develop normally. It’s more prevalent in areas with persistent wetness and humidity. Affected berries become swollen and discolored and need to be picked off and thrown away—don’t compost them. Increasing air circulation via thoughtful pruning helps tremendously with reducing both this and other fungal problems.

Scale Insects and Whitefly

Scale insects sometimes settle into mulberry bark in clusters, looking like tiny brown bumps arranged along the branches. When populations get heavy, they weaken the tree and slash fruit output. A dormant-oil spray applied during winter is the conventional remedy and works reliably if you follow label directions. Whitefly occasionally appears on trees in warm, sheltered locations, but even when it shows up, healthy, properly maintained trees rarely suffer serious consequences.

Harvesting Mulberries: Timing, Techniques, and Storage

Mulberry harvesting operates on totally different principles than harvesting nearly every other fruit crop. You’re not out there picking individual berries one by one—you’re shaking the tree. This paradigm shift changes your entire approach to the harvest season.

When Are Mulberries Ripe?

Ripening schedules shift depending on species and cultivar. White mulberry and its red mulberry hybrids (think ‘Illinois Everbearing’) typically peak between late May and July in regions with temperate climates. Black mulberries transition to ripeness much later, usually from July onward into August. A berry has achieved full ripeness when it drops from its stem with barely any pressure—when the connection feels barely there. Full, deep color is another indicator. The most foolproof test is flavor: ripe mulberries explode with sweetness and intensity, while unripe ones taste tart and somewhat chalky.

The Tarp Method

Stretch a broad sheet or heavy canvas beneath the canopy and gently shake the branches. The ripe berries fall freely—unripe ones cling and stay behind. This is by far the fastest way to harvest a medium-sized or large tree. Scoop berries from the tarp into a bowl, and sort out any twigs or leaf debris. Using this technique, I can walk away with 5–8 pounds from a mature tree in less than half an hour. It’s genuinely one of my favorite rituals of the entire year.

Storing Fresh Mulberries

Mulberries spoil quickly. Your window in the refrigerator is narrow—roughly 2–3 days—even if you’re careful with handling. Spread them in a single layer across a baking sheet and place them in the freezer for 2 hours before sliding them into freezer bags. Frozen mulberries stay excellent for up to 12 months. For keeping mulberries throughout the year, I turn to jam, syrup, and fermentation. Check here for a decade’s worth of preservation projects I’ve honed and tested.

Culinary Uses: What to Do With All Those Mulberries

The year my ‘Illinois Everbearing’ hit full maturity, I was looking at over 30 pounds of ripe berries crammed into a six-week window. That abundance demanded creativity. Mulberries reveal themselves to be wonderfully flexible in the kitchen—sweeter than blackberries, less acidic, adaptable to both desserts and savory applications.

Fresh Eating and Simple Preparations

Nothing surpasses eating them fresh, straight off the branch, warm from the sun. Beyond that straightforward pleasure, mulberries integrate beautifully into smoothies, stirred into yogurt, scattered across oatmeal, or mixed into fruit salads. A quick mulberry compote—finished in 10 minutes—transforms pancakes, ice cream, or a cheese platter into something special. Because mulberries are naturally sweet, they typically demand less added sugar than other berry recipes call for.

Preservation and Pantry Uses

Mulberry jam has become my signature gift—it’s practically impossible to find someone who doesn’t love it. The berries themselves are loaded with natural pectin, which means you can usually create a set jam without adding commercial pectin. Mulberry syrup (nothing but berries, sugar, and water, simmered down) keeps in the refrigerator for weeks and works wonderfully swirled into cocktails, mixed into lemonade, or poured across cakes and desserts. If you’re feeling ambitious, mulberry wine is genuinely outstanding—ruby-deep, richly textured, complex.

Dried Mulberries

White mulberries dry beautifully and develop a caramel-toned sweetness through the process. Run them through a food dehydrator set to 135°F for 10–14 hours, or use a low conventional oven (150°F) with the door cracked slightly open. Dried mulberries work well in granola mixes, trail mixes, and baked applications. They’re also among the few mulberry products available commercially, which gives you a useful reference for what properly dried mulberry should taste like.

Common Mistakes and Beginner Questions

Mistake #1: Planting Too Close to Structures

Standard mulberry varieties can stretch to 30–50 feet tall and equally wide at maturity, depending on cultivar. Many people new to the plant underestimate this eventual size and tuck their tree too close to walls, fences, or neighboring trees. Allocate at least 15–20 feet of unobstructed space in every direction for standard varieties. Dwarf cultivars like ‘Gerardi Dwarf’ are comfortable at 6–8 feet. Misjudging this creates problems years later—you’re facing either severe pruning or removal entirely.

Mistake #2: Expecting Fast Fruit from Black Mulberry

Black mulberry trees test your patience relentlessly. Inexperienced growers plant one, watch year two and three pass with no fruit, then worry that something’s broken. Nothing’s broken. Black mulberries operate on their own timeline—often 5–10 years from planting to anything you’d call a genuine crop. If you’re craving fruit soon, begin with ‘Illinois Everbearing’ or ‘Oscar.’ Plant your black mulberry elsewhere as a long-term commitment. The flavor payoff eventually justifies every year of waiting.

Mistake #3: Ignoring the Staining Risk

Mulberry pigment binds permanently to almost everything it touches. Wear disposable clothes during harvest. Reach for stainless steel or glass containers—plastic absorbs the color and never releases it. Any concrete or stone directly beneath the tree’s canopy will discolor as fruit falls. Some growers layer bark mulch under the canopy annually to buffer the staining. Plan for this reality before you dig that planting hole, not in July when it’s too late.

FAQ: Do Mulberries Need a Pollinator?

Most named mulberry cultivars pollinate themselves—you need only one tree to generate a respectable harvest. Certain cultivars do show improved fruit set when a second tree occupies the same space, though. ‘Illinois Everbearing’ and standard white mulberry cultivars are self-fertile without hesitation. If space and budget allow for two trees, go that direction. You’ll almost always see increased production. But a single well-selected mulberry, standing alone, produces generously anyway.

FAQ: Are Mulberries Safe to Eat?

Ripe mulberries—fully colored, soft, sweet—are safe and nutritious for humans and most animals. Unripe white mulberries and the tree’s milky sap are different stories; they contain compounds that can cause digestive upset and hallucinogenic effects if eaten in substantial quantities. NC State Extension categorizes Morus alba as low-toxicity overall, with the unripe fruit and sap flagged as the problematic parts. In practical terms, this almost never matters—unripe mulberries taste so terrible that no one eats them willingly anyway. Berries at full ripeness carry no toxicity concerns whatsoever. As always, if you’re harvesting from an unfamiliar tree, verify its identity confidently before eating significant quantities.

Final Thoughts: Your Complete Guide to Mulberry Trees Starts Here

This complete guide anchors everything I publish on this site. But guides can only carry you so far. Inevitably, you have to put a shovel in the ground and plant the actual tree. I’m telling you with total confidence: a thoughtfully chosen mulberry positioned in the right spot transforms into one of your garden’s most gratifying plants. My own trees have outlasted flower beds that got ripped out, perennial borders that fell out of fashion, and countless “superfoods” that failed to deliver anything resembling their marketing promises.

The essential recipe is straightforward: pick your cultivar based on climate and available space, plant in genuine sunlight with drainage that actually drains, give the tree time to settle in, and then step back. Let it do what mulberries do naturally. For most situations, that cultivar is ‘Illinois Everbearing’—productive early, dependably tasty, and comfortable across a spectrum of conditions.

I’ve walked through 12 different cultivars across my 15 years. Some fell short of my hopes. Most blew past my expectations. Each one handed me something to learn. Get your first good tree in the ground, live with it through its seasons, taste what it produces, and I’m wagering you’ll be planning number two before that first harvest wraps up. Come join the mulberry growers. You’re going to find it tremendously rewarding.

This post contains affiliate links. As an Amazon Associate, I earn from qualifying purchases at no extra cost to you.

My most productive mulberry—a ‘Illinois Everbearing’—yields over 30 pounds of fruit in a single season with virtually zero effort from me. That staggering output, repeated year after year, is what convinced me that backyard mulberry growing isn’t just possible—it’s a game-changer for home orchardists. Fifteen years ago, I bit into a sun-warmed black mulberry fresh from the branch and knew immediately that my entire approach to fruit trees needed to shift. Within months, I’d removed a struggling apple and planted two mulberries to take its place. That decision hasn’t just paid dividends; it’s become the anchor of everything I grow and everything I write about here.

Strangely, mulberries remain nearly invisible in mainstream gardening conversations. Nurseries keep their shelves stocked with apples, peaches, and blueberries while mulberries languish in obscurity—when they’re stocked at all. Most people’s only exposure to mulberries comes from the nursery rhyme, not from actually tasting one. It’s a missed opportunity on a massive scale, because these trees deliver something almost no other fruit tree can: extraordinary productivity with minimal fussing, minimal pest pressure, and flavors that range from simple sweetness to wine-like complexity. I’ve watched my ‘Illinois Everbearing’ pump out 30-plus pounds annually with almost no intervention from my side.

What follows here is the complete picture: the three main species you’ll encounter, how to narrow down which cultivar actually makes sense for your specific situation, planting methodology, ongoing care routines, pruning strategy, disease and pest issues you might face, harvest timing and technique, and ways to actually use the fruit beyond just eating berries straight from your hand. Whether you’re starting from zero or you’ve already got a tree producing and want to squeeze more potential from it, save this page. I revise it continually as my own backyard teaches me new lessons each season.

The Three Main Species of Mulberry Trees

Many people are surprised to learn that mulberries aren’t just one tree—they’re actually several species, each with its own distinct personality and growing requirements. Knowing how these differ from one another will prevent you from buying the wrong species for your particular region or what you’re hoping to harvest. I’ve personally grown specimens from all three, and they’ve each earned their spot in my yard for completely different reasons.

Black Mulberry (Morus nigra)

If mulberries had a flavor hierarchy, black mulberry would sit at the very top. The berries themselves pack layers of flavor—a balance of sweetness and tartness with almost wine-like undertones that linger. This species originated in western Asia and gravitates toward warm, protected microclimates. The real challenge with black mulberry isn’t climate or pests—it’s patience. These trees frustrate beginners because they’re glacially slow to begin bearing. My ‘Chelsea’ black mulberry ate up seven full years before it delivered anything resembling a respectable crop. But here’s the payoff: once mature, a well-tended black mulberry can live for centuries, making it less of an investment in your lifetime and more of a gift to future generations.

White Mulberry (Morus alba)

White mulberry is the overachiever of the trio—fastest-growing, hardiest, most forgiving. It traces its origins back to China, where it was historically grown in massive quantities to feed silkworms destined for silk production. Depending on which cultivar you plant, the berries themselves shift color dramatically: white, or pale rose, or deep plum-purple. Flavor-wise, white mulberry plays it safe—sweetness without the complexity you get in black mulberry. It’s pleasant, approachable, less challenging to the palate. But white mulberry compensates for its straightforward taste with extraordinary adaptability. These trees laugh at poor soil, drought, and temperatures down to USDA Zone 4. If your climate is anything but ideal, white mulberry is almost certainly your answer.

Red Mulberry (Morus rubra)

Red mulberry is the native North American option—it’s the only mulberry species that actually originated on this continent. Its fruit runs toward the larger side, with color a deep burgundy and flavor that lands somewhere between white and black in terms of complexity and punch. I find red mulberry criminally underused among home growers, perhaps because it doesn’t get marketed the way other species do. It reaches USDA Zone 4 without breaking a sweat, handles humidity superbly, and produces with genuine consistency. The real obstacle is sourcing authentic red mulberry. This species cross-pollinates freely with white mulberry, so many trees sold under the red mulberry label are actually hybrids. Before you hand over your money, quiz your nursery about lineage and origin.

Choosing the Best Mulberry Variety for Your Garden

Species is only the beginning of the conversation. Each species contains named cultivars that differ wildly from one another—different sizes, different flavors, different ripening windows, different growth patterns. Picking the correct cultivar at the outset rescues you from years of frustration and wasted space. Below are the cultivars that have lived in my backyard, ones I’ve tasted repeatedly, and ones I recommend without hesitation.

Top Cultivars Worth Growing

  • ‘Illinois Everbearing’ — A hybrid of Morus alba and Morus rubra. Produces tremendous volumes of fruit across a 4–6 week window. Works equally well for fresh consumption and preservation. My top pick for anyone starting out with zero mulberry experience.
  • ‘Oscar’ — Enormous berries, deep red shifting to black, intensely sweet. Grows as a compact tree. Begins fruiting in year two or three. Excellent choice when square footage is limited.
  • ‘Chelsea’ — A textbook black mulberry. Fruits take their time to arrive, but the payoff in flavor is extraordinary. Best suited to Zone 6 and milder regions.
  • ‘Kokuso’ — A Korean-origin white mulberry. Produces aggressively, extends its fruiting season considerably, and survives reliably to Zone 5.
  • ‘Gerardi Dwarf’ — A white mulberry that never exceeds 6 feet. Purpose-built for containers or when you’re working with very tight spatial constraints.
  • ‘Pakistan’ — Grows berries of extraordinary length—sometimes exceeding 3 inches. Delivers rich, concentrated flavor. Requires Zone 7 warmth and genuinely benefits from heat; it’s not worth the effort in cooler regions.

For an in-depth examination of each of these, with detailed flavor comparisons pulled from my own tastings, check here.

Mulberries ripen fast and grow high, so having the right harvesting tool before the season peaks makes a real difference. The DonSail Fruit Picker Pole Tool with Basket Long Handle, 35-65 Inch Adjustable Apple Orange Picker Pole Tool with Basket for Avocado Acorn Lemon Pear Mango Tree Picker adjusts from 35 to 65 inches, letting you reach fruit on mid-height branches without a ladder and without bruising the delicate berries. It’s a sturdy, reusable piece of kit that will earn its place in your garden shed for years of harvests to come.

Fruitless vs. Fruiting Varieties

It bears mentioning: the mulberry world includes trees bred to produce no fruit whatsoever. These fruitless types are marketed as ornamental or shade trees, and they’ve been engineered specifically to eliminate the staining mess that comes with fruit-bearing varieties. Before you accept a mulberry recommendation without question, always verify that it’s actually a fruiting cultivar. For everything discussed in this post, we’re talking exclusively about varieties that produce edible berries.

How to Plant a Mulberry Tree

Mulberries rank among the most accommodating fruit trees you can buy. They don’t fuss the way stone fruits do, and they avoid the temperamental behavior that figs sometimes display in marginal climates. Still, planting methodology matters enormously. A tree planted thoughtfully establishes itself faster and performs better for decades afterward. I’ve planted trees both correctly and poorly, and the gap in first-year establishment speed is striking.

Site Selection

You’ll want a location bathed in sunlight—minimum of 6–8 hours of unobstructed direct sun every single day. Mulberries technically survive in partial shade, but fruit production noticeably declines. Equally important: consider the mess factor. During harvest season, ripe mulberries shed themselves constantly. They leave behind deep purple stains on concrete, paving stones, and clothing that don’t wash out. Position your tree no closer than 15–20 feet from hardscaping you care about. I learned this particular lesson the slow way: my first tree landed 8 feet from a concrete path, and now every June involves scrubbing that path until my hands cramp.

Soil and Drainage

Mulberries exist contentedly in all sorts of soil—sandy soils, clay soils, loamy soils. They’re not fussy. The one absolute requirement is drainage. Mulberry roots despise waterlogging. If your ground is predominantly clay, create a mound or raised bed to funnel water away from the root zone. Aim for a soil pH window between 5.5 and 7.0. Most garden soils naturally fall somewhere in this range, so soil amendment is usually unnecessary.

Planting Steps

  1. Excavate a planting hole between two and three times as wide as the root ball itself, matched in depth to the root ball’s height.
  2. Position your tree so the root flare—the widened section where the roots meet the trunk—sits exactly at grade or slightly proud of the soil surface. Never bury it.
  3. Refill using the soil you removed. Skip the temptation to blend in compost; it often causes drainage headaches.
  4. Deliver water slowly and deliberately right after planting until the soil is thoroughly saturated—roughly 10–15 gallons for a standard nursery container.
  5. Lay down a 3-inch blanket of wood chip mulch across a 3-foot radius, keeping it 3 inches clear of the trunk itself.

Bare-root mulberries should enter the ground in early spring, well before the growing season accelerates. Container-grown stock can be planted anytime from spring through early autumn, though spring planting yields the strongest establishment.

Mulberry Tree Care: Water, Fertilizer, and Ongoing Maintenance

An established mulberry tree demands surprisingly little from you. The first two years after planting are different, though. During that window, attentive care produces noticeable benefits. A mulberry with roots well-established handles heat stress, drought, and indifferent soil with equanimity. A newly planted mulberry cannot yet do any of those things.

Watering

During the first full growing season after planting, supply newly planted trees with deep, soaking watering once or twice per week. Frequency depends on rainfall and how hot it gets. Once the tree’s roots have truly established—generally by the beginning of year two—most mulberries in typical climates need almost no supplemental watering. During an extended dry period, a thorough watering every two or three weeks prevents stress. The more frequent mistake isn’t underwatering; it’s overwatering an already-settled tree.

Fertilizing

Mulberries are modest feeders and don’t clamor for additional nutrition. Once established, most mulberries growing in residential garden soil need zero supplemental fertilization. For young, establishing trees, a balanced-formula fertilizer (something like 10-10-10) applied in early spring—using roughly 1 pound per inch of trunk diameter—supports vigorous development. Avoid nitrogen-heavy products; they channel energy into foliage production at the cost of fruit. In my own orchard, I’ve largely abandoned purchased fertilizers in favor of yearly wood chip mulch as a slow-release nutrient source. The trees have responded beautifully.

Pruning Mulberry Trees

Mulberry pruning is considerably less complicated than pruning most other fruit trees. Your primary objective during the first three years involves building a solid framework. After that, annual pruning keeps things tidy and maintains productivity. Late winter or early spring—right before the tree’s buds swell—is the optimal window. The tree is dormant and won’t bleed sap excessively.

Eliminate branches that cross one another, remove anything dead, and cut away shoots that angle inward toward the tree’s center. Target an open vase configuration that permits light and moving air throughout the canopy. Prune in late spring or summer and you’ll trigger profuse sap bleeding—it’s not lethal but it’s messy and depletes the tree’s reserves. Winter pruning avoids this issue. For a detailed walkthrough with photos from my own trees, head here.

Common Mulberry Pests and Diseases

This is one of the traits that makes me love growing mulberries. They evade the vast catalog of pest and disease mayhem that ransacks apples or cherries. A few issues do warrant your attention, though, so you can intercept them early if they do show up.

If your mulberry tree has been allowed to grow tall — or you planted a vigorous variety like Illinois Everbearing — you’ll quickly discover that a standard picker won’t cut it for the upper canopy. The SISIUPASSIE 26FT Reach Fruit Picker, Apple Picker Pole with Basket Telescoping Tool for Apple Lemon Orange Mango Avocado Fruit Tree Picking extends to a full 26 feet, bringing those high clusters within reach safely from the ground. Investing in a tool with genuine reach means less fruit left to drop and ferment — and a noticeably better harvest yield.

Birds

Birds represent your most formidable “pest” when harvest arrives. They fight intensely for ripe fruit. For trees on the smaller side, bird netting is your most effective solution. Larger trees—mine stretch 15–20 feet tall—make full netting logistically annoying. My strategy has shifted to harvesting frequently and planting surplus trees so there’s enough fruit for both the birds and me. Usually it works.

Fungal Issues

Popcorn disease (the culprit is the fungus Ciboria carunculoides) can strike mulberry fruit, causing berries to balloon grotesquely and fail to develop normally. It’s more prevalent in areas with persistent wetness and humidity. Affected berries become swollen and discolored and need to be picked off and thrown away—don’t compost them. Increasing air circulation via thoughtful pruning helps tremendously with reducing both this and other fungal problems.

Scale Insects and Whitefly

Scale insects sometimes settle into mulberry bark in clusters, looking like tiny brown bumps arranged along the branches. When populations get heavy, they weaken the tree and slash fruit output. A dormant-oil spray applied during winter is the conventional remedy and works reliably if you follow label directions. Whitefly occasionally appears on trees in warm, sheltered locations, but even when it shows up, healthy, properly maintained trees rarely suffer serious consequences.

Harvesting Mulberries: Timing, Techniques, and Storage

Mulberry harvesting operates on totally different principles than harvesting nearly every other fruit crop. You’re not out there picking individual berries one by one—you’re shaking the tree. This paradigm shift changes your entire approach to the harvest season.

When Are Mulberries Ripe?

Ripening schedules shift depending on species and cultivar. White mulberry and its red mulberry hybrids (think ‘Illinois Everbearing’) typically peak between late May and July in regions with temperate climates. Black mulberries transition to ripeness much later, usually from July onward into August. A berry has achieved full ripeness when it drops from its stem with barely any pressure—when the connection feels barely there. Full, deep color is another indicator. The most foolproof test is flavor: ripe mulberries explode with sweetness and intensity, while unripe ones taste tart and somewhat chalky.

The Tarp Method

Stretch a broad sheet or heavy canvas beneath the canopy and gently shake the branches. The ripe berries fall freely—unripe ones cling and stay behind. This is by far the fastest way to harvest a medium-sized or large tree. Scoop berries from the tarp into a bowl, and sort out any twigs or leaf debris. Using this technique, I can walk away with 5–8 pounds from a mature tree in less than half an hour. It’s genuinely one of my favorite rituals of the entire year.

Storing Fresh Mulberries

Mulberries spoil quickly. Your window in the refrigerator is narrow—roughly 2–3 days—even if you’re careful with handling. Spread them in a single layer across a baking sheet and place them in the freezer for 2 hours before sliding them into freezer bags. Frozen mulberries stay excellent for up to 12 months. For keeping mulberries throughout the year, I turn to jam, syrup, and fermentation. Check here for a decade’s worth of preservation projects I’ve honed and tested.

Culinary Uses: What to Do With All Those Mulberries

The year my ‘Illinois Everbearing’ hit full maturity, I was looking at over 30 pounds of ripe berries crammed into a six-week window. That abundance demanded creativity. Mulberries reveal themselves to be wonderfully flexible in the kitchen—sweeter than blackberries, less acidic, adaptable to both desserts and savory applications.

Fresh Eating and Simple Preparations

Nothing surpasses eating them fresh, straight off the branch, warm from the sun. Beyond that straightforward pleasure, mulberries integrate beautifully into smoothies, stirred into yogurt, scattered across oatmeal, or mixed into fruit salads. A quick mulberry compote—finished in 10 minutes—transforms pancakes, ice cream, or a cheese platter into something special. Because mulberries are naturally sweet, they typically demand less added sugar than other berry recipes call for.

Preservation and Pantry Uses

Mulberry jam has become my signature gift—it’s practically impossible to find someone who doesn’t love it. The berries themselves are loaded with natural pectin, which means you can usually create a set jam without adding commercial pectin. Mulberry syrup (nothing but berries, sugar, and water, simmered down) keeps in the refrigerator for weeks and works wonderfully swirled into cocktails, mixed into lemonade, or poured across cakes and desserts. If you’re feeling ambitious, mulberry wine is genuinely outstanding—ruby-deep, richly textured, complex.

Dried Mulberries

White mulberries dry beautifully and develop a caramel-toned sweetness through the process. Run them through a food dehydrator set to 135°F for 10–14 hours, or use a low conventional oven (150°F) with the door cracked slightly open. Dried mulberries work well in granola mixes, trail mixes, and baked applications. They’re also among the few mulberry products available commercially, which gives you a useful reference for what properly dried mulberry should taste like.

Common Mistakes and Beginner Questions

Mistake #1: Planting Too Close to Structures

Standard mulberry varieties can stretch to 30–50 feet tall and equally wide at maturity, depending on cultivar. Many people new to the plant underestimate this eventual size and tuck their tree too close to walls, fences, or neighboring trees. Allocate at least 15–20 feet of unobstructed space in every direction for standard varieties. Dwarf cultivars like ‘Gerardi Dwarf’ are comfortable at 6–8 feet. Misjudging this creates problems years later—you’re facing either severe pruning or removal entirely.

Mistake #2: Expecting Fast Fruit from Black Mulberry

Black mulberry trees test your patience relentlessly. Inexperienced growers plant one, watch year two and three pass with no fruit, then worry that something’s broken. Nothing’s broken. Black mulberries operate on their own timeline—often 5–10 years from planting to anything you’d call a genuine crop. If you’re craving fruit soon, begin with ‘Illinois Everbearing’ or ‘Oscar.’ Plant your black mulberry elsewhere as a long-term commitment. The flavor payoff eventually justifies every year of waiting.

Mistake #3: Ignoring the Staining Risk

Mulberry pigment binds permanently to almost everything it touches. Wear disposable clothes during harvest. Reach for stainless steel or glass containers—plastic absorbs the color and never releases it. Any concrete or stone directly beneath the tree’s canopy will discolor as fruit falls. Some growers layer bark mulch under the canopy annually to buffer the staining. Plan for this reality before you dig that planting hole, not in July when it’s too late.

FAQ: Do Mulberries Need a Pollinator?

Most named mulberry cultivars pollinate themselves—you need only one tree to generate a respectable harvest. Certain cultivars do show improved fruit set when a second tree occupies the same space, though. ‘Illinois Everbearing’ and standard white mulberry cultivars are self-fertile without hesitation. If space and budget allow for two trees, go that direction. You’ll almost always see increased production. But a single well-selected mulberry, standing alone, produces generously anyway.

FAQ: Are Mulberries Safe to Eat?

Ripe mulberries—fully colored, soft, sweet—are safe and nutritious for humans and most animals. Unripe white mulberries and the tree’s milky sap are different stories; they contain compounds that can cause digestive upset and hallucinogenic effects if eaten in substantial quantities. NC State Extension categorizes Morus alba as low-toxicity overall, with the unripe fruit and sap flagged as the problematic parts. In practical terms, this almost never matters—unripe mulberries taste so terrible that no one eats them willingly anyway. Berries at full ripeness carry no toxicity concerns whatsoever. As always, if you’re harvesting from an unfamiliar tree, verify its identity confidently before eating significant quantities.

Final Thoughts: Your Complete Guide to Mulberry Trees Starts Here

This complete guide anchors everything I publish on this site. But guides can only carry you so far. Inevitably, you have to put a shovel in the ground and plant the actual tree. I’m telling you with total confidence: a thoughtfully chosen mulberry positioned in the right spot transforms into one of your garden’s most gratifying plants. My own trees have outlasted flower beds that got ripped out, perennial borders that fell out of fashion, and countless “superfoods” that failed to deliver anything resembling their marketing promises.

The essential recipe is straightforward: pick your cultivar based on climate and available space, plant in genuine sunlight with drainage that actually drains, give the tree time to settle in, and then step back. Let it do what mulberries do naturally. For most situations, that cultivar is ‘Illinois Everbearing’—productive early, dependably tasty, and comfortable across a spectrum of conditions.

I’ve walked through 12 different cultivars across my 15 years. Some fell short of my hopes. Most blew past my expectations. Each one handed me something to learn. Get your first good tree in the ground, live with it through its seasons, taste what it produces, and I’m wagering you’ll be planning number two before that first harvest wraps up. Come join the mulberry growers. You’re going to find it tremendously rewarding.

This post contains affiliate links. As an Amazon Associate, I earn from qualifying purchases at no extra cost to you.

For an in-depth examination of each of these, with detailed flavor comparisons pulled from my own tastings, check here.

Mulberries ripen fast and grow high, so having the right harvesting tool before the season peaks makes a real difference. The DonSail Fruit Picker Pole Tool with Basket Long Handle, 35-65 Inch Adjustable Apple Orange Picker Pole Tool with Basket for Avocado Acorn Lemon Pear Mango Tree Picker adjusts from 35 to 65 inches, letting you reach fruit on mid-height branches without a ladder and without bruising the delicate berries. It’s a sturdy, reusable piece of kit that will earn its place in your garden shed for years of harvests to come.

Fruitless vs. Fruiting Varieties

It bears mentioning: the mulberry world includes trees bred to produce no fruit whatsoever. These fruitless types are marketed as ornamental or shade trees, and they’ve been engineered specifically to eliminate the staining mess that comes with fruit-bearing varieties. Before you accept a mulberry recommendation without question, always verify that it’s actually a fruiting cultivar. For everything discussed in this post, we’re talking exclusively about varieties that produce edible berries.

How to Plant a Mulberry Tree

Mulberries rank among the most accommodating fruit trees you can buy. They don’t fuss the way stone fruits do, and they avoid the temperamental behavior that figs sometimes display in marginal climates. Still, planting methodology matters enormously. A tree planted thoughtfully establishes itself faster and performs better for decades afterward. I’ve planted trees both correctly and poorly, and the gap in first-year establishment speed is striking.

Site Selection

You’ll want a location bathed in sunlight—minimum of 6–8 hours of unobstructed direct sun every single day. Mulberries technically survive in partial shade, but fruit production noticeably declines. Equally important: consider the mess factor. During harvest season, ripe mulberries shed themselves constantly. They leave behind deep purple stains on concrete, paving stones, and clothing that don’t wash out. Position your tree no closer than 15–20 feet from hardscaping you care about. I learned this particular lesson the slow way: my first tree landed 8 feet from a concrete path, and now every June involves scrubbing that path until my hands cramp.

Soil and Drainage

Mulberries exist contentedly in all sorts of soil—sandy soils, clay soils, loamy soils. They’re not fussy. The one absolute requirement is drainage. Mulberry roots despise waterlogging. If your ground is predominantly clay, create a mound or raised bed to funnel water away from the root zone. Aim for a soil pH window between 5.5 and 7.0. Most garden soils naturally fall somewhere in this range, so soil amendment is usually unnecessary.

Planting Steps

  1. Excavate a planting hole between two and three times as wide as the root ball itself, matched in depth to the root ball’s height.
  2. Position your tree so the root flare—the widened section where the roots meet the trunk—sits exactly at grade or slightly proud of the soil surface. Never bury it.
  3. Refill using the soil you removed. Skip the temptation to blend in compost; it often causes drainage headaches.
  4. Deliver water slowly and deliberately right after planting until the soil is thoroughly saturated—roughly 10–15 gallons for a standard nursery container.
  5. Lay down a 3-inch blanket of wood chip mulch across a 3-foot radius, keeping it 3 inches clear of the trunk itself.

Bare-root mulberries should enter the ground in early spring, well before the growing season accelerates. Container-grown stock can be planted anytime from spring through early autumn, though spring planting yields the strongest establishment.

Mulberry Tree Care: Water, Fertilizer, and Ongoing Maintenance

An established mulberry tree demands surprisingly little from you. The first two years after planting are different, though. During that window, attentive care produces noticeable benefits. A mulberry with roots well-established handles heat stress, drought, and indifferent soil with equanimity. A newly planted mulberry cannot yet do any of those things.

Watering

During the first full growing season after planting, supply newly planted trees with deep, soaking watering once or twice per week. Frequency depends on rainfall and how hot it gets. Once the tree’s roots have truly established—generally by the beginning of year two—most mulberries in typical climates need almost no supplemental watering. During an extended dry period, a thorough watering every two or three weeks prevents stress. The more frequent mistake isn’t underwatering; it’s overwatering an already-settled tree.

Fertilizing

Mulberries are modest feeders and don’t clamor for additional nutrition. Once established, most mulberries growing in residential garden soil need zero supplemental fertilization. For young, establishing trees, a balanced-formula fertilizer (something like 10-10-10) applied in early spring—using roughly 1 pound per inch of trunk diameter—supports vigorous development. Avoid nitrogen-heavy products; they channel energy into foliage production at the cost of fruit. In my own orchard, I’ve largely abandoned purchased fertilizers in favor of yearly wood chip mulch as a slow-release nutrient source. The trees have responded beautifully.

Pruning Mulberry Trees

Mulberry pruning is considerably less complicated than pruning most other fruit trees. Your primary objective during the first three years involves building a solid framework. After that, annual pruning keeps things tidy and maintains productivity. Late winter or early spring—right before the tree’s buds swell—is the optimal window. The tree is dormant and won’t bleed sap excessively.

Eliminate branches that cross one another, remove anything dead, and cut away shoots that angle inward toward the tree’s center. Target an open vase configuration that permits light and moving air throughout the canopy. Prune in late spring or summer and you’ll trigger profuse sap bleeding—it’s not lethal but it’s messy and depletes the tree’s reserves. Winter pruning avoids this issue. For a detailed walkthrough with photos from my own trees, head here.

Common Mulberry Pests and Diseases

This is one of the traits that makes me love growing mulberries. They evade the vast catalog of pest and disease mayhem that ransacks apples or cherries. A few issues do warrant your attention, though, so you can intercept them early if they do show up.

If your mulberry tree has been allowed to grow tall — or you planted a vigorous variety like Illinois Everbearing — you’ll quickly discover that a standard picker won’t cut it for the upper canopy. The SISIUPASSIE 26FT Reach Fruit Picker, Apple Picker Pole with Basket Telescoping Tool for Apple Lemon Orange Mango Avocado Fruit Tree Picking extends to a full 26 feet, bringing those high clusters within reach safely from the ground. Investing in a tool with genuine reach means less fruit left to drop and ferment — and a noticeably better harvest yield.

Birds

Birds represent your most formidable “pest” when harvest arrives. They fight intensely for ripe fruit. For trees on the smaller side, bird netting is your most effective solution. Larger trees—mine stretch 15–20 feet tall—make full netting logistically annoying. My strategy has shifted to harvesting frequently and planting surplus trees so there’s enough fruit for both the birds and me. Usually it works.

Fungal Issues

Popcorn disease (the culprit is the fungus Ciboria carunculoides) can strike mulberry fruit, causing berries to balloon grotesquely and fail to develop normally. It’s more prevalent in areas with persistent wetness and humidity. Affected berries become swollen and discolored and need to be picked off and thrown away—don’t compost them. Increasing air circulation via thoughtful pruning helps tremendously with reducing both this and other fungal problems.

Scale Insects and Whitefly

Scale insects sometimes settle into mulberry bark in clusters, looking like tiny brown bumps arranged along the branches. When populations get heavy, they weaken the tree and slash fruit output. A dormant-oil spray applied during winter is the conventional remedy and works reliably if you follow label directions. Whitefly occasionally appears on trees in warm, sheltered locations, but even when it shows up, healthy, properly maintained trees rarely suffer serious consequences.

Harvesting Mulberries: Timing, Techniques, and Storage

Mulberry harvesting operates on totally different principles than harvesting nearly every other fruit crop. You’re not out there picking individual berries one by one—you’re shaking the tree. This paradigm shift changes your entire approach to the harvest season.

When Are Mulberries Ripe?

Ripening schedules shift depending on species and cultivar. White mulberry and its red mulberry hybrids (think ‘Illinois Everbearing’) typically peak between late May and July in regions with temperate climates. Black mulberries transition to ripeness much later, usually from July onward into August. A berry has achieved full ripeness when it drops from its stem with barely any pressure—when the connection feels barely there. Full, deep color is another indicator. The most foolproof test is flavor: ripe mulberries explode with sweetness and intensity, while unripe ones taste tart and somewhat chalky.

The Tarp Method

Stretch a broad sheet or heavy canvas beneath the canopy and gently shake the branches. The ripe berries fall freely—unripe ones cling and stay behind. This is by far the fastest way to harvest a medium-sized or large tree. Scoop berries from the tarp into a bowl, and sort out any twigs or leaf debris. Using this technique, I can walk away with 5–8 pounds from a mature tree in less than half an hour. It’s genuinely one of my favorite rituals of the entire year.

Storing Fresh Mulberries

Mulberries spoil quickly. Your window in the refrigerator is narrow—roughly 2–3 days—even if you’re careful with handling. Spread them in a single layer across a baking sheet and place them in the freezer for 2 hours before sliding them into freezer bags. Frozen mulberries stay excellent for up to 12 months. For keeping mulberries throughout the year, I turn to jam, syrup, and fermentation. Check here for a decade’s worth of preservation projects I’ve honed and tested.

Culinary Uses: What to Do With All Those Mulberries

The year my ‘Illinois Everbearing’ hit full maturity, I was looking at over 30 pounds of ripe berries crammed into a six-week window. That abundance demanded creativity. Mulberries reveal themselves to be wonderfully flexible in the kitchen—sweeter than blackberries, less acidic, adaptable to both desserts and savory applications.

Fresh Eating and Simple Preparations

Nothing surpasses eating them fresh, straight off the branch, warm from the sun. Beyond that straightforward pleasure, mulberries integrate beautifully into smoothies, stirred into yogurt, scattered across oatmeal, or mixed into fruit salads. A quick mulberry compote—finished in 10 minutes—transforms pancakes, ice cream, or a cheese platter into something special. Because mulberries are naturally sweet, they typically demand less added sugar than other berry recipes call for.

Preservation and Pantry Uses

Mulberry jam has become my signature gift—it’s practically impossible to find someone who doesn’t love it. The berries themselves are loaded with natural pectin, which means you can usually create a set jam without adding commercial pectin. Mulberry syrup (nothing but berries, sugar, and water, simmered down) keeps in the refrigerator for weeks and works wonderfully swirled into cocktails, mixed into lemonade, or poured across cakes and desserts. If you’re feeling ambitious, mulberry wine is genuinely outstanding—ruby-deep, richly textured, complex.

Dried Mulberries

White mulberries dry beautifully and develop a caramel-toned sweetness through the process. Run them through a food dehydrator set to 135°F for 10–14 hours, or use a low conventional oven (150°F) with the door cracked slightly open. Dried mulberries work well in granola mixes, trail mixes, and baked applications. They’re also among the few mulberry products available commercially, which gives you a useful reference for what properly dried mulberry should taste like.

Common Mistakes and Beginner Questions

Mistake #1: Planting Too Close to Structures

Standard mulberry varieties can stretch to 30–50 feet tall and equally wide at maturity, depending on cultivar. Many people new to the plant underestimate this eventual size and tuck their tree too close to walls, fences, or neighboring trees. Allocate at least 15–20 feet of unobstructed space in every direction for standard varieties. Dwarf cultivars like ‘Gerardi Dwarf’ are comfortable at 6–8 feet. Misjudging this creates problems years later—you’re facing either severe pruning or removal entirely.

Mistake #2: Expecting Fast Fruit from Black Mulberry

Black mulberry trees test your patience relentlessly. Inexperienced growers plant one, watch year two and three pass with no fruit, then worry that something’s broken. Nothing’s broken. Black mulberries operate on their own timeline—often 5–10 years from planting to anything you’d call a genuine crop. If you’re craving fruit soon, begin with ‘Illinois Everbearing’ or ‘Oscar.’ Plant your black mulberry elsewhere as a long-term commitment. The flavor payoff eventually justifies every year of waiting.

Mistake #3: Ignoring the Staining Risk

Mulberry pigment binds permanently to almost everything it touches. Wear disposable clothes during harvest. Reach for stainless steel or glass containers—plastic absorbs the color and never releases it. Any concrete or stone directly beneath the tree’s canopy will discolor as fruit falls. Some growers layer bark mulch under the canopy annually to buffer the staining. Plan for this reality before you dig that planting hole, not in July when it’s too late.

FAQ: Do Mulberries Need a Pollinator?

Most named mulberry cultivars pollinate themselves—you need only one tree to generate a respectable harvest. Certain cultivars do show improved fruit set when a second tree occupies the same space, though. ‘Illinois Everbearing’ and standard white mulberry cultivars are self-fertile without hesitation. If space and budget allow for two trees, go that direction. You’ll almost always see increased production. But a single well-selected mulberry, standing alone, produces generously anyway.

FAQ: Are Mulberries Safe to Eat?

Ripe mulberries—fully colored, soft, sweet—are safe and nutritious for humans and most animals. Unripe white mulberries and the tree’s milky sap are different stories; they contain compounds that can cause digestive upset and hallucinogenic effects if eaten in substantial quantities. NC State Extension categorizes Morus alba as low-toxicity overall, with the unripe fruit and sap flagged as the problematic parts. In practical terms, this almost never matters—unripe mulberries taste so terrible that no one eats them willingly anyway. Berries at full ripeness carry no toxicity concerns whatsoever. As always, if you’re harvesting from an unfamiliar tree, verify its identity confidently before eating significant quantities.

Final Thoughts: Your Complete Guide to Mulberry Trees Starts Here

This complete guide anchors everything I publish on this site. But guides can only carry you so far. Inevitably, you have to put a shovel in the ground and plant the actual tree. I’m telling you with total confidence: a thoughtfully chosen mulberry positioned in the right spot transforms into one of your garden’s most gratifying plants. My own trees have outlasted flower beds that got ripped out, perennial borders that fell out of fashion, and countless “superfoods” that failed to deliver anything resembling their marketing promises.

The essential recipe is straightforward: pick your cultivar based on climate and available space, plant in genuine sunlight with drainage that actually drains, give the tree time to settle in, and then step back. Let it do what mulberries do naturally. For most situations, that cultivar is ‘Illinois Everbearing’—productive early, dependably tasty, and comfortable across a spectrum of conditions.

I’ve walked through 12 different cultivars across my 15 years. Some fell short of my hopes. Most blew past my expectations. Each one handed me something to learn. Get your first good tree in the ground, live with it through its seasons, taste what it produces, and I’m wagering you’ll be planning number two before that first harvest wraps up. Come join the mulberry growers. You’re going to find it tremendously rewarding.

This post contains affiliate links. As an Amazon Associate, I earn from qualifying purchases at no extra cost to you.

My most productive mulberry—a ‘Illinois Everbearing’—yields over 30 pounds of fruit in a single season with virtually zero effort from me. That staggering output, repeated year after year, is what convinced me that backyard mulberry growing isn’t just possible—it’s a game-changer for home orchardists. Fifteen years ago, I bit into a sun-warmed black mulberry fresh from the branch and knew immediately that my entire approach to fruit trees needed to shift. Within months, I’d removed a struggling apple and planted two mulberries to take its place. That decision hasn’t just paid dividends; it’s become the anchor of everything I grow and everything I write about here.

Strangely, mulberries remain nearly invisible in mainstream gardening conversations. Nurseries keep their shelves stocked with apples, peaches, and blueberries while mulberries languish in obscurity—when they’re stocked at all. Most people’s only exposure to mulberries comes from the nursery rhyme, not from actually tasting one. It’s a missed opportunity on a massive scale, because these trees deliver something almost no other fruit tree can: extraordinary productivity with minimal fussing, minimal pest pressure, and flavors that range from simple sweetness to wine-like complexity. I’ve watched my ‘Illinois Everbearing’ pump out 30-plus pounds annually with almost no intervention from my side.

What follows here is the complete picture: the three main species you’ll encounter, how to narrow down which cultivar actually makes sense for your specific situation, planting methodology, ongoing care routines, pruning strategy, disease and pest issues you might face, harvest timing and technique, and ways to actually use the fruit beyond just eating berries straight from your hand. Whether you’re starting from zero or you’ve already got a tree producing and want to squeeze more potential from it, save this page. I revise it continually as my own backyard teaches me new lessons each season.

The Three Main Species of Mulberry Trees

Many people are surprised to learn that mulberries aren’t just one tree—they’re actually several species, each with its own distinct personality and growing requirements. Knowing how these differ from one another will prevent you from buying the wrong species for your particular region or what you’re hoping to harvest. I’ve personally grown specimens from all three, and they’ve each earned their spot in my yard for completely different reasons.

Black Mulberry (Morus nigra)

If mulberries had a flavor hierarchy, black mulberry would sit at the very top. The berries themselves pack layers of flavor—a balance of sweetness and tartness with almost wine-like undertones that linger. This species originated in western Asia and gravitates toward warm, protected microclimates. The real challenge with black mulberry isn’t climate or pests—it’s patience. These trees frustrate beginners because they’re glacially slow to begin bearing. My ‘Chelsea’ black mulberry ate up seven full years before it delivered anything resembling a respectable crop. But here’s the payoff: once mature, a well-tended black mulberry can live for centuries, making it less of an investment in your lifetime and more of a gift to future generations.

White Mulberry (Morus alba)

White mulberry is the overachiever of the trio—fastest-growing, hardiest, most forgiving. It traces its origins back to China, where it was historically grown in massive quantities to feed silkworms destined for silk production. Depending on which cultivar you plant, the berries themselves shift color dramatically: white, or pale rose, or deep plum-purple. Flavor-wise, white mulberry plays it safe—sweetness without the complexity you get in black mulberry. It’s pleasant, approachable, less challenging to the palate. But white mulberry compensates for its straightforward taste with extraordinary adaptability. These trees laugh at poor soil, drought, and temperatures down to USDA Zone 4. If your climate is anything but ideal, white mulberry is almost certainly your answer.

Red Mulberry (Morus rubra)

Red mulberry is the native North American option—it’s the only mulberry species that actually originated on this continent. Its fruit runs toward the larger side, with color a deep burgundy and flavor that lands somewhere between white and black in terms of complexity and punch. I find red mulberry criminally underused among home growers, perhaps because it doesn’t get marketed the way other species do. It reaches USDA Zone 4 without breaking a sweat, handles humidity superbly, and produces with genuine consistency. The real obstacle is sourcing authentic red mulberry. This species cross-pollinates freely with white mulberry, so many trees sold under the red mulberry label are actually hybrids. Before you hand over your money, quiz your nursery about lineage and origin.

Choosing the Best Mulberry Variety for Your Garden

Species is only the beginning of the conversation. Each species contains named cultivars that differ wildly from one another—different sizes, different flavors, different ripening windows, different growth patterns. Picking the correct cultivar at the outset rescues you from years of frustration and wasted space. Below are the cultivars that have lived in my backyard, ones I’ve tasted repeatedly, and ones I recommend without hesitation.

Top Cultivars Worth Growing

  • ‘Illinois Everbearing’ — A hybrid of Morus alba and Morus rubra. Produces tremendous volumes of fruit across a 4–6 week window. Works equally well for fresh consumption and preservation. My top pick for anyone starting out with zero mulberry experience.
  • ‘Oscar’ — Enormous berries, deep red shifting to black, intensely sweet. Grows as a compact tree. Begins fruiting in year two or three. Excellent choice when square footage is limited.
  • ‘Chelsea’ — A textbook black mulberry. Fruits take their time to arrive, but the payoff in flavor is extraordinary. Best suited to Zone 6 and milder regions.
  • ‘Kokuso’ — A Korean-origin white mulberry. Produces aggressively, extends its fruiting season considerably, and survives reliably to Zone 5.
  • ‘Gerardi Dwarf’ — A white mulberry that never exceeds 6 feet. Purpose-built for containers or when you’re working with very tight spatial constraints.
  • ‘Pakistan’ — Grows berries of extraordinary length—sometimes exceeding 3 inches. Delivers rich, concentrated flavor. Requires Zone 7 warmth and genuinely benefits from heat; it’s not worth the effort in cooler regions.

For an in-depth examination of each of these, with detailed flavor comparisons pulled from my own tastings, check here.

Mulberries ripen fast and grow high, so having the right harvesting tool before the season peaks makes a real difference. The DonSail Fruit Picker Pole Tool with Basket Long Handle, 35-65 Inch Adjustable Apple Orange Picker Pole Tool with Basket for Avocado Acorn Lemon Pear Mango Tree Picker adjusts from 35 to 65 inches, letting you reach fruit on mid-height branches without a ladder and without bruising the delicate berries. It’s a sturdy, reusable piece of kit that will earn its place in your garden shed for years of harvests to come.

Fruitless vs. Fruiting Varieties

It bears mentioning: the mulberry world includes trees bred to produce no fruit whatsoever. These fruitless types are marketed as ornamental or shade trees, and they’ve been engineered specifically to eliminate the staining mess that comes with fruit-bearing varieties. Before you accept a mulberry recommendation without question, always verify that it’s actually a fruiting cultivar. For everything discussed in this post, we’re talking exclusively about varieties that produce edible berries.

How to Plant a Mulberry Tree

Mulberries rank among the most accommodating fruit trees you can buy. They don’t fuss the way stone fruits do, and they avoid the temperamental behavior that figs sometimes display in marginal climates. Still, planting methodology matters enormously. A tree planted thoughtfully establishes itself faster and performs better for decades afterward. I’ve planted trees both correctly and poorly, and the gap in first-year establishment speed is striking.

Site Selection

You’ll want a location bathed in sunlight—minimum of 6–8 hours of unobstructed direct sun every single day. Mulberries technically survive in partial shade, but fruit production noticeably declines. Equally important: consider the mess factor. During harvest season, ripe mulberries shed themselves constantly. They leave behind deep purple stains on concrete, paving stones, and clothing that don’t wash out. Position your tree no closer than 15–20 feet from hardscaping you care about. I learned this particular lesson the slow way: my first tree landed 8 feet from a concrete path, and now every June involves scrubbing that path until my hands cramp.

Soil and Drainage

Mulberries exist contentedly in all sorts of soil—sandy soils, clay soils, loamy soils. They’re not fussy. The one absolute requirement is drainage. Mulberry roots despise waterlogging. If your ground is predominantly clay, create a mound or raised bed to funnel water away from the root zone. Aim for a soil pH window between 5.5 and 7.0. Most garden soils naturally fall somewhere in this range, so soil amendment is usually unnecessary.

Planting Steps

  1. Excavate a planting hole between two and three times as wide as the root ball itself, matched in depth to the root ball’s height.
  2. Position your tree so the root flare—the widened section where the roots meet the trunk—sits exactly at grade or slightly proud of the soil surface. Never bury it.
  3. Refill using the soil you removed. Skip the temptation to blend in compost; it often causes drainage headaches.
  4. Deliver water slowly and deliberately right after planting until the soil is thoroughly saturated—roughly 10–15 gallons for a standard nursery container.
  5. Lay down a 3-inch blanket of wood chip mulch across a 3-foot radius, keeping it 3 inches clear of the trunk itself.

Bare-root mulberries should enter the ground in early spring, well before the growing season accelerates. Container-grown stock can be planted anytime from spring through early autumn, though spring planting yields the strongest establishment.

Mulberry Tree Care: Water, Fertilizer, and Ongoing Maintenance

An established mulberry tree demands surprisingly little from you. The first two years after planting are different, though. During that window, attentive care produces noticeable benefits. A mulberry with roots well-established handles heat stress, drought, and indifferent soil with equanimity. A newly planted mulberry cannot yet do any of those things.

Watering

During the first full growing season after planting, supply newly planted trees with deep, soaking watering once or twice per week. Frequency depends on rainfall and how hot it gets. Once the tree’s roots have truly established—generally by the beginning of year two—most mulberries in typical climates need almost no supplemental watering. During an extended dry period, a thorough watering every two or three weeks prevents stress. The more frequent mistake isn’t underwatering; it’s overwatering an already-settled tree.

Fertilizing

Mulberries are modest feeders and don’t clamor for additional nutrition. Once established, most mulberries growing in residential garden soil need zero supplemental fertilization. For young, establishing trees, a balanced-formula fertilizer (something like 10-10-10) applied in early spring—using roughly 1 pound per inch of trunk diameter—supports vigorous development. Avoid nitrogen-heavy products; they channel energy into foliage production at the cost of fruit. In my own orchard, I’ve largely abandoned purchased fertilizers in favor of yearly wood chip mulch as a slow-release nutrient source. The trees have responded beautifully.

Pruning Mulberry Trees

Mulberry pruning is considerably less complicated than pruning most other fruit trees. Your primary objective during the first three years involves building a solid framework. After that, annual pruning keeps things tidy and maintains productivity. Late winter or early spring—right before the tree’s buds swell—is the optimal window. The tree is dormant and won’t bleed sap excessively.

Eliminate branches that cross one another, remove anything dead, and cut away shoots that angle inward toward the tree’s center. Target an open vase configuration that permits light and moving air throughout the canopy. Prune in late spring or summer and you’ll trigger profuse sap bleeding—it’s not lethal but it’s messy and depletes the tree’s reserves. Winter pruning avoids this issue. For a detailed walkthrough with photos from my own trees, head here.

Common Mulberry Pests and Diseases

This is one of the traits that makes me love growing mulberries. They evade the vast catalog of pest and disease mayhem that ransacks apples or cherries. A few issues do warrant your attention, though, so you can intercept them early if they do show up.

If your mulberry tree has been allowed to grow tall — or you planted a vigorous variety like Illinois Everbearing — you’ll quickly discover that a standard picker won’t cut it for the upper canopy. The SISIUPASSIE 26FT Reach Fruit Picker, Apple Picker Pole with Basket Telescoping Tool for Apple Lemon Orange Mango Avocado Fruit Tree Picking extends to a full 26 feet, bringing those high clusters within reach safely from the ground. Investing in a tool with genuine reach means less fruit left to drop and ferment — and a noticeably better harvest yield.

Birds

Birds represent your most formidable “pest” when harvest arrives. They fight intensely for ripe fruit. For trees on the smaller side, bird netting is your most effective solution. Larger trees—mine stretch 15–20 feet tall—make full netting logistically annoying. My strategy has shifted to harvesting frequently and planting surplus trees so there’s enough fruit for both the birds and me. Usually it works.

Fungal Issues

Popcorn disease (the culprit is the fungus Ciboria carunculoides) can strike mulberry fruit, causing berries to balloon grotesquely and fail to develop normally. It’s more prevalent in areas with persistent wetness and humidity. Affected berries become swollen and discolored and need to be picked off and thrown away—don’t compost them. Increasing air circulation via thoughtful pruning helps tremendously with reducing both this and other fungal problems.

Scale Insects and Whitefly

Scale insects sometimes settle into mulberry bark in clusters, looking like tiny brown bumps arranged along the branches. When populations get heavy, they weaken the tree and slash fruit output. A dormant-oil spray applied during winter is the conventional remedy and works reliably if you follow label directions. Whitefly occasionally appears on trees in warm, sheltered locations, but even when it shows up, healthy, properly maintained trees rarely suffer serious consequences.

Harvesting Mulberries: Timing, Techniques, and Storage

Mulberry harvesting operates on totally different principles than harvesting nearly every other fruit crop. You’re not out there picking individual berries one by one—you’re shaking the tree. This paradigm shift changes your entire approach to the harvest season.

When Are Mulberries Ripe?

Ripening schedules shift depending on species and cultivar. White mulberry and its red mulberry hybrids (think ‘Illinois Everbearing’) typically peak between late May and July in regions with temperate climates. Black mulberries transition to ripeness much later, usually from July onward into August. A berry has achieved full ripeness when it drops from its stem with barely any pressure—when the connection feels barely there. Full, deep color is another indicator. The most foolproof test is flavor: ripe mulberries explode with sweetness and intensity, while unripe ones taste tart and somewhat chalky.

The Tarp Method

Stretch a broad sheet or heavy canvas beneath the canopy and gently shake the branches. The ripe berries fall freely—unripe ones cling and stay behind. This is by far the fastest way to harvest a medium-sized or large tree. Scoop berries from the tarp into a bowl, and sort out any twigs or leaf debris. Using this technique, I can walk away with 5–8 pounds from a mature tree in less than half an hour. It’s genuinely one of my favorite rituals of the entire year.

Storing Fresh Mulberries

Mulberries spoil quickly. Your window in the refrigerator is narrow—roughly 2–3 days—even if you’re careful with handling. Spread them in a single layer across a baking sheet and place them in the freezer for 2 hours before sliding them into freezer bags. Frozen mulberries stay excellent for up to 12 months. For keeping mulberries throughout the year, I turn to jam, syrup, and fermentation. Check here for a decade’s worth of preservation projects I’ve honed and tested.

Culinary Uses: What to Do With All Those Mulberries

The year my ‘Illinois Everbearing’ hit full maturity, I was looking at over 30 pounds of ripe berries crammed into a six-week window. That abundance demanded creativity. Mulberries reveal themselves to be wonderfully flexible in the kitchen—sweeter than blackberries, less acidic, adaptable to both desserts and savory applications.

Fresh Eating and Simple Preparations

Nothing surpasses eating them fresh, straight off the branch, warm from the sun. Beyond that straightforward pleasure, mulberries integrate beautifully into smoothies, stirred into yogurt, scattered across oatmeal, or mixed into fruit salads. A quick mulberry compote—finished in 10 minutes—transforms pancakes, ice cream, or a cheese platter into something special. Because mulberries are naturally sweet, they typically demand less added sugar than other berry recipes call for.

Preservation and Pantry Uses

Mulberry jam has become my signature gift—it’s practically impossible to find someone who doesn’t love it. The berries themselves are loaded with natural pectin, which means you can usually create a set jam without adding commercial pectin. Mulberry syrup (nothing but berries, sugar, and water, simmered down) keeps in the refrigerator for weeks and works wonderfully swirled into cocktails, mixed into lemonade, or poured across cakes and desserts. If you’re feeling ambitious, mulberry wine is genuinely outstanding—ruby-deep, richly textured, complex.

Dried Mulberries

White mulberries dry beautifully and develop a caramel-toned sweetness through the process. Run them through a food dehydrator set to 135°F for 10–14 hours, or use a low conventional oven (150°F) with the door cracked slightly open. Dried mulberries work well in granola mixes, trail mixes, and baked applications. They’re also among the few mulberry products available commercially, which gives you a useful reference for what properly dried mulberry should taste like.

Common Mistakes and Beginner Questions

Mistake #1: Planting Too Close to Structures

Standard mulberry varieties can stretch to 30–50 feet tall and equally wide at maturity, depending on cultivar. Many people new to the plant underestimate this eventual size and tuck their tree too close to walls, fences, or neighboring trees. Allocate at least 15–20 feet of unobstructed space in every direction for standard varieties. Dwarf cultivars like ‘Gerardi Dwarf’ are comfortable at 6–8 feet. Misjudging this creates problems years later—you’re facing either severe pruning or removal entirely.

Mistake #2: Expecting Fast Fruit from Black Mulberry

Black mulberry trees test your patience relentlessly. Inexperienced growers plant one, watch year two and three pass with no fruit, then worry that something’s broken. Nothing’s broken. Black mulberries operate on their own timeline—often 5–10 years from planting to anything you’d call a genuine crop. If you’re craving fruit soon, begin with ‘Illinois Everbearing’ or ‘Oscar.’ Plant your black mulberry elsewhere as a long-term commitment. The flavor payoff eventually justifies every year of waiting.

Mistake #3: Ignoring the Staining Risk

Mulberry pigment binds permanently to almost everything it touches. Wear disposable clothes during harvest. Reach for stainless steel or glass containers—plastic absorbs the color and never releases it. Any concrete or stone directly beneath the tree’s canopy will discolor as fruit falls. Some growers layer bark mulch under the canopy annually to buffer the staining. Plan for this reality before you dig that planting hole, not in July when it’s too late.

FAQ: Do Mulberries Need a Pollinator?

Most named mulberry cultivars pollinate themselves—you need only one tree to generate a respectable harvest. Certain cultivars do show improved fruit set when a second tree occupies the same space, though. ‘Illinois Everbearing’ and standard white mulberry cultivars are self-fertile without hesitation. If space and budget allow for two trees, go that direction. You’ll almost always see increased production. But a single well-selected mulberry, standing alone, produces generously anyway.

FAQ: Are Mulberries Safe to Eat?

Ripe mulberries—fully colored, soft, sweet—are safe and nutritious for humans and most animals. Unripe white mulberries and the tree’s milky sap are different stories; they contain compounds that can cause digestive upset and hallucinogenic effects if eaten in substantial quantities. NC State Extension categorizes Morus alba as low-toxicity overall, with the unripe fruit and sap flagged as the problematic parts. In practical terms, this almost never matters—unripe mulberries taste so terrible that no one eats them willingly anyway. Berries at full ripeness carry no toxicity concerns whatsoever. As always, if you’re harvesting from an unfamiliar tree, verify its identity confidently before eating significant quantities.

Final Thoughts: Your Complete Guide to Mulberry Trees Starts Here

This complete guide anchors everything I publish on this site. But guides can only carry you so far. Inevitably, you have to put a shovel in the ground and plant the actual tree. I’m telling you with total confidence: a thoughtfully chosen mulberry positioned in the right spot transforms into one of your garden’s most gratifying plants. My own trees have outlasted flower beds that got ripped out, perennial borders that fell out of fashion, and countless “superfoods” that failed to deliver anything resembling their marketing promises.

The essential recipe is straightforward: pick your cultivar based on climate and available space, plant in genuine sunlight with drainage that actually drains, give the tree time to settle in, and then step back. Let it do what mulberries do naturally. For most situations, that cultivar is ‘Illinois Everbearing’—productive early, dependably tasty, and comfortable across a spectrum of conditions.

I’ve walked through 12 different cultivars across my 15 years. Some fell short of my hopes. Most blew past my expectations. Each one handed me something to learn. Get your first good tree in the ground, live with it through its seasons, taste what it produces, and I’m wagering you’ll be planning number two before that first harvest wraps up. Come join the mulberry growers. You’re going to find it tremendously rewarding.

This post contains affiliate links. As an Amazon Associate, I earn from qualifying purchases at no extra cost to you.

This is one of the traits that makes me love growing mulberries. They evade the vast catalog of pest and disease mayhem that ransacks apples or cherries. A few issues do warrant your attention, though, so you can intercept them early if they do show up.

If your mulberry tree has been allowed to grow tall — or you planted a vigorous variety like Illinois Everbearing — you’ll quickly discover that a standard picker won’t cut it for the upper canopy. The SISIUPASSIE 26FT Reach Fruit Picker, Apple Picker Pole with Basket Telescoping Tool for Apple Lemon Orange Mango Avocado Fruit Tree Picking extends to a full 26 feet, bringing those high clusters within reach safely from the ground. Investing in a tool with genuine reach means less fruit left to drop and ferment — and a noticeably better harvest yield.

Birds

Birds represent your most formidable “pest” when harvest arrives. They fight intensely for ripe fruit. For trees on the smaller side, bird netting is your most effective solution. Larger trees—mine stretch 15–20 feet tall—make full netting logistically annoying. My strategy has shifted to harvesting frequently and planting surplus trees so there’s enough fruit for both the birds and me. Usually it works.

Fungal Issues

Popcorn disease (the culprit is the fungus Ciboria carunculoides) can strike mulberry fruit, causing berries to balloon grotesquely and fail to develop normally. It’s more prevalent in areas with persistent wetness and humidity. Affected berries become swollen and discolored and need to be picked off and thrown away—don’t compost them. Increasing air circulation via thoughtful pruning helps tremendously with reducing both this and other fungal problems.

Scale Insects and Whitefly

Scale insects sometimes settle into mulberry bark in clusters, looking like tiny brown bumps arranged along the branches. When populations get heavy, they weaken the tree and slash fruit output. A dormant-oil spray applied during winter is the conventional remedy and works reliably if you follow label directions. Whitefly occasionally appears on trees in warm, sheltered locations, but even when it shows up, healthy, properly maintained trees rarely suffer serious consequences.

Harvesting Mulberries: Timing, Techniques, and Storage

Mulberry harvesting operates on totally different principles than harvesting nearly every other fruit crop. You’re not out there picking individual berries one by one—you’re shaking the tree. This paradigm shift changes your entire approach to the harvest season.

When Are Mulberries Ripe?

Ripening schedules shift depending on species and cultivar. White mulberry and its red mulberry hybrids (think ‘Illinois Everbearing’) typically peak between late May and July in regions with temperate climates. Black mulberries transition to ripeness much later, usually from July onward into August. A berry has achieved full ripeness when it drops from its stem with barely any pressure—when the connection feels barely there. Full, deep color is another indicator. The most foolproof test is flavor: ripe mulberries explode with sweetness and intensity, while unripe ones taste tart and somewhat chalky.

The Tarp Method

Stretch a broad sheet or heavy canvas beneath the canopy and gently shake the branches. The ripe berries fall freely—unripe ones cling and stay behind. This is by far the fastest way to harvest a medium-sized or large tree. Scoop berries from the tarp into a bowl, and sort out any twigs or leaf debris. Using this technique, I can walk away with 5–8 pounds from a mature tree in less than half an hour. It’s genuinely one of my favorite rituals of the entire year.

Storing Fresh Mulberries

Mulberries spoil quickly. Your window in the refrigerator is narrow—roughly 2–3 days—even if you’re careful with handling. Spread them in a single layer across a baking sheet and place them in the freezer for 2 hours before sliding them into freezer bags. Frozen mulberries stay excellent for up to 12 months. For keeping mulberries throughout the year, I turn to jam, syrup, and fermentation. Check here for a decade’s worth of preservation projects I’ve honed and tested.

Culinary Uses: What to Do With All Those Mulberries

The year my ‘Illinois Everbearing’ hit full maturity, I was looking at over 30 pounds of ripe berries crammed into a six-week window. That abundance demanded creativity. Mulberries reveal themselves to be wonderfully flexible in the kitchen—sweeter than blackberries, less acidic, adaptable to both desserts and savory applications.

Fresh Eating and Simple Preparations

Nothing surpasses eating them fresh, straight off the branch, warm from the sun. Beyond that straightforward pleasure, mulberries integrate beautifully into smoothies, stirred into yogurt, scattered across oatmeal, or mixed into fruit salads. A quick mulberry compote—finished in 10 minutes—transforms pancakes, ice cream, or a cheese platter into something special. Because mulberries are naturally sweet, they typically demand less added sugar than other berry recipes call for.

Preservation and Pantry Uses

Mulberry jam has become my signature gift—it’s practically impossible to find someone who doesn’t love it. The berries themselves are loaded with natural pectin, which means you can usually create a set jam without adding commercial pectin. Mulberry syrup (nothing but berries, sugar, and water, simmered down) keeps in the refrigerator for weeks and works wonderfully swirled into cocktails, mixed into lemonade, or poured across cakes and desserts. If you’re feeling ambitious, mulberry wine is genuinely outstanding—ruby-deep, richly textured, complex.

Dried Mulberries

White mulberries dry beautifully and develop a caramel-toned sweetness through the process. Run them through a food dehydrator set to 135°F for 10–14 hours, or use a low conventional oven (150°F) with the door cracked slightly open. Dried mulberries work well in granola mixes, trail mixes, and baked applications. They’re also among the few mulberry products available commercially, which gives you a useful reference for what properly dried mulberry should taste like.

Common Mistakes and Beginner Questions

Mistake #1: Planting Too Close to Structures

Standard mulberry varieties can stretch to 30–50 feet tall and equally wide at maturity, depending on cultivar. Many people new to the plant underestimate this eventual size and tuck their tree too close to walls, fences, or neighboring trees. Allocate at least 15–20 feet of unobstructed space in every direction for standard varieties. Dwarf cultivars like ‘Gerardi Dwarf’ are comfortable at 6–8 feet. Misjudging this creates problems years later—you’re facing either severe pruning or removal entirely.

Mistake #2: Expecting Fast Fruit from Black Mulberry

Black mulberry trees test your patience relentlessly. Inexperienced growers plant one, watch year two and three pass with no fruit, then worry that something’s broken. Nothing’s broken. Black mulberries operate on their own timeline—often 5–10 years from planting to anything you’d call a genuine crop. If you’re craving fruit soon, begin with ‘Illinois Everbearing’ or ‘Oscar.’ Plant your black mulberry elsewhere as a long-term commitment. The flavor payoff eventually justifies every year of waiting.

Mistake #3: Ignoring the Staining Risk

Mulberry pigment binds permanently to almost everything it touches. Wear disposable clothes during harvest. Reach for stainless steel or glass containers—plastic absorbs the color and never releases it. Any concrete or stone directly beneath the tree’s canopy will discolor as fruit falls. Some growers layer bark mulch under the canopy annually to buffer the staining. Plan for this reality before you dig that planting hole, not in July when it’s too late.

FAQ: Do Mulberries Need a Pollinator?

Most named mulberry cultivars pollinate themselves—you need only one tree to generate a respectable harvest. Certain cultivars do show improved fruit set when a second tree occupies the same space, though. ‘Illinois Everbearing’ and standard white mulberry cultivars are self-fertile without hesitation. If space and budget allow for two trees, go that direction. You’ll almost always see increased production. But a single well-selected mulberry, standing alone, produces generously anyway.

FAQ: Are Mulberries Safe to Eat?

Ripe mulberries—fully colored, soft, sweet—are safe and nutritious for humans and most animals. Unripe white mulberries and the tree’s milky sap are different stories; they contain compounds that can cause digestive upset and hallucinogenic effects if eaten in substantial quantities. NC State Extension categorizes Morus alba as low-toxicity overall, with the unripe fruit and sap flagged as the problematic parts. In practical terms, this almost never matters—unripe mulberries taste so terrible that no one eats them willingly anyway. Berries at full ripeness carry no toxicity concerns whatsoever. As always, if you’re harvesting from an unfamiliar tree, verify its identity confidently before eating significant quantities.

Final Thoughts: Your Complete Guide to Mulberry Trees Starts Here

This complete guide anchors everything I publish on this site. But guides can only carry you so far. Inevitably, you have to put a shovel in the ground and plant the actual tree. I’m telling you with total confidence: a thoughtfully chosen mulberry positioned in the right spot transforms into one of your garden’s most gratifying plants. My own trees have outlasted flower beds that got ripped out, perennial borders that fell out of fashion, and countless “superfoods” that failed to deliver anything resembling their marketing promises.

The essential recipe is straightforward: pick your cultivar based on climate and available space, plant in genuine sunlight with drainage that actually drains, give the tree time to settle in, and then step back. Let it do what mulberries do naturally. For most situations, that cultivar is ‘Illinois Everbearing’—productive early, dependably tasty, and comfortable across a spectrum of conditions.

I’ve walked through 12 different cultivars across my 15 years. Some fell short of my hopes. Most blew past my expectations. Each one handed me something to learn. Get your first good tree in the ground, live with it through its seasons, taste what it produces, and I’m wagering you’ll be planning number two before that first harvest wraps up. Come join the mulberry growers. You’re going to find it tremendously rewarding.

This post contains affiliate links. As an Amazon Associate, I earn from qualifying purchases at no extra cost to you.

For an in-depth examination of each of these, with detailed flavor comparisons pulled from my own tastings, check here.

Mulberries ripen fast and grow high, so having the right harvesting tool before the season peaks makes a real difference. The DonSail Fruit Picker Pole Tool with Basket Long Handle, 35-65 Inch Adjustable Apple Orange Picker Pole Tool with Basket for Avocado Acorn Lemon Pear Mango Tree Picker adjusts from 35 to 65 inches, letting you reach fruit on mid-height branches without a ladder and without bruising the delicate berries. It’s a sturdy, reusable piece of kit that will earn its place in your garden shed for years of harvests to come.

Fruitless vs. Fruiting Varieties

It bears mentioning: the mulberry world includes trees bred to produce no fruit whatsoever. These fruitless types are marketed as ornamental or shade trees, and they’ve been engineered specifically to eliminate the staining mess that comes with fruit-bearing varieties. Before you accept a mulberry recommendation without question, always verify that it’s actually a fruiting cultivar. For everything discussed in this post, we’re talking exclusively about varieties that produce edible berries.

How to Plant a Mulberry Tree

Mulberries rank among the most accommodating fruit trees you can buy. They don’t fuss the way stone fruits do, and they avoid the temperamental behavior that figs sometimes display in marginal climates. Still, planting methodology matters enormously. A tree planted thoughtfully establishes itself faster and performs better for decades afterward. I’ve planted trees both correctly and poorly, and the gap in first-year establishment speed is striking.

Site Selection

You’ll want a location bathed in sunlight—minimum of 6–8 hours of unobstructed direct sun every single day. Mulberries technically survive in partial shade, but fruit production noticeably declines. Equally important: consider the mess factor. During harvest season, ripe mulberries shed themselves constantly. They leave behind deep purple stains on concrete, paving stones, and clothing that don’t wash out. Position your tree no closer than 15–20 feet from hardscaping you care about. I learned this particular lesson the slow way: my first tree landed 8 feet from a concrete path, and now every June involves scrubbing that path until my hands cramp.

Soil and Drainage

Mulberries exist contentedly in all sorts of soil—sandy soils, clay soils, loamy soils. They’re not fussy. The one absolute requirement is drainage. Mulberry roots despise waterlogging. If your ground is predominantly clay, create a mound or raised bed to funnel water away from the root zone. Aim for a soil pH window between 5.5 and 7.0. Most garden soils naturally fall somewhere in this range, so soil amendment is usually unnecessary.

Planting Steps

  1. Excavate a planting hole between two and three times as wide as the root ball itself, matched in depth to the root ball’s height.
  2. Position your tree so the root flare—the widened section where the roots meet the trunk—sits exactly at grade or slightly proud of the soil surface. Never bury it.
  3. Refill using the soil you removed. Skip the temptation to blend in compost; it often causes drainage headaches.
  4. Deliver water slowly and deliberately right after planting until the soil is thoroughly saturated—roughly 10–15 gallons for a standard nursery container.
  5. Lay down a 3-inch blanket of wood chip mulch across a 3-foot radius, keeping it 3 inches clear of the trunk itself.

Bare-root mulberries should enter the ground in early spring, well before the growing season accelerates. Container-grown stock can be planted anytime from spring through early autumn, though spring planting yields the strongest establishment.

Mulberry Tree Care: Water, Fertilizer, and Ongoing Maintenance

An established mulberry tree demands surprisingly little from you. The first two years after planting are different, though. During that window, attentive care produces noticeable benefits. A mulberry with roots well-established handles heat stress, drought, and indifferent soil with equanimity. A newly planted mulberry cannot yet do any of those things.

Watering

During the first full growing season after planting, supply newly planted trees with deep, soaking watering once or twice per week. Frequency depends on rainfall and how hot it gets. Once the tree’s roots have truly established—generally by the beginning of year two—most mulberries in typical climates need almost no supplemental watering. During an extended dry period, a thorough watering every two or three weeks prevents stress. The more frequent mistake isn’t underwatering; it’s overwatering an already-settled tree.

Fertilizing

Mulberries are modest feeders and don’t clamor for additional nutrition. Once established, most mulberries growing in residential garden soil need zero supplemental fertilization. For young, establishing trees, a balanced-formula fertilizer (something like 10-10-10) applied in early spring—using roughly 1 pound per inch of trunk diameter—supports vigorous development. Avoid nitrogen-heavy products; they channel energy into foliage production at the cost of fruit. In my own orchard, I’ve largely abandoned purchased fertilizers in favor of yearly wood chip mulch as a slow-release nutrient source. The trees have responded beautifully.

Pruning Mulberry Trees

Mulberry pruning is considerably less complicated than pruning most other fruit trees. Your primary objective during the first three years involves building a solid framework. After that, annual pruning keeps things tidy and maintains productivity. Late winter or early spring—right before the tree’s buds swell—is the optimal window. The tree is dormant and won’t bleed sap excessively.

Eliminate branches that cross one another, remove anything dead, and cut away shoots that angle inward toward the tree’s center. Target an open vase configuration that permits light and moving air throughout the canopy. Prune in late spring or summer and you’ll trigger profuse sap bleeding—it’s not lethal but it’s messy and depletes the tree’s reserves. Winter pruning avoids this issue. For a detailed walkthrough with photos from my own trees, head here.

Common Mulberry Pests and Diseases

This is one of the traits that makes me love growing mulberries. They evade the vast catalog of pest and disease mayhem that ransacks apples or cherries. A few issues do warrant your attention, though, so you can intercept them early if they do show up.

If your mulberry tree has been allowed to grow tall — or you planted a vigorous variety like Illinois Everbearing — you’ll quickly discover that a standard picker won’t cut it for the upper canopy. The SISIUPASSIE 26FT Reach Fruit Picker, Apple Picker Pole with Basket Telescoping Tool for Apple Lemon Orange Mango Avocado Fruit Tree Picking extends to a full 26 feet, bringing those high clusters within reach safely from the ground. Investing in a tool with genuine reach means less fruit left to drop and ferment — and a noticeably better harvest yield.

Birds

Birds represent your most formidable “pest” when harvest arrives. They fight intensely for ripe fruit. For trees on the smaller side, bird netting is your most effective solution. Larger trees—mine stretch 15–20 feet tall—make full netting logistically annoying. My strategy has shifted to harvesting frequently and planting surplus trees so there’s enough fruit for both the birds and me. Usually it works.

Fungal Issues

Popcorn disease (the culprit is the fungus Ciboria carunculoides) can strike mulberry fruit, causing berries to balloon grotesquely and fail to develop normally. It’s more prevalent in areas with persistent wetness and humidity. Affected berries become swollen and discolored and need to be picked off and thrown away—don’t compost them. Increasing air circulation via thoughtful pruning helps tremendously with reducing both this and other fungal problems.

Scale Insects and Whitefly

Scale insects sometimes settle into mulberry bark in clusters, looking like tiny brown bumps arranged along the branches. When populations get heavy, they weaken the tree and slash fruit output. A dormant-oil spray applied during winter is the conventional remedy and works reliably if you follow label directions. Whitefly occasionally appears on trees in warm, sheltered locations, but even when it shows up, healthy, properly maintained trees rarely suffer serious consequences.

Harvesting Mulberries: Timing, Techniques, and Storage

Mulberry harvesting operates on totally different principles than harvesting nearly every other fruit crop. You’re not out there picking individual berries one by one—you’re shaking the tree. This paradigm shift changes your entire approach to the harvest season.

When Are Mulberries Ripe?

Ripening schedules shift depending on species and cultivar. White mulberry and its red mulberry hybrids (think ‘Illinois Everbearing’) typically peak between late May and July in regions with temperate climates. Black mulberries transition to ripeness much later, usually from July onward into August. A berry has achieved full ripeness when it drops from its stem with barely any pressure—when the connection feels barely there. Full, deep color is another indicator. The most foolproof test is flavor: ripe mulberries explode with sweetness and intensity, while unripe ones taste tart and somewhat chalky.

The Tarp Method

Stretch a broad sheet or heavy canvas beneath the canopy and gently shake the branches. The ripe berries fall freely—unripe ones cling and stay behind. This is by far the fastest way to harvest a medium-sized or large tree. Scoop berries from the tarp into a bowl, and sort out any twigs or leaf debris. Using this technique, I can walk away with 5–8 pounds from a mature tree in less than half an hour. It’s genuinely one of my favorite rituals of the entire year.

Storing Fresh Mulberries

Mulberries spoil quickly. Your window in the refrigerator is narrow—roughly 2–3 days—even if you’re careful with handling. Spread them in a single layer across a baking sheet and place them in the freezer for 2 hours before sliding them into freezer bags. Frozen mulberries stay excellent for up to 12 months. For keeping mulberries throughout the year, I turn to jam, syrup, and fermentation. Check here for a decade’s worth of preservation projects I’ve honed and tested.

Culinary Uses: What to Do With All Those Mulberries

The year my ‘Illinois Everbearing’ hit full maturity, I was looking at over 30 pounds of ripe berries crammed into a six-week window. That abundance demanded creativity. Mulberries reveal themselves to be wonderfully flexible in the kitchen—sweeter than blackberries, less acidic, adaptable to both desserts and savory applications.

Fresh Eating and Simple Preparations

Nothing surpasses eating them fresh, straight off the branch, warm from the sun. Beyond that straightforward pleasure, mulberries integrate beautifully into smoothies, stirred into yogurt, scattered across oatmeal, or mixed into fruit salads. A quick mulberry compote—finished in 10 minutes—transforms pancakes, ice cream, or a cheese platter into something special. Because mulberries are naturally sweet, they typically demand less added sugar than other berry recipes call for.

Preservation and Pantry Uses

Mulberry jam has become my signature gift—it’s practically impossible to find someone who doesn’t love it. The berries themselves are loaded with natural pectin, which means you can usually create a set jam without adding commercial pectin. Mulberry syrup (nothing but berries, sugar, and water, simmered down) keeps in the refrigerator for weeks and works wonderfully swirled into cocktails, mixed into lemonade, or poured across cakes and desserts. If you’re feeling ambitious, mulberry wine is genuinely outstanding—ruby-deep, richly textured, complex.

Dried Mulberries

White mulberries dry beautifully and develop a caramel-toned sweetness through the process. Run them through a food dehydrator set to 135°F for 10–14 hours, or use a low conventional oven (150°F) with the door cracked slightly open. Dried mulberries work well in granola mixes, trail mixes, and baked applications. They’re also among the few mulberry products available commercially, which gives you a useful reference for what properly dried mulberry should taste like.

Common Mistakes and Beginner Questions

Mistake #1: Planting Too Close to Structures

Standard mulberry varieties can stretch to 30–50 feet tall and equally wide at maturity, depending on cultivar. Many people new to the plant underestimate this eventual size and tuck their tree too close to walls, fences, or neighboring trees. Allocate at least 15–20 feet of unobstructed space in every direction for standard varieties. Dwarf cultivars like ‘Gerardi Dwarf’ are comfortable at 6–8 feet. Misjudging this creates problems years later—you’re facing either severe pruning or removal entirely.

Mistake #2: Expecting Fast Fruit from Black Mulberry

Black mulberry trees test your patience relentlessly. Inexperienced growers plant one, watch year two and three pass with no fruit, then worry that something’s broken. Nothing’s broken. Black mulberries operate on their own timeline—often 5–10 years from planting to anything you’d call a genuine crop. If you’re craving fruit soon, begin with ‘Illinois Everbearing’ or ‘Oscar.’ Plant your black mulberry elsewhere as a long-term commitment. The flavor payoff eventually justifies every year of waiting.

Mistake #3: Ignoring the Staining Risk

Mulberry pigment binds permanently to almost everything it touches. Wear disposable clothes during harvest. Reach for stainless steel or glass containers—plastic absorbs the color and never releases it. Any concrete or stone directly beneath the tree’s canopy will discolor as fruit falls. Some growers layer bark mulch under the canopy annually to buffer the staining. Plan for this reality before you dig that planting hole, not in July when it’s too late.

FAQ: Do Mulberries Need a Pollinator?

Most named mulberry cultivars pollinate themselves—you need only one tree to generate a respectable harvest. Certain cultivars do show improved fruit set when a second tree occupies the same space, though. ‘Illinois Everbearing’ and standard white mulberry cultivars are self-fertile without hesitation. If space and budget allow for two trees, go that direction. You’ll almost always see increased production. But a single well-selected mulberry, standing alone, produces generously anyway.

FAQ: Are Mulberries Safe to Eat?

Ripe mulberries—fully colored, soft, sweet—are safe and nutritious for humans and most animals. Unripe white mulberries and the tree’s milky sap are different stories; they contain compounds that can cause digestive upset and hallucinogenic effects if eaten in substantial quantities. NC State Extension categorizes Morus alba as low-toxicity overall, with the unripe fruit and sap flagged as the problematic parts. In practical terms, this almost never matters—unripe mulberries taste so terrible that no one eats them willingly anyway. Berries at full ripeness carry no toxicity concerns whatsoever. As always, if you’re harvesting from an unfamiliar tree, verify its identity confidently before eating significant quantities.

Final Thoughts: Your Complete Guide to Mulberry Trees Starts Here

This complete guide anchors everything I publish on this site. But guides can only carry you so far. Inevitably, you have to put a shovel in the ground and plant the actual tree. I’m telling you with total confidence: a thoughtfully chosen mulberry positioned in the right spot transforms into one of your garden’s most gratifying plants. My own trees have outlasted flower beds that got ripped out, perennial borders that fell out of fashion, and countless “superfoods” that failed to deliver anything resembling their marketing promises.

The essential recipe is straightforward: pick your cultivar based on climate and available space, plant in genuine sunlight with drainage that actually drains, give the tree time to settle in, and then step back. Let it do what mulberries do naturally. For most situations, that cultivar is ‘Illinois Everbearing’—productive early, dependably tasty, and comfortable across a spectrum of conditions.

I’ve walked through 12 different cultivars across my 15 years. Some fell short of my hopes. Most blew past my expectations. Each one handed me something to learn. Get your first good tree in the ground, live with it through its seasons, taste what it produces, and I’m wagering you’ll be planning number two before that first harvest wraps up. Come join the mulberry growers. You’re going to find it tremendously rewarding.

This post contains affiliate links. As an Amazon Associate, I earn from qualifying purchases at no extra cost to you.

My most productive mulberry—a ‘Illinois Everbearing’—yields over 30 pounds of fruit in a single season with virtually zero effort from me. That staggering output, repeated year after year, is what convinced me that backyard mulberry growing isn’t just possible—it’s a game-changer for home orchardists. Fifteen years ago, I bit into a sun-warmed black mulberry fresh from the branch and knew immediately that my entire approach to fruit trees needed to shift. Within months, I’d removed a struggling apple and planted two mulberries to take its place. That decision hasn’t just paid dividends; it’s become the anchor of everything I grow and everything I write about here.

Strangely, mulberries remain nearly invisible in mainstream gardening conversations. Nurseries keep their shelves stocked with apples, peaches, and blueberries while mulberries languish in obscurity—when they’re stocked at all. Most people’s only exposure to mulberries comes from the nursery rhyme, not from actually tasting one. It’s a missed opportunity on a massive scale, because these trees deliver something almost no other fruit tree can: extraordinary productivity with minimal fussing, minimal pest pressure, and flavors that range from simple sweetness to wine-like complexity. I’ve watched my ‘Illinois Everbearing’ pump out 30-plus pounds annually with almost no intervention from my side.

What follows here is the complete picture: the three main species you’ll encounter, how to narrow down which cultivar actually makes sense for your specific situation, planting methodology, ongoing care routines, pruning strategy, disease and pest issues you might face, harvest timing and technique, and ways to actually use the fruit beyond just eating berries straight from your hand. Whether you’re starting from zero or you’ve already got a tree producing and want to squeeze more potential from it, save this page. I revise it continually as my own backyard teaches me new lessons each season.

The Three Main Species of Mulberry Trees

Many people are surprised to learn that mulberries aren’t just one tree—they’re actually several species, each with its own distinct personality and growing requirements. Knowing how these differ from one another will prevent you from buying the wrong species for your particular region or what you’re hoping to harvest. I’ve personally grown specimens from all three, and they’ve each earned their spot in my yard for completely different reasons.

Black Mulberry (Morus nigra)

If mulberries had a flavor hierarchy, black mulberry would sit at the very top. The berries themselves pack layers of flavor—a balance of sweetness and tartness with almost wine-like undertones that linger. This species originated in western Asia and gravitates toward warm, protected microclimates. The real challenge with black mulberry isn’t climate or pests—it’s patience. These trees frustrate beginners because they’re glacially slow to begin bearing. My ‘Chelsea’ black mulberry ate up seven full years before it delivered anything resembling a respectable crop. But here’s the payoff: once mature, a well-tended black mulberry can live for centuries, making it less of an investment in your lifetime and more of a gift to future generations.

White Mulberry (Morus alba)

White mulberry is the overachiever of the trio—fastest-growing, hardiest, most forgiving. It traces its origins back to China, where it was historically grown in massive quantities to feed silkworms destined for silk production. Depending on which cultivar you plant, the berries themselves shift color dramatically: white, or pale rose, or deep plum-purple. Flavor-wise, white mulberry plays it safe—sweetness without the complexity you get in black mulberry. It’s pleasant, approachable, less challenging to the palate. But white mulberry compensates for its straightforward taste with extraordinary adaptability. These trees laugh at poor soil, drought, and temperatures down to USDA Zone 4. If your climate is anything but ideal, white mulberry is almost certainly your answer.

Red Mulberry (Morus rubra)

Red mulberry is the native North American option—it’s the only mulberry species that actually originated on this continent. Its fruit runs toward the larger side, with color a deep burgundy and flavor that lands somewhere between white and black in terms of complexity and punch. I find red mulberry criminally underused among home growers, perhaps because it doesn’t get marketed the way other species do. It reaches USDA Zone 4 without breaking a sweat, handles humidity superbly, and produces with genuine consistency. The real obstacle is sourcing authentic red mulberry. This species cross-pollinates freely with white mulberry, so many trees sold under the red mulberry label are actually hybrids. Before you hand over your money, quiz your nursery about lineage and origin.

Choosing the Best Mulberry Variety for Your Garden

Species is only the beginning of the conversation. Each species contains named cultivars that differ wildly from one another—different sizes, different flavors, different ripening windows, different growth patterns. Picking the correct cultivar at the outset rescues you from years of frustration and wasted space. Below are the cultivars that have lived in my backyard, ones I’ve tasted repeatedly, and ones I recommend without hesitation.

Top Cultivars Worth Growing

  • ‘Illinois Everbearing’ — A hybrid of Morus alba and Morus rubra. Produces tremendous volumes of fruit across a 4–6 week window. Works equally well for fresh consumption and preservation. My top pick for anyone starting out with zero mulberry experience.
  • ‘Oscar’ — Enormous berries, deep red shifting to black, intensely sweet. Grows as a compact tree. Begins fruiting in year two or three. Excellent choice when square footage is limited.
  • ‘Chelsea’ — A textbook black mulberry. Fruits take their time to arrive, but the payoff in flavor is extraordinary. Best suited to Zone 6 and milder regions.
  • ‘Kokuso’ — A Korean-origin white mulberry. Produces aggressively, extends its fruiting season considerably, and survives reliably to Zone 5.
  • ‘Gerardi Dwarf’ — A white mulberry that never exceeds 6 feet. Purpose-built for containers or when you’re working with very tight spatial constraints.
  • ‘Pakistan’ — Grows berries of extraordinary length—sometimes exceeding 3 inches. Delivers rich, concentrated flavor. Requires Zone 7 warmth and genuinely benefits from heat; it’s not worth the effort in cooler regions.

For an in-depth examination of each of these, with detailed flavor comparisons pulled from my own tastings, check here.

Mulberries ripen fast and grow high, so having the right harvesting tool before the season peaks makes a real difference. The DonSail Fruit Picker Pole Tool with Basket Long Handle, 35-65 Inch Adjustable Apple Orange Picker Pole Tool with Basket for Avocado Acorn Lemon Pear Mango Tree Picker adjusts from 35 to 65 inches, letting you reach fruit on mid-height branches without a ladder and without bruising the delicate berries. It’s a sturdy, reusable piece of kit that will earn its place in your garden shed for years of harvests to come.

Fruitless vs. Fruiting Varieties

It bears mentioning: the mulberry world includes trees bred to produce no fruit whatsoever. These fruitless types are marketed as ornamental or shade trees, and they’ve been engineered specifically to eliminate the staining mess that comes with fruit-bearing varieties. Before you accept a mulberry recommendation without question, always verify that it’s actually a fruiting cultivar. For everything discussed in this post, we’re talking exclusively about varieties that produce edible berries.

How to Plant a Mulberry Tree

Mulberries rank among the most accommodating fruit trees you can buy. They don’t fuss the way stone fruits do, and they avoid the temperamental behavior that figs sometimes display in marginal climates. Still, planting methodology matters enormously. A tree planted thoughtfully establishes itself faster and performs better for decades afterward. I’ve planted trees both correctly and poorly, and the gap in first-year establishment speed is striking.

Site Selection

You’ll want a location bathed in sunlight—minimum of 6–8 hours of unobstructed direct sun every single day. Mulberries technically survive in partial shade, but fruit production noticeably declines. Equally important: consider the mess factor. During harvest season, ripe mulberries shed themselves constantly. They leave behind deep purple stains on concrete, paving stones, and clothing that don’t wash out. Position your tree no closer than 15–20 feet from hardscaping you care about. I learned this particular lesson the slow way: my first tree landed 8 feet from a concrete path, and now every June involves scrubbing that path until my hands cramp.

Soil and Drainage

Mulberries exist contentedly in all sorts of soil—sandy soils, clay soils, loamy soils. They’re not fussy. The one absolute requirement is drainage. Mulberry roots despise waterlogging. If your ground is predominantly clay, create a mound or raised bed to funnel water away from the root zone. Aim for a soil pH window between 5.5 and 7.0. Most garden soils naturally fall somewhere in this range, so soil amendment is usually unnecessary.

Planting Steps

  1. Excavate a planting hole between two and three times as wide as the root ball itself, matched in depth to the root ball’s height.
  2. Position your tree so the root flare—the widened section where the roots meet the trunk—sits exactly at grade or slightly proud of the soil surface. Never bury it.
  3. Refill using the soil you removed. Skip the temptation to blend in compost; it often causes drainage headaches.
  4. Deliver water slowly and deliberately right after planting until the soil is thoroughly saturated—roughly 10–15 gallons for a standard nursery container.
  5. Lay down a 3-inch blanket of wood chip mulch across a 3-foot radius, keeping it 3 inches clear of the trunk itself.

Bare-root mulberries should enter the ground in early spring, well before the growing season accelerates. Container-grown stock can be planted anytime from spring through early autumn, though spring planting yields the strongest establishment.

Mulberry Tree Care: Water, Fertilizer, and Ongoing Maintenance

An established mulberry tree demands surprisingly little from you. The first two years after planting are different, though. During that window, attentive care produces noticeable benefits. A mulberry with roots well-established handles heat stress, drought, and indifferent soil with equanimity. A newly planted mulberry cannot yet do any of those things.

Watering

During the first full growing season after planting, supply newly planted trees with deep, soaking watering once or twice per week. Frequency depends on rainfall and how hot it gets. Once the tree’s roots have truly established—generally by the beginning of year two—most mulberries in typical climates need almost no supplemental watering. During an extended dry period, a thorough watering every two or three weeks prevents stress. The more frequent mistake isn’t underwatering; it’s overwatering an already-settled tree.

Fertilizing

Mulberries are modest feeders and don’t clamor for additional nutrition. Once established, most mulberries growing in residential garden soil need zero supplemental fertilization. For young, establishing trees, a balanced-formula fertilizer (something like 10-10-10) applied in early spring—using roughly 1 pound per inch of trunk diameter—supports vigorous development. Avoid nitrogen-heavy products; they channel energy into foliage production at the cost of fruit. In my own orchard, I’ve largely abandoned purchased fertilizers in favor of yearly wood chip mulch as a slow-release nutrient source. The trees have responded beautifully.

Pruning Mulberry Trees

Mulberry pruning is considerably less complicated than pruning most other fruit trees. Your primary objective during the first three years involves building a solid framework. After that, annual pruning keeps things tidy and maintains productivity. Late winter or early spring—right before the tree’s buds swell—is the optimal window. The tree is dormant and won’t bleed sap excessively.

Eliminate branches that cross one another, remove anything dead, and cut away shoots that angle inward toward the tree’s center. Target an open vase configuration that permits light and moving air throughout the canopy. Prune in late spring or summer and you’ll trigger profuse sap bleeding—it’s not lethal but it’s messy and depletes the tree’s reserves. Winter pruning avoids this issue. For a detailed walkthrough with photos from my own trees, head here.

Common Mulberry Pests and Diseases

This is one of the traits that makes me love growing mulberries. They evade the vast catalog of pest and disease mayhem that ransacks apples or cherries. A few issues do warrant your attention, though, so you can intercept them early if they do show up.

If your mulberry tree has been allowed to grow tall — or you planted a vigorous variety like Illinois Everbearing — you’ll quickly discover that a standard picker won’t cut it for the upper canopy. The SISIUPASSIE 26FT Reach Fruit Picker, Apple Picker Pole with Basket Telescoping Tool for Apple Lemon Orange Mango Avocado Fruit Tree Picking extends to a full 26 feet, bringing those high clusters within reach safely from the ground. Investing in a tool with genuine reach means less fruit left to drop and ferment — and a noticeably better harvest yield.

Birds

Birds represent your most formidable “pest” when harvest arrives. They fight intensely for ripe fruit. For trees on the smaller side, bird netting is your most effective solution. Larger trees—mine stretch 15–20 feet tall—make full netting logistically annoying. My strategy has shifted to harvesting frequently and planting surplus trees so there’s enough fruit for both the birds and me. Usually it works.

Fungal Issues

Popcorn disease (the culprit is the fungus Ciboria carunculoides) can strike mulberry fruit, causing berries to balloon grotesquely and fail to develop normally. It’s more prevalent in areas with persistent wetness and humidity. Affected berries become swollen and discolored and need to be picked off and thrown away—don’t compost them. Increasing air circulation via thoughtful pruning helps tremendously with reducing both this and other fungal problems.

Scale Insects and Whitefly

Scale insects sometimes settle into mulberry bark in clusters, looking like tiny brown bumps arranged along the branches. When populations get heavy, they weaken the tree and slash fruit output. A dormant-oil spray applied during winter is the conventional remedy and works reliably if you follow label directions. Whitefly occasionally appears on trees in warm, sheltered locations, but even when it shows up, healthy, properly maintained trees rarely suffer serious consequences.

Harvesting Mulberries: Timing, Techniques, and Storage

Mulberry harvesting operates on totally different principles than harvesting nearly every other fruit crop. You’re not out there picking individual berries one by one—you’re shaking the tree. This paradigm shift changes your entire approach to the harvest season.

When Are Mulberries Ripe?

Ripening schedules shift depending on species and cultivar. White mulberry and its red mulberry hybrids (think ‘Illinois Everbearing’) typically peak between late May and July in regions with temperate climates. Black mulberries transition to ripeness much later, usually from July onward into August. A berry has achieved full ripeness when it drops from its stem with barely any pressure—when the connection feels barely there. Full, deep color is another indicator. The most foolproof test is flavor: ripe mulberries explode with sweetness and intensity, while unripe ones taste tart and somewhat chalky.

The Tarp Method

Stretch a broad sheet or heavy canvas beneath the canopy and gently shake the branches. The ripe berries fall freely—unripe ones cling and stay behind. This is by far the fastest way to harvest a medium-sized or large tree. Scoop berries from the tarp into a bowl, and sort out any twigs or leaf debris. Using this technique, I can walk away with 5–8 pounds from a mature tree in less than half an hour. It’s genuinely one of my favorite rituals of the entire year.

Storing Fresh Mulberries

Mulberries spoil quickly. Your window in the refrigerator is narrow—roughly 2–3 days—even if you’re careful with handling. Spread them in a single layer across a baking sheet and place them in the freezer for 2 hours before sliding them into freezer bags. Frozen mulberries stay excellent for up to 12 months. For keeping mulberries throughout the year, I turn to jam, syrup, and fermentation. Check here for a decade’s worth of preservation projects I’ve honed and tested.

Culinary Uses: What to Do With All Those Mulberries

The year my ‘Illinois Everbearing’ hit full maturity, I was looking at over 30 pounds of ripe berries crammed into a six-week window. That abundance demanded creativity. Mulberries reveal themselves to be wonderfully flexible in the kitchen—sweeter than blackberries, less acidic, adaptable to both desserts and savory applications.

Fresh Eating and Simple Preparations

Nothing surpasses eating them fresh, straight off the branch, warm from the sun. Beyond that straightforward pleasure, mulberries integrate beautifully into smoothies, stirred into yogurt, scattered across oatmeal, or mixed into fruit salads. A quick mulberry compote—finished in 10 minutes—transforms pancakes, ice cream, or a cheese platter into something special. Because mulberries are naturally sweet, they typically demand less added sugar than other berry recipes call for.

Preservation and Pantry Uses

Mulberry jam has become my signature gift—it’s practically impossible to find someone who doesn’t love it. The berries themselves are loaded with natural pectin, which means you can usually create a set jam without adding commercial pectin. Mulberry syrup (nothing but berries, sugar, and water, simmered down) keeps in the refrigerator for weeks and works wonderfully swirled into cocktails, mixed into lemonade, or poured across cakes and desserts. If you’re feeling ambitious, mulberry wine is genuinely outstanding—ruby-deep, richly textured, complex.

Dried Mulberries

White mulberries dry beautifully and develop a caramel-toned sweetness through the process. Run them through a food dehydrator set to 135°F for 10–14 hours, or use a low conventional oven (150°F) with the door cracked slightly open. Dried mulberries work well in granola mixes, trail mixes, and baked applications. They’re also among the few mulberry products available commercially, which gives you a useful reference for what properly dried mulberry should taste like.

Common Mistakes and Beginner Questions

Mistake #1: Planting Too Close to Structures

Standard mulberry varieties can stretch to 30–50 feet tall and equally wide at maturity, depending on cultivar. Many people new to the plant underestimate this eventual size and tuck their tree too close to walls, fences, or neighboring trees. Allocate at least 15–20 feet of unobstructed space in every direction for standard varieties. Dwarf cultivars like ‘Gerardi Dwarf’ are comfortable at 6–8 feet. Misjudging this creates problems years later—you’re facing either severe pruning or removal entirely.

Mistake #2: Expecting Fast Fruit from Black Mulberry

Black mulberry trees test your patience relentlessly. Inexperienced growers plant one, watch year two and three pass with no fruit, then worry that something’s broken. Nothing’s broken. Black mulberries operate on their own timeline—often 5–10 years from planting to anything you’d call a genuine crop. If you’re craving fruit soon, begin with ‘Illinois Everbearing’ or ‘Oscar.’ Plant your black mulberry elsewhere as a long-term commitment. The flavor payoff eventually justifies every year of waiting.

Mistake #3: Ignoring the Staining Risk

Mulberry pigment binds permanently to almost everything it touches. Wear disposable clothes during harvest. Reach for stainless steel or glass containers—plastic absorbs the color and never releases it. Any concrete or stone directly beneath the tree’s canopy will discolor as fruit falls. Some growers layer bark mulch under the canopy annually to buffer the staining. Plan for this reality before you dig that planting hole, not in July when it’s too late.

FAQ: Do Mulberries Need a Pollinator?

Most named mulberry cultivars pollinate themselves—you need only one tree to generate a respectable harvest. Certain cultivars do show improved fruit set when a second tree occupies the same space, though. ‘Illinois Everbearing’ and standard white mulberry cultivars are self-fertile without hesitation. If space and budget allow for two trees, go that direction. You’ll almost always see increased production. But a single well-selected mulberry, standing alone, produces generously anyway.

FAQ: Are Mulberries Safe to Eat?

Ripe mulberries—fully colored, soft, sweet—are safe and nutritious for humans and most animals. Unripe white mulberries and the tree’s milky sap are different stories; they contain compounds that can cause digestive upset and hallucinogenic effects if eaten in substantial quantities. NC State Extension categorizes Morus alba as low-toxicity overall, with the unripe fruit and sap flagged as the problematic parts. In practical terms, this almost never matters—unripe mulberries taste so terrible that no one eats them willingly anyway. Berries at full ripeness carry no toxicity concerns whatsoever. As always, if you’re harvesting from an unfamiliar tree, verify its identity confidently before eating significant quantities.

Final Thoughts: Your Complete Guide to Mulberry Trees Starts Here

This complete guide anchors everything I publish on this site. But guides can only carry you so far. Inevitably, you have to put a shovel in the ground and plant the actual tree. I’m telling you with total confidence: a thoughtfully chosen mulberry positioned in the right spot transforms into one of your garden’s most gratifying plants. My own trees have outlasted flower beds that got ripped out, perennial borders that fell out of fashion, and countless “superfoods” that failed to deliver anything resembling their marketing promises.

The essential recipe is straightforward: pick your cultivar based on climate and available space, plant in genuine sunlight with drainage that actually drains, give the tree time to settle in, and then step back. Let it do what mulberries do naturally. For most situations, that cultivar is ‘Illinois Everbearing’—productive early, dependably tasty, and comfortable across a spectrum of conditions.

I’ve walked through 12 different cultivars across my 15 years. Some fell short of my hopes. Most blew past my expectations. Each one handed me something to learn. Get your first good tree in the ground, live with it through its seasons, taste what it produces, and I’m wagering you’ll be planning number two before that first harvest wraps up. Come join the mulberry growers. You’re going to find it tremendously rewarding.

This post contains affiliate links. As an Amazon Associate, I earn from qualifying purchases at no extra cost to you.

Eliminate branches that cross one another, remove anything dead, and cut away shoots that angle inward toward the tree’s center. Target an open vase configuration that permits light and moving air throughout the canopy. Prune in late spring or summer and you’ll trigger profuse sap bleeding—it’s not lethal but it’s messy and depletes the tree’s reserves. Winter pruning avoids this issue. For a detailed walkthrough with photos from my own trees, head here.

Common Mulberry Pests and Diseases

This is one of the traits that makes me love growing mulberries. They evade the vast catalog of pest and disease mayhem that ransacks apples or cherries. A few issues do warrant your attention, though, so you can intercept them early if they do show up.

If your mulberry tree has been allowed to grow tall — or you planted a vigorous variety like Illinois Everbearing — you’ll quickly discover that a standard picker won’t cut it for the upper canopy. The SISIUPASSIE 26FT Reach Fruit Picker, Apple Picker Pole with Basket Telescoping Tool for Apple Lemon Orange Mango Avocado Fruit Tree Picking extends to a full 26 feet, bringing those high clusters within reach safely from the ground. Investing in a tool with genuine reach means less fruit left to drop and ferment — and a noticeably better harvest yield.

Birds

Birds represent your most formidable “pest” when harvest arrives. They fight intensely for ripe fruit. For trees on the smaller side, bird netting is your most effective solution. Larger trees—mine stretch 15–20 feet tall—make full netting logistically annoying. My strategy has shifted to harvesting frequently and planting surplus trees so there’s enough fruit for both the birds and me. Usually it works.

Fungal Issues

Popcorn disease (the culprit is the fungus Ciboria carunculoides) can strike mulberry fruit, causing berries to balloon grotesquely and fail to develop normally. It’s more prevalent in areas with persistent wetness and humidity. Affected berries become swollen and discolored and need to be picked off and thrown away—don’t compost them. Increasing air circulation via thoughtful pruning helps tremendously with reducing both this and other fungal problems.

Scale Insects and Whitefly

Scale insects sometimes settle into mulberry bark in clusters, looking like tiny brown bumps arranged along the branches. When populations get heavy, they weaken the tree and slash fruit output. A dormant-oil spray applied during winter is the conventional remedy and works reliably if you follow label directions. Whitefly occasionally appears on trees in warm, sheltered locations, but even when it shows up, healthy, properly maintained trees rarely suffer serious consequences.

Harvesting Mulberries: Timing, Techniques, and Storage

Mulberry harvesting operates on totally different principles than harvesting nearly every other fruit crop. You’re not out there picking individual berries one by one—you’re shaking the tree. This paradigm shift changes your entire approach to the harvest season.

When Are Mulberries Ripe?

Ripening schedules shift depending on species and cultivar. White mulberry and its red mulberry hybrids (think ‘Illinois Everbearing’) typically peak between late May and July in regions with temperate climates. Black mulberries transition to ripeness much later, usually from July onward into August. A berry has achieved full ripeness when it drops from its stem with barely any pressure—when the connection feels barely there. Full, deep color is another indicator. The most foolproof test is flavor: ripe mulberries explode with sweetness and intensity, while unripe ones taste tart and somewhat chalky.

The Tarp Method

Stretch a broad sheet or heavy canvas beneath the canopy and gently shake the branches. The ripe berries fall freely—unripe ones cling and stay behind. This is by far the fastest way to harvest a medium-sized or large tree. Scoop berries from the tarp into a bowl, and sort out any twigs or leaf debris. Using this technique, I can walk away with 5–8 pounds from a mature tree in less than half an hour. It’s genuinely one of my favorite rituals of the entire year.

Storing Fresh Mulberries

Mulberries spoil quickly. Your window in the refrigerator is narrow—roughly 2–3 days—even if you’re careful with handling. Spread them in a single layer across a baking sheet and place them in the freezer for 2 hours before sliding them into freezer bags. Frozen mulberries stay excellent for up to 12 months. For keeping mulberries throughout the year, I turn to jam, syrup, and fermentation. Check here for a decade’s worth of preservation projects I’ve honed and tested.

Culinary Uses: What to Do With All Those Mulberries

The year my ‘Illinois Everbearing’ hit full maturity, I was looking at over 30 pounds of ripe berries crammed into a six-week window. That abundance demanded creativity. Mulberries reveal themselves to be wonderfully flexible in the kitchen—sweeter than blackberries, less acidic, adaptable to both desserts and savory applications.

Fresh Eating and Simple Preparations

Nothing surpasses eating them fresh, straight off the branch, warm from the sun. Beyond that straightforward pleasure, mulberries integrate beautifully into smoothies, stirred into yogurt, scattered across oatmeal, or mixed into fruit salads. A quick mulberry compote—finished in 10 minutes—transforms pancakes, ice cream, or a cheese platter into something special. Because mulberries are naturally sweet, they typically demand less added sugar than other berry recipes call for.

Preservation and Pantry Uses

Mulberry jam has become my signature gift—it’s practically impossible to find someone who doesn’t love it. The berries themselves are loaded with natural pectin, which means you can usually create a set jam without adding commercial pectin. Mulberry syrup (nothing but berries, sugar, and water, simmered down) keeps in the refrigerator for weeks and works wonderfully swirled into cocktails, mixed into lemonade, or poured across cakes and desserts. If you’re feeling ambitious, mulberry wine is genuinely outstanding—ruby-deep, richly textured, complex.

Dried Mulberries

White mulberries dry beautifully and develop a caramel-toned sweetness through the process. Run them through a food dehydrator set to 135°F for 10–14 hours, or use a low conventional oven (150°F) with the door cracked slightly open. Dried mulberries work well in granola mixes, trail mixes, and baked applications. They’re also among the few mulberry products available commercially, which gives you a useful reference for what properly dried mulberry should taste like.

Common Mistakes and Beginner Questions

Mistake #1: Planting Too Close to Structures

Standard mulberry varieties can stretch to 30–50 feet tall and equally wide at maturity, depending on cultivar. Many people new to the plant underestimate this eventual size and tuck their tree too close to walls, fences, or neighboring trees. Allocate at least 15–20 feet of unobstructed space in every direction for standard varieties. Dwarf cultivars like ‘Gerardi Dwarf’ are comfortable at 6–8 feet. Misjudging this creates problems years later—you’re facing either severe pruning or removal entirely.

Mistake #2: Expecting Fast Fruit from Black Mulberry

Black mulberry trees test your patience relentlessly. Inexperienced growers plant one, watch year two and three pass with no fruit, then worry that something’s broken. Nothing’s broken. Black mulberries operate on their own timeline—often 5–10 years from planting to anything you’d call a genuine crop. If you’re craving fruit soon, begin with ‘Illinois Everbearing’ or ‘Oscar.’ Plant your black mulberry elsewhere as a long-term commitment. The flavor payoff eventually justifies every year of waiting.

Mistake #3: Ignoring the Staining Risk

Mulberry pigment binds permanently to almost everything it touches. Wear disposable clothes during harvest. Reach for stainless steel or glass containers—plastic absorbs the color and never releases it. Any concrete or stone directly beneath the tree’s canopy will discolor as fruit falls. Some growers layer bark mulch under the canopy annually to buffer the staining. Plan for this reality before you dig that planting hole, not in July when it’s too late.

FAQ: Do Mulberries Need a Pollinator?

Most named mulberry cultivars pollinate themselves—you need only one tree to generate a respectable harvest. Certain cultivars do show improved fruit set when a second tree occupies the same space, though. ‘Illinois Everbearing’ and standard white mulberry cultivars are self-fertile without hesitation. If space and budget allow for two trees, go that direction. You’ll almost always see increased production. But a single well-selected mulberry, standing alone, produces generously anyway.

FAQ: Are Mulberries Safe to Eat?

Ripe mulberries—fully colored, soft, sweet—are safe and nutritious for humans and most animals. Unripe white mulberries and the tree’s milky sap are different stories; they contain compounds that can cause digestive upset and hallucinogenic effects if eaten in substantial quantities. NC State Extension categorizes Morus alba as low-toxicity overall, with the unripe fruit and sap flagged as the problematic parts. In practical terms, this almost never matters—unripe mulberries taste so terrible that no one eats them willingly anyway. Berries at full ripeness carry no toxicity concerns whatsoever. As always, if you’re harvesting from an unfamiliar tree, verify its identity confidently before eating significant quantities.

Final Thoughts: Your Complete Guide to Mulberry Trees Starts Here

This complete guide anchors everything I publish on this site. But guides can only carry you so far. Inevitably, you have to put a shovel in the ground and plant the actual tree. I’m telling you with total confidence: a thoughtfully chosen mulberry positioned in the right spot transforms into one of your garden’s most gratifying plants. My own trees have outlasted flower beds that got ripped out, perennial borders that fell out of fashion, and countless “superfoods” that failed to deliver anything resembling their marketing promises.

The essential recipe is straightforward: pick your cultivar based on climate and available space, plant in genuine sunlight with drainage that actually drains, give the tree time to settle in, and then step back. Let it do what mulberries do naturally. For most situations, that cultivar is ‘Illinois Everbearing’—productive early, dependably tasty, and comfortable across a spectrum of conditions.

I’ve walked through 12 different cultivars across my 15 years. Some fell short of my hopes. Most blew past my expectations. Each one handed me something to learn. Get your first good tree in the ground, live with it through its seasons, taste what it produces, and I’m wagering you’ll be planning number two before that first harvest wraps up. Come join the mulberry growers. You’re going to find it tremendously rewarding.

This post contains affiliate links. As an Amazon Associate, I earn from qualifying purchases at no extra cost to you.

For an in-depth examination of each of these, with detailed flavor comparisons pulled from my own tastings, check here.

Mulberries ripen fast and grow high, so having the right harvesting tool before the season peaks makes a real difference. The DonSail Fruit Picker Pole Tool with Basket Long Handle, 35-65 Inch Adjustable Apple Orange Picker Pole Tool with Basket for Avocado Acorn Lemon Pear Mango Tree Picker adjusts from 35 to 65 inches, letting you reach fruit on mid-height branches without a ladder and without bruising the delicate berries. It’s a sturdy, reusable piece of kit that will earn its place in your garden shed for years of harvests to come.

Fruitless vs. Fruiting Varieties

It bears mentioning: the mulberry world includes trees bred to produce no fruit whatsoever. These fruitless types are marketed as ornamental or shade trees, and they’ve been engineered specifically to eliminate the staining mess that comes with fruit-bearing varieties. Before you accept a mulberry recommendation without question, always verify that it’s actually a fruiting cultivar. For everything discussed in this post, we’re talking exclusively about varieties that produce edible berries.

How to Plant a Mulberry Tree

Mulberries rank among the most accommodating fruit trees you can buy. They don’t fuss the way stone fruits do, and they avoid the temperamental behavior that figs sometimes display in marginal climates. Still, planting methodology matters enormously. A tree planted thoughtfully establishes itself faster and performs better for decades afterward. I’ve planted trees both correctly and poorly, and the gap in first-year establishment speed is striking.

Site Selection

You’ll want a location bathed in sunlight—minimum of 6–8 hours of unobstructed direct sun every single day. Mulberries technically survive in partial shade, but fruit production noticeably declines. Equally important: consider the mess factor. During harvest season, ripe mulberries shed themselves constantly. They leave behind deep purple stains on concrete, paving stones, and clothing that don’t wash out. Position your tree no closer than 15–20 feet from hardscaping you care about. I learned this particular lesson the slow way: my first tree landed 8 feet from a concrete path, and now every June involves scrubbing that path until my hands cramp.

Soil and Drainage

Mulberries exist contentedly in all sorts of soil—sandy soils, clay soils, loamy soils. They’re not fussy. The one absolute requirement is drainage. Mulberry roots despise waterlogging. If your ground is predominantly clay, create a mound or raised bed to funnel water away from the root zone. Aim for a soil pH window between 5.5 and 7.0. Most garden soils naturally fall somewhere in this range, so soil amendment is usually unnecessary.

Planting Steps

  1. Excavate a planting hole between two and three times as wide as the root ball itself, matched in depth to the root ball’s height.
  2. Position your tree so the root flare—the widened section where the roots meet the trunk—sits exactly at grade or slightly proud of the soil surface. Never bury it.
  3. Refill using the soil you removed. Skip the temptation to blend in compost; it often causes drainage headaches.
  4. Deliver water slowly and deliberately right after planting until the soil is thoroughly saturated—roughly 10–15 gallons for a standard nursery container.
  5. Lay down a 3-inch blanket of wood chip mulch across a 3-foot radius, keeping it 3 inches clear of the trunk itself.

Bare-root mulberries should enter the ground in early spring, well before the growing season accelerates. Container-grown stock can be planted anytime from spring through early autumn, though spring planting yields the strongest establishment.

Mulberry Tree Care: Water, Fertilizer, and Ongoing Maintenance

An established mulberry tree demands surprisingly little from you. The first two years after planting are different, though. During that window, attentive care produces noticeable benefits. A mulberry with roots well-established handles heat stress, drought, and indifferent soil with equanimity. A newly planted mulberry cannot yet do any of those things.

Watering

During the first full growing season after planting, supply newly planted trees with deep, soaking watering once or twice per week. Frequency depends on rainfall and how hot it gets. Once the tree’s roots have truly established—generally by the beginning of year two—most mulberries in typical climates need almost no supplemental watering. During an extended dry period, a thorough watering every two or three weeks prevents stress. The more frequent mistake isn’t underwatering; it’s overwatering an already-settled tree.

Fertilizing

Mulberries are modest feeders and don’t clamor for additional nutrition. Once established, most mulberries growing in residential garden soil need zero supplemental fertilization. For young, establishing trees, a balanced-formula fertilizer (something like 10-10-10) applied in early spring—using roughly 1 pound per inch of trunk diameter—supports vigorous development. Avoid nitrogen-heavy products; they channel energy into foliage production at the cost of fruit. In my own orchard, I’ve largely abandoned purchased fertilizers in favor of yearly wood chip mulch as a slow-release nutrient source. The trees have responded beautifully.

Pruning Mulberry Trees

Mulberry pruning is considerably less complicated than pruning most other fruit trees. Your primary objective during the first three years involves building a solid framework. After that, annual pruning keeps things tidy and maintains productivity. Late winter or early spring—right before the tree’s buds swell—is the optimal window. The tree is dormant and won’t bleed sap excessively.

Eliminate branches that cross one another, remove anything dead, and cut away shoots that angle inward toward the tree’s center. Target an open vase configuration that permits light and moving air throughout the canopy. Prune in late spring or summer and you’ll trigger profuse sap bleeding—it’s not lethal but it’s messy and depletes the tree’s reserves. Winter pruning avoids this issue. For a detailed walkthrough with photos from my own trees, head here.

Common Mulberry Pests and Diseases

This is one of the traits that makes me love growing mulberries. They evade the vast catalog of pest and disease mayhem that ransacks apples or cherries. A few issues do warrant your attention, though, so you can intercept them early if they do show up.

If your mulberry tree has been allowed to grow tall — or you planted a vigorous variety like Illinois Everbearing — you’ll quickly discover that a standard picker won’t cut it for the upper canopy. The SISIUPASSIE 26FT Reach Fruit Picker, Apple Picker Pole with Basket Telescoping Tool for Apple Lemon Orange Mango Avocado Fruit Tree Picking extends to a full 26 feet, bringing those high clusters within reach safely from the ground. Investing in a tool with genuine reach means less fruit left to drop and ferment — and a noticeably better harvest yield.

Birds

Birds represent your most formidable “pest” when harvest arrives. They fight intensely for ripe fruit. For trees on the smaller side, bird netting is your most effective solution. Larger trees—mine stretch 15–20 feet tall—make full netting logistically annoying. My strategy has shifted to harvesting frequently and planting surplus trees so there’s enough fruit for both the birds and me. Usually it works.

Fungal Issues

Popcorn disease (the culprit is the fungus Ciboria carunculoides) can strike mulberry fruit, causing berries to balloon grotesquely and fail to develop normally. It’s more prevalent in areas with persistent wetness and humidity. Affected berries become swollen and discolored and need to be picked off and thrown away—don’t compost them. Increasing air circulation via thoughtful pruning helps tremendously with reducing both this and other fungal problems.

Scale Insects and Whitefly

Scale insects sometimes settle into mulberry bark in clusters, looking like tiny brown bumps arranged along the branches. When populations get heavy, they weaken the tree and slash fruit output. A dormant-oil spray applied during winter is the conventional remedy and works reliably if you follow label directions. Whitefly occasionally appears on trees in warm, sheltered locations, but even when it shows up, healthy, properly maintained trees rarely suffer serious consequences.

Harvesting Mulberries: Timing, Techniques, and Storage

Mulberry harvesting operates on totally different principles than harvesting nearly every other fruit crop. You’re not out there picking individual berries one by one—you’re shaking the tree. This paradigm shift changes your entire approach to the harvest season.

When Are Mulberries Ripe?

Ripening schedules shift depending on species and cultivar. White mulberry and its red mulberry hybrids (think ‘Illinois Everbearing’) typically peak between late May and July in regions with temperate climates. Black mulberries transition to ripeness much later, usually from July onward into August. A berry has achieved full ripeness when it drops from its stem with barely any pressure—when the connection feels barely there. Full, deep color is another indicator. The most foolproof test is flavor: ripe mulberries explode with sweetness and intensity, while unripe ones taste tart and somewhat chalky.

The Tarp Method

Stretch a broad sheet or heavy canvas beneath the canopy and gently shake the branches. The ripe berries fall freely—unripe ones cling and stay behind. This is by far the fastest way to harvest a medium-sized or large tree. Scoop berries from the tarp into a bowl, and sort out any twigs or leaf debris. Using this technique, I can walk away with 5–8 pounds from a mature tree in less than half an hour. It’s genuinely one of my favorite rituals of the entire year.

Storing Fresh Mulberries

Mulberries spoil quickly. Your window in the refrigerator is narrow—roughly 2–3 days—even if you’re careful with handling. Spread them in a single layer across a baking sheet and place them in the freezer for 2 hours before sliding them into freezer bags. Frozen mulberries stay excellent for up to 12 months. For keeping mulberries throughout the year, I turn to jam, syrup, and fermentation. Check here for a decade’s worth of preservation projects I’ve honed and tested.

Culinary Uses: What to Do With All Those Mulberries

The year my ‘Illinois Everbearing’ hit full maturity, I was looking at over 30 pounds of ripe berries crammed into a six-week window. That abundance demanded creativity. Mulberries reveal themselves to be wonderfully flexible in the kitchen—sweeter than blackberries, less acidic, adaptable to both desserts and savory applications.

Fresh Eating and Simple Preparations

Nothing surpasses eating them fresh, straight off the branch, warm from the sun. Beyond that straightforward pleasure, mulberries integrate beautifully into smoothies, stirred into yogurt, scattered across oatmeal, or mixed into fruit salads. A quick mulberry compote—finished in 10 minutes—transforms pancakes, ice cream, or a cheese platter into something special. Because mulberries are naturally sweet, they typically demand less added sugar than other berry recipes call for.

Preservation and Pantry Uses

Mulberry jam has become my signature gift—it’s practically impossible to find someone who doesn’t love it. The berries themselves are loaded with natural pectin, which means you can usually create a set jam without adding commercial pectin. Mulberry syrup (nothing but berries, sugar, and water, simmered down) keeps in the refrigerator for weeks and works wonderfully swirled into cocktails, mixed into lemonade, or poured across cakes and desserts. If you’re feeling ambitious, mulberry wine is genuinely outstanding—ruby-deep, richly textured, complex.

Dried Mulberries

White mulberries dry beautifully and develop a caramel-toned sweetness through the process. Run them through a food dehydrator set to 135°F for 10–14 hours, or use a low conventional oven (150°F) with the door cracked slightly open. Dried mulberries work well in granola mixes, trail mixes, and baked applications. They’re also among the few mulberry products available commercially, which gives you a useful reference for what properly dried mulberry should taste like.

Common Mistakes and Beginner Questions

Mistake #1: Planting Too Close to Structures

Standard mulberry varieties can stretch to 30–50 feet tall and equally wide at maturity, depending on cultivar. Many people new to the plant underestimate this eventual size and tuck their tree too close to walls, fences, or neighboring trees. Allocate at least 15–20 feet of unobstructed space in every direction for standard varieties. Dwarf cultivars like ‘Gerardi Dwarf’ are comfortable at 6–8 feet. Misjudging this creates problems years later—you’re facing either severe pruning or removal entirely.

Mistake #2: Expecting Fast Fruit from Black Mulberry

Black mulberry trees test your patience relentlessly. Inexperienced growers plant one, watch year two and three pass with no fruit, then worry that something’s broken. Nothing’s broken. Black mulberries operate on their own timeline—often 5–10 years from planting to anything you’d call a genuine crop. If you’re craving fruit soon, begin with ‘Illinois Everbearing’ or ‘Oscar.’ Plant your black mulberry elsewhere as a long-term commitment. The flavor payoff eventually justifies every year of waiting.

Mistake #3: Ignoring the Staining Risk

Mulberry pigment binds permanently to almost everything it touches. Wear disposable clothes during harvest. Reach for stainless steel or glass containers—plastic absorbs the color and never releases it. Any concrete or stone directly beneath the tree’s canopy will discolor as fruit falls. Some growers layer bark mulch under the canopy annually to buffer the staining. Plan for this reality before you dig that planting hole, not in July when it’s too late.

FAQ: Do Mulberries Need a Pollinator?

Most named mulberry cultivars pollinate themselves—you need only one tree to generate a respectable harvest. Certain cultivars do show improved fruit set when a second tree occupies the same space, though. ‘Illinois Everbearing’ and standard white mulberry cultivars are self-fertile without hesitation. If space and budget allow for two trees, go that direction. You’ll almost always see increased production. But a single well-selected mulberry, standing alone, produces generously anyway.

FAQ: Are Mulberries Safe to Eat?

Ripe mulberries—fully colored, soft, sweet—are safe and nutritious for humans and most animals. Unripe white mulberries and the tree’s milky sap are different stories; they contain compounds that can cause digestive upset and hallucinogenic effects if eaten in substantial quantities. NC State Extension categorizes Morus alba as low-toxicity overall, with the unripe fruit and sap flagged as the problematic parts. In practical terms, this almost never matters—unripe mulberries taste so terrible that no one eats them willingly anyway. Berries at full ripeness carry no toxicity concerns whatsoever. As always, if you’re harvesting from an unfamiliar tree, verify its identity confidently before eating significant quantities.

Final Thoughts: Your Complete Guide to Mulberry Trees Starts Here

This complete guide anchors everything I publish on this site. But guides can only carry you so far. Inevitably, you have to put a shovel in the ground and plant the actual tree. I’m telling you with total confidence: a thoughtfully chosen mulberry positioned in the right spot transforms into one of your garden’s most gratifying plants. My own trees have outlasted flower beds that got ripped out, perennial borders that fell out of fashion, and countless “superfoods” that failed to deliver anything resembling their marketing promises.

The essential recipe is straightforward: pick your cultivar based on climate and available space, plant in genuine sunlight with drainage that actually drains, give the tree time to settle in, and then step back. Let it do what mulberries do naturally. For most situations, that cultivar is ‘Illinois Everbearing’—productive early, dependably tasty, and comfortable across a spectrum of conditions.

I’ve walked through 12 different cultivars across my 15 years. Some fell short of my hopes. Most blew past my expectations. Each one handed me something to learn. Get your first good tree in the ground, live with it through its seasons, taste what it produces, and I’m wagering you’ll be planning number two before that first harvest wraps up. Come join the mulberry growers. You’re going to find it tremendously rewarding.

This post contains affiliate links. As an Amazon Associate, I earn from qualifying purchases at no extra cost to you.

My most productive mulberry—a ‘Illinois Everbearing’—yields over 30 pounds of fruit in a single season with virtually zero effort from me. That staggering output, repeated year after year, is what convinced me that backyard mulberry growing isn’t just possible—it’s a game-changer for home orchardists. Fifteen years ago, I bit into a sun-warmed black mulberry fresh from the branch and knew immediately that my entire approach to fruit trees needed to shift. Within months, I’d removed a struggling apple and planted two mulberries to take its place. That decision hasn’t just paid dividends; it’s become the anchor of everything I grow and everything I write about here.

Strangely, mulberries remain nearly invisible in mainstream gardening conversations. Nurseries keep their shelves stocked with apples, peaches, and blueberries while mulberries languish in obscurity—when they’re stocked at all. Most people’s only exposure to mulberries comes from the nursery rhyme, not from actually tasting one. It’s a missed opportunity on a massive scale, because these trees deliver something almost no other fruit tree can: extraordinary productivity with minimal fussing, minimal pest pressure, and flavors that range from simple sweetness to wine-like complexity. I’ve watched my ‘Illinois Everbearing’ pump out 30-plus pounds annually with almost no intervention from my side.

What follows here is the complete picture: the three main species you’ll encounter, how to narrow down which cultivar actually makes sense for your specific situation, planting methodology, ongoing care routines, pruning strategy, disease and pest issues you might face, harvest timing and technique, and ways to actually use the fruit beyond just eating berries straight from your hand. Whether you’re starting from zero or you’ve already got a tree producing and want to squeeze more potential from it, save this page. I revise it continually as my own backyard teaches me new lessons each season.

The Three Main Species of Mulberry Trees

Many people are surprised to learn that mulberries aren’t just one tree—they’re actually several species, each with its own distinct personality and growing requirements. Knowing how these differ from one another will prevent you from buying the wrong species for your particular region or what you’re hoping to harvest. I’ve personally grown specimens from all three, and they’ve each earned their spot in my yard for completely different reasons.

Black Mulberry (Morus nigra)

If mulberries had a flavor hierarchy, black mulberry would sit at the very top. The berries themselves pack layers of flavor—a balance of sweetness and tartness with almost wine-like undertones that linger. This species originated in western Asia and gravitates toward warm, protected microclimates. The real challenge with black mulberry isn’t climate or pests—it’s patience. These trees frustrate beginners because they’re glacially slow to begin bearing. My ‘Chelsea’ black mulberry ate up seven full years before it delivered anything resembling a respectable crop. But here’s the payoff: once mature, a well-tended black mulberry can live for centuries, making it less of an investment in your lifetime and more of a gift to future generations.

White Mulberry (Morus alba)

White mulberry is the overachiever of the trio—fastest-growing, hardiest, most forgiving. It traces its origins back to China, where it was historically grown in massive quantities to feed silkworms destined for silk production. Depending on which cultivar you plant, the berries themselves shift color dramatically: white, or pale rose, or deep plum-purple. Flavor-wise, white mulberry plays it safe—sweetness without the complexity you get in black mulberry. It’s pleasant, approachable, less challenging to the palate. But white mulberry compensates for its straightforward taste with extraordinary adaptability. These trees laugh at poor soil, drought, and temperatures down to USDA Zone 4. If your climate is anything but ideal, white mulberry is almost certainly your answer.

Red Mulberry (Morus rubra)

Red mulberry is the native North American option—it’s the only mulberry species that actually originated on this continent. Its fruit runs toward the larger side, with color a deep burgundy and flavor that lands somewhere between white and black in terms of complexity and punch. I find red mulberry criminally underused among home growers, perhaps because it doesn’t get marketed the way other species do. It reaches USDA Zone 4 without breaking a sweat, handles humidity superbly, and produces with genuine consistency. The real obstacle is sourcing authentic red mulberry. This species cross-pollinates freely with white mulberry, so many trees sold under the red mulberry label are actually hybrids. Before you hand over your money, quiz your nursery about lineage and origin.

Choosing the Best Mulberry Variety for Your Garden

Species is only the beginning of the conversation. Each species contains named cultivars that differ wildly from one another—different sizes, different flavors, different ripening windows, different growth patterns. Picking the correct cultivar at the outset rescues you from years of frustration and wasted space. Below are the cultivars that have lived in my backyard, ones I’ve tasted repeatedly, and ones I recommend without hesitation.

Top Cultivars Worth Growing

  • ‘Illinois Everbearing’ — A hybrid of Morus alba and Morus rubra. Produces tremendous volumes of fruit across a 4–6 week window. Works equally well for fresh consumption and preservation. My top pick for anyone starting out with zero mulberry experience.
  • ‘Oscar’ — Enormous berries, deep red shifting to black, intensely sweet. Grows as a compact tree. Begins fruiting in year two or three. Excellent choice when square footage is limited.
  • ‘Chelsea’ — A textbook black mulberry. Fruits take their time to arrive, but the payoff in flavor is extraordinary. Best suited to Zone 6 and milder regions.
  • ‘Kokuso’ — A Korean-origin white mulberry. Produces aggressively, extends its fruiting season considerably, and survives reliably to Zone 5.
  • ‘Gerardi Dwarf’ — A white mulberry that never exceeds 6 feet. Purpose-built for containers or when you’re working with very tight spatial constraints.
  • ‘Pakistan’ — Grows berries of extraordinary length—sometimes exceeding 3 inches. Delivers rich, concentrated flavor. Requires Zone 7 warmth and genuinely benefits from heat; it’s not worth the effort in cooler regions.

For an in-depth examination of each of these, with detailed flavor comparisons pulled from my own tastings, check here.

Mulberries ripen fast and grow high, so having the right harvesting tool before the season peaks makes a real difference. The DonSail Fruit Picker Pole Tool with Basket Long Handle, 35-65 Inch Adjustable Apple Orange Picker Pole Tool with Basket for Avocado Acorn Lemon Pear Mango Tree Picker adjusts from 35 to 65 inches, letting you reach fruit on mid-height branches without a ladder and without bruising the delicate berries. It’s a sturdy, reusable piece of kit that will earn its place in your garden shed for years of harvests to come.

Fruitless vs. Fruiting Varieties

It bears mentioning: the mulberry world includes trees bred to produce no fruit whatsoever. These fruitless types are marketed as ornamental or shade trees, and they’ve been engineered specifically to eliminate the staining mess that comes with fruit-bearing varieties. Before you accept a mulberry recommendation without question, always verify that it’s actually a fruiting cultivar. For everything discussed in this post, we’re talking exclusively about varieties that produce edible berries.

How to Plant a Mulberry Tree

Mulberries rank among the most accommodating fruit trees you can buy. They don’t fuss the way stone fruits do, and they avoid the temperamental behavior that figs sometimes display in marginal climates. Still, planting methodology matters enormously. A tree planted thoughtfully establishes itself faster and performs better for decades afterward. I’ve planted trees both correctly and poorly, and the gap in first-year establishment speed is striking.

Site Selection

You’ll want a location bathed in sunlight—minimum of 6–8 hours of unobstructed direct sun every single day. Mulberries technically survive in partial shade, but fruit production noticeably declines. Equally important: consider the mess factor. During harvest season, ripe mulberries shed themselves constantly. They leave behind deep purple stains on concrete, paving stones, and clothing that don’t wash out. Position your tree no closer than 15–20 feet from hardscaping you care about. I learned this particular lesson the slow way: my first tree landed 8 feet from a concrete path, and now every June involves scrubbing that path until my hands cramp.

Soil and Drainage

Mulberries exist contentedly in all sorts of soil—sandy soils, clay soils, loamy soils. They’re not fussy. The one absolute requirement is drainage. Mulberry roots despise waterlogging. If your ground is predominantly clay, create a mound or raised bed to funnel water away from the root zone. Aim for a soil pH window between 5.5 and 7.0. Most garden soils naturally fall somewhere in this range, so soil amendment is usually unnecessary.

Planting Steps

  1. Excavate a planting hole between two and three times as wide as the root ball itself, matched in depth to the root ball’s height.
  2. Position your tree so the root flare—the widened section where the roots meet the trunk—sits exactly at grade or slightly proud of the soil surface. Never bury it.
  3. Refill using the soil you removed. Skip the temptation to blend in compost; it often causes drainage headaches.
  4. Deliver water slowly and deliberately right after planting until the soil is thoroughly saturated—roughly 10–15 gallons for a standard nursery container.
  5. Lay down a 3-inch blanket of wood chip mulch across a 3-foot radius, keeping it 3 inches clear of the trunk itself.

Bare-root mulberries should enter the ground in early spring, well before the growing season accelerates. Container-grown stock can be planted anytime from spring through early autumn, though spring planting yields the strongest establishment.

Mulberry Tree Care: Water, Fertilizer, and Ongoing Maintenance

An established mulberry tree demands surprisingly little from you. The first two years after planting are different, though. During that window, attentive care produces noticeable benefits. A mulberry with roots well-established handles heat stress, drought, and indifferent soil with equanimity. A newly planted mulberry cannot yet do any of those things.

Watering

During the first full growing season after planting, supply newly planted trees with deep, soaking watering once or twice per week. Frequency depends on rainfall and how hot it gets. Once the tree’s roots have truly established—generally by the beginning of year two—most mulberries in typical climates need almost no supplemental watering. During an extended dry period, a thorough watering every two or three weeks prevents stress. The more frequent mistake isn’t underwatering; it’s overwatering an already-settled tree.

Fertilizing

Mulberries are modest feeders and don’t clamor for additional nutrition. Once established, most mulberries growing in residential garden soil need zero supplemental fertilization. For young, establishing trees, a balanced-formula fertilizer (something like 10-10-10) applied in early spring—using roughly 1 pound per inch of trunk diameter—supports vigorous development. Avoid nitrogen-heavy products; they channel energy into foliage production at the cost of fruit. In my own orchard, I’ve largely abandoned purchased fertilizers in favor of yearly wood chip mulch as a slow-release nutrient source. The trees have responded beautifully.

Pruning Mulberry Trees

Mulberry pruning is considerably less complicated than pruning most other fruit trees. Your primary objective during the first three years involves building a solid framework. After that, annual pruning keeps things tidy and maintains productivity. Late winter or early spring—right before the tree’s buds swell—is the optimal window. The tree is dormant and won’t bleed sap excessively.

Eliminate branches that cross one another, remove anything dead, and cut away shoots that angle inward toward the tree’s center. Target an open vase configuration that permits light and moving air throughout the canopy. Prune in late spring or summer and you’ll trigger profuse sap bleeding—it’s not lethal but it’s messy and depletes the tree’s reserves. Winter pruning avoids this issue. For a detailed walkthrough with photos from my own trees, head here.

Common Mulberry Pests and Diseases

This is one of the traits that makes me love growing mulberries. They evade the vast catalog of pest and disease mayhem that ransacks apples or cherries. A few issues do warrant your attention, though, so you can intercept them early if they do show up.

If your mulberry tree has been allowed to grow tall — or you planted a vigorous variety like Illinois Everbearing — you’ll quickly discover that a standard picker won’t cut it for the upper canopy. The SISIUPASSIE 26FT Reach Fruit Picker, Apple Picker Pole with Basket Telescoping Tool for Apple Lemon Orange Mango Avocado Fruit Tree Picking extends to a full 26 feet, bringing those high clusters within reach safely from the ground. Investing in a tool with genuine reach means less fruit left to drop and ferment — and a noticeably better harvest yield.

Birds

Birds represent your most formidable “pest” when harvest arrives. They fight intensely for ripe fruit. For trees on the smaller side, bird netting is your most effective solution. Larger trees—mine stretch 15–20 feet tall—make full netting logistically annoying. My strategy has shifted to harvesting frequently and planting surplus trees so there’s enough fruit for both the birds and me. Usually it works.

Fungal Issues

Popcorn disease (the culprit is the fungus Ciboria carunculoides) can strike mulberry fruit, causing berries to balloon grotesquely and fail to develop normally. It’s more prevalent in areas with persistent wetness and humidity. Affected berries become swollen and discolored and need to be picked off and thrown away—don’t compost them. Increasing air circulation via thoughtful pruning helps tremendously with reducing both this and other fungal problems.

Scale Insects and Whitefly

Scale insects sometimes settle into mulberry bark in clusters, looking like tiny brown bumps arranged along the branches. When populations get heavy, they weaken the tree and slash fruit output. A dormant-oil spray applied during winter is the conventional remedy and works reliably if you follow label directions. Whitefly occasionally appears on trees in warm, sheltered locations, but even when it shows up, healthy, properly maintained trees rarely suffer serious consequences.

Harvesting Mulberries: Timing, Techniques, and Storage

Mulberry harvesting operates on totally different principles than harvesting nearly every other fruit crop. You’re not out there picking individual berries one by one—you’re shaking the tree. This paradigm shift changes your entire approach to the harvest season.

When Are Mulberries Ripe?

Ripening schedules shift depending on species and cultivar. White mulberry and its red mulberry hybrids (think ‘Illinois Everbearing’) typically peak between late May and July in regions with temperate climates. Black mulberries transition to ripeness much later, usually from July onward into August. A berry has achieved full ripeness when it drops from its stem with barely any pressure—when the connection feels barely there. Full, deep color is another indicator. The most foolproof test is flavor: ripe mulberries explode with sweetness and intensity, while unripe ones taste tart and somewhat chalky.

The Tarp Method

Stretch a broad sheet or heavy canvas beneath the canopy and gently shake the branches. The ripe berries fall freely—unripe ones cling and stay behind. This is by far the fastest way to harvest a medium-sized or large tree. Scoop berries from the tarp into a bowl, and sort out any twigs or leaf debris. Using this technique, I can walk away with 5–8 pounds from a mature tree in less than half an hour. It’s genuinely one of my favorite rituals of the entire year.

Storing Fresh Mulberries

Mulberries spoil quickly. Your window in the refrigerator is narrow—roughly 2–3 days—even if you’re careful with handling. Spread them in a single layer across a baking sheet and place them in the freezer for 2 hours before sliding them into freezer bags. Frozen mulberries stay excellent for up to 12 months. For keeping mulberries throughout the year, I turn to jam, syrup, and fermentation. Check here for a decade’s worth of preservation projects I’ve honed and tested.

Culinary Uses: What to Do With All Those Mulberries

The year my ‘Illinois Everbearing’ hit full maturity, I was looking at over 30 pounds of ripe berries crammed into a six-week window. That abundance demanded creativity. Mulberries reveal themselves to be wonderfully flexible in the kitchen—sweeter than blackberries, less acidic, adaptable to both desserts and savory applications.

Fresh Eating and Simple Preparations

Nothing surpasses eating them fresh, straight off the branch, warm from the sun. Beyond that straightforward pleasure, mulberries integrate beautifully into smoothies, stirred into yogurt, scattered across oatmeal, or mixed into fruit salads. A quick mulberry compote—finished in 10 minutes—transforms pancakes, ice cream, or a cheese platter into something special. Because mulberries are naturally sweet, they typically demand less added sugar than other berry recipes call for.

Preservation and Pantry Uses

Mulberry jam has become my signature gift—it’s practically impossible to find someone who doesn’t love it. The berries themselves are loaded with natural pectin, which means you can usually create a set jam without adding commercial pectin. Mulberry syrup (nothing but berries, sugar, and water, simmered down) keeps in the refrigerator for weeks and works wonderfully swirled into cocktails, mixed into lemonade, or poured across cakes and desserts. If you’re feeling ambitious, mulberry wine is genuinely outstanding—ruby-deep, richly textured, complex.

Dried Mulberries

White mulberries dry beautifully and develop a caramel-toned sweetness through the process. Run them through a food dehydrator set to 135°F for 10–14 hours, or use a low conventional oven (150°F) with the door cracked slightly open. Dried mulberries work well in granola mixes, trail mixes, and baked applications. They’re also among the few mulberry products available commercially, which gives you a useful reference for what properly dried mulberry should taste like.

Common Mistakes and Beginner Questions

Mistake #1: Planting Too Close to Structures

Standard mulberry varieties can stretch to 30–50 feet tall and equally wide at maturity, depending on cultivar. Many people new to the plant underestimate this eventual size and tuck their tree too close to walls, fences, or neighboring trees. Allocate at least 15–20 feet of unobstructed space in every direction for standard varieties. Dwarf cultivars like ‘Gerardi Dwarf’ are comfortable at 6–8 feet. Misjudging this creates problems years later—you’re facing either severe pruning or removal entirely.

Mistake #2: Expecting Fast Fruit from Black Mulberry

Black mulberry trees test your patience relentlessly. Inexperienced growers plant one, watch year two and three pass with no fruit, then worry that something’s broken. Nothing’s broken. Black mulberries operate on their own timeline—often 5–10 years from planting to anything you’d call a genuine crop. If you’re craving fruit soon, begin with ‘Illinois Everbearing’ or ‘Oscar.’ Plant your black mulberry elsewhere as a long-term commitment. The flavor payoff eventually justifies every year of waiting.

Mistake #3: Ignoring the Staining Risk

Mulberry pigment binds permanently to almost everything it touches. Wear disposable clothes during harvest. Reach for stainless steel or glass containers—plastic absorbs the color and never releases it. Any concrete or stone directly beneath the tree’s canopy will discolor as fruit falls. Some growers layer bark mulch under the canopy annually to buffer the staining. Plan for this reality before you dig that planting hole, not in July when it’s too late.

FAQ: Do Mulberries Need a Pollinator?

Most named mulberry cultivars pollinate themselves—you need only one tree to generate a respectable harvest. Certain cultivars do show improved fruit set when a second tree occupies the same space, though. ‘Illinois Everbearing’ and standard white mulberry cultivars are self-fertile without hesitation. If space and budget allow for two trees, go that direction. You’ll almost always see increased production. But a single well-selected mulberry, standing alone, produces generously anyway.

FAQ: Are Mulberries Safe to Eat?

Ripe mulberries—fully colored, soft, sweet—are safe and nutritious for humans and most animals. Unripe white mulberries and the tree’s milky sap are different stories; they contain compounds that can cause digestive upset and hallucinogenic effects if eaten in substantial quantities. NC State Extension categorizes Morus alba as low-toxicity overall, with the unripe fruit and sap flagged as the problematic parts. In practical terms, this almost never matters—unripe mulberries taste so terrible that no one eats them willingly anyway. Berries at full ripeness carry no toxicity concerns whatsoever. As always, if you’re harvesting from an unfamiliar tree, verify its identity confidently before eating significant quantities.

Final Thoughts: Your Complete Guide to Mulberry Trees Starts Here

This complete guide anchors everything I publish on this site. But guides can only carry you so far. Inevitably, you have to put a shovel in the ground and plant the actual tree. I’m telling you with total confidence: a thoughtfully chosen mulberry positioned in the right spot transforms into one of your garden’s most gratifying plants. My own trees have outlasted flower beds that got ripped out, perennial borders that fell out of fashion, and countless “superfoods” that failed to deliver anything resembling their marketing promises.

The essential recipe is straightforward: pick your cultivar based on climate and available space, plant in genuine sunlight with drainage that actually drains, give the tree time to settle in, and then step back. Let it do what mulberries do naturally. For most situations, that cultivar is ‘Illinois Everbearing’—productive early, dependably tasty, and comfortable across a spectrum of conditions.

I’ve walked through 12 different cultivars across my 15 years. Some fell short of my hopes. Most blew past my expectations. Each one handed me something to learn. Get your first good tree in the ground, live with it through its seasons, taste what it produces, and I’m wagering you’ll be planning number two before that first harvest wraps up. Come join the mulberry growers. You’re going to find it tremendously rewarding.

This post contains affiliate links. As an Amazon Associate, I earn from qualifying purchases at no extra cost to you.